
Can I just say I absolutely love the online sewing community! After life was kind of thrown for a loop and my kids were suddenly home with me all day everyday, things changed. I struggled to find the time to sew/work, and by that I mean of course we had nothing but time, but I have always said family comes first. My kids needed me, then as time went by and even as school ended and they needed me less I was still struggling to find that desire to get back to my sewing room. I would sit in there stare and everything and then leave. So in my facebook group recently when someone shared a photo of an adorable romper and asked if there was a pattern like it in my shop. (which there wasn’t) other group members began suggesting the Magil&Lil romper as a starting off point. They even suggested a mash up of the Magil& Sally top. Well this got my wheels turning. My girls LOVE rompers so I knew if I made this mash up they would be in 7th heaven. So I did it, and it was SO easy, and quick and the result is everything I hoped it would be. I got out of my sewing funk with the help of those lovely ladies and their ideas, and now I have a quick tutorial for you so you can do the same if you want.
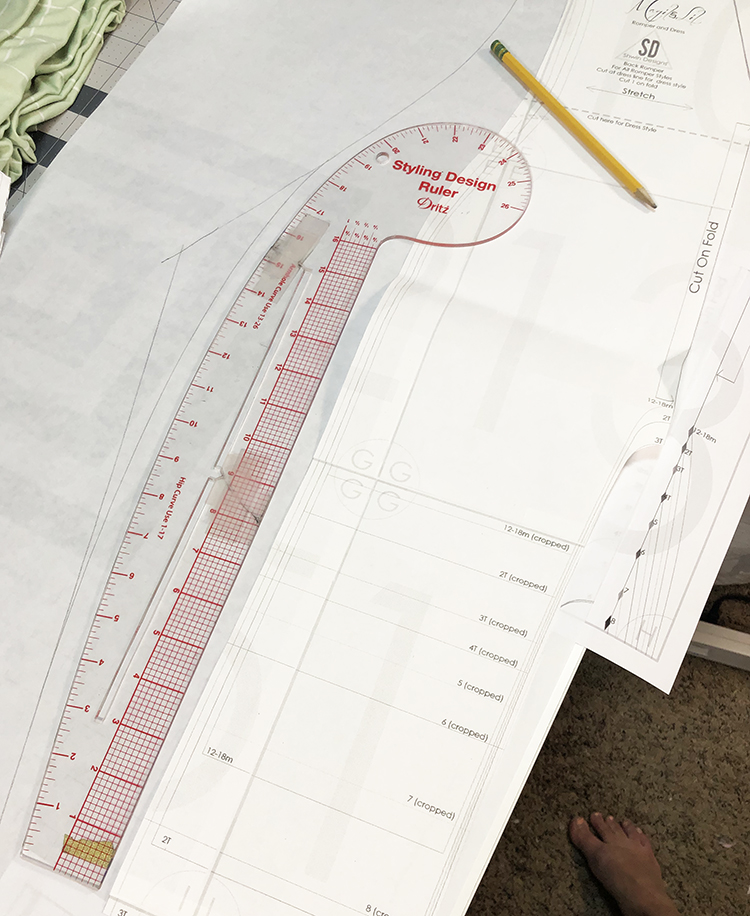
To start, I used the Magil&Lil romper as it is. (although I had to alter the one in the photo slightly since it is cut at the 3T and my daughter is currently in a 4T/6 mash up but I didn’t want to reprint the whole pattern and couldn’t find my master pattern at the time I was just excited to move forward) I then used the Sally top (cut at top length) and I lined up the underarm of the Sally with the underarm of the Magil. The sally is wider since it’s a loose flowing top and has a gathered front and back neckline, so I moved it over making sure the underarms were still on the same line. I traced the Sally top all along the neckline, underarm, and side of the bodice stopping at the bottom edge of the top. Then I drew a straight line from the bottom hem of the romper up to the bottom of the bodice. This made them meet at an angle.
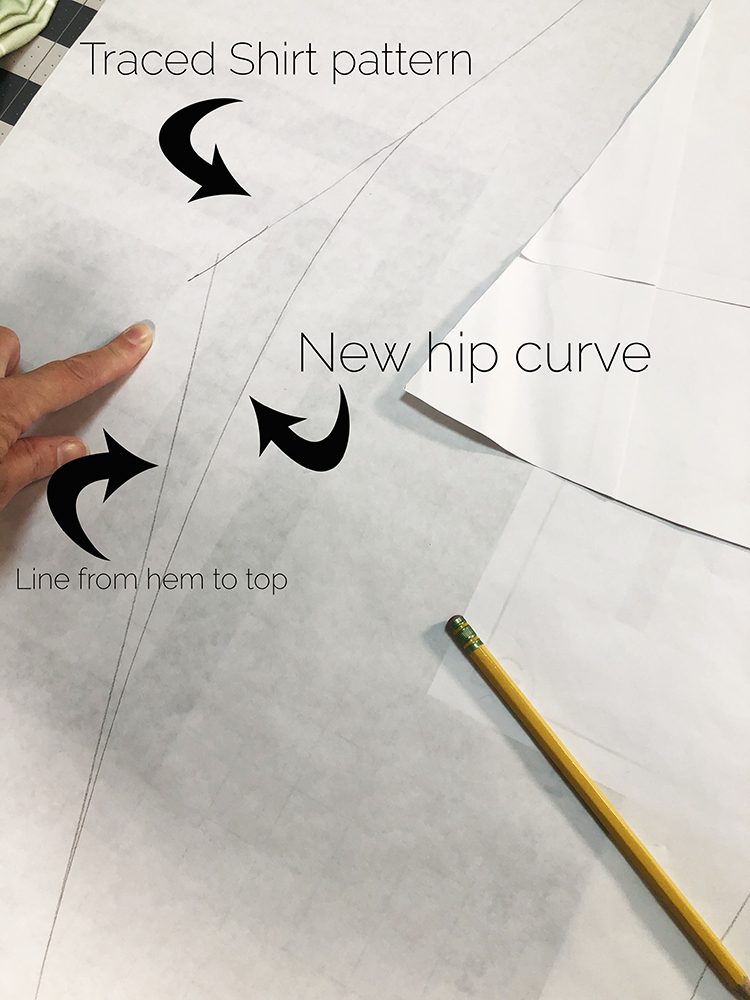
I didn’t want my romper to come to a point like this, so with a curved ruler, I drew a new hip line making a smooth transition from leg line, and the bodice line. As you can see this cut off a little of the bodice which is fine because the romper is plenty full. You will also be able to see how the new lines are quite a bit wider than the original romper pattern, this will result in all the fullness you see in the romper photos.

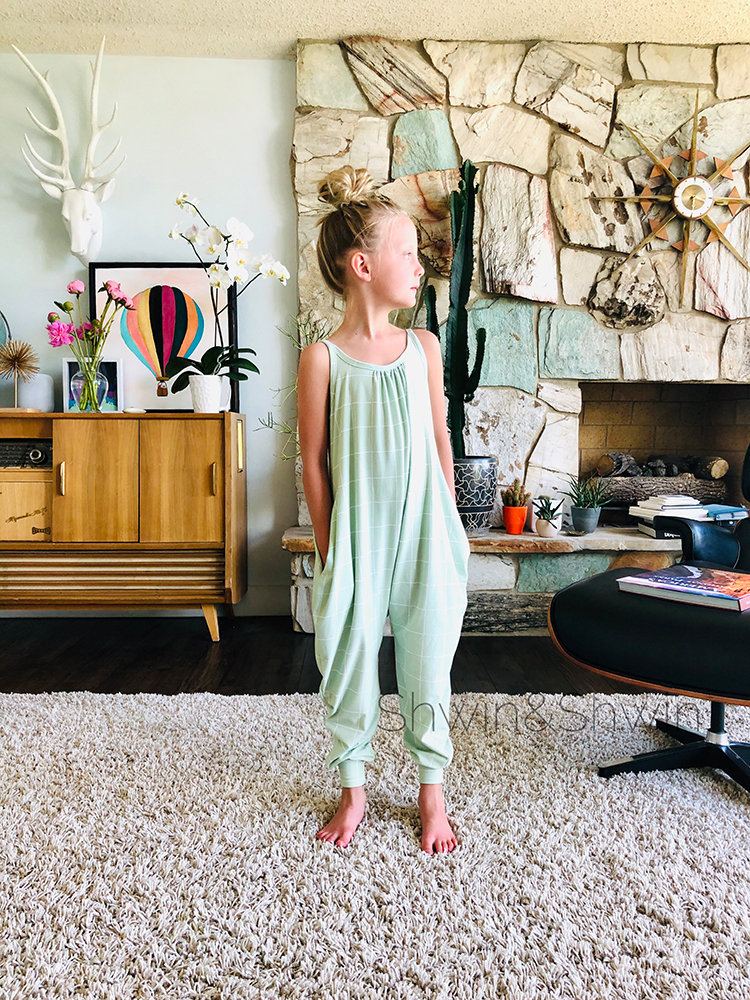
I don’t have any more photos of the pattern drafting (again excitement) or the construction because the romper went together the same as the romper instructions until I got to the top portion and that all went together the same way as the top pattern instructs. I did use knit fabric for this but I didn’t change any part of the sewing. Since the drafting is really just slapping the Sally top pattern down over the romper pattern I felt like it would be pretty easy to understand. I also did add the pockets from the Magil, I just placed them around the same placement as the Magil pattern marks. (I think they did end up a little lower because I didn’t want them at the top of the curve but that was just a personal choice)
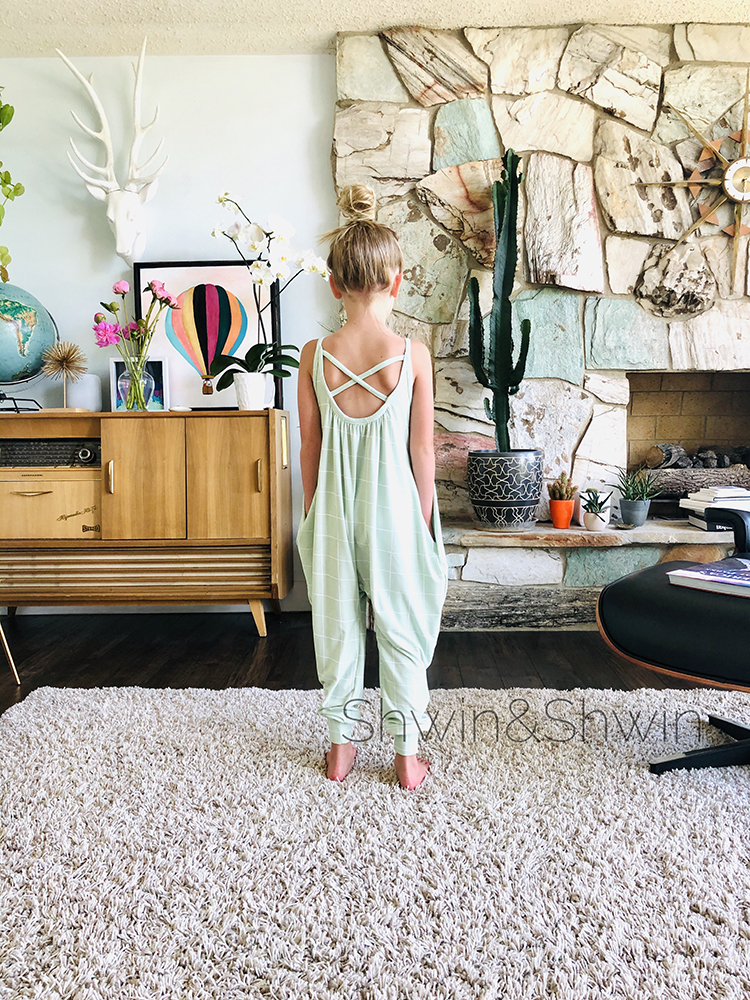
I love the Super relaxed fit of the romper and the strappy top allows it to still come off and on easy for changing or using the bathroom.
It makes me tempted to see what other tops can mash up with a romper to make a whole new romper.
