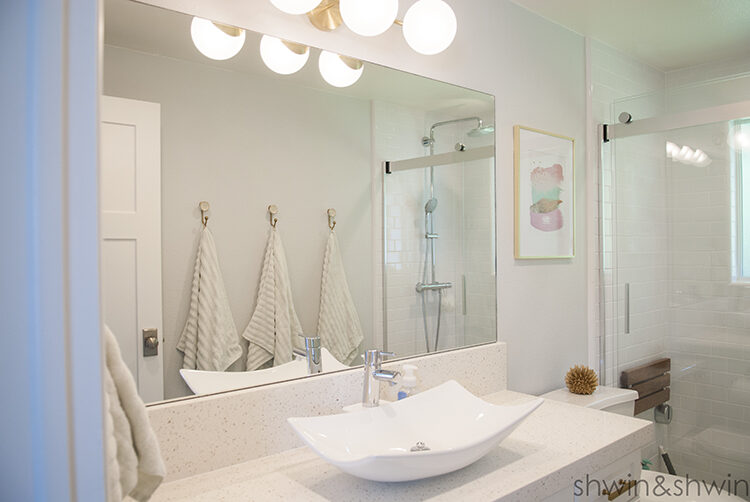
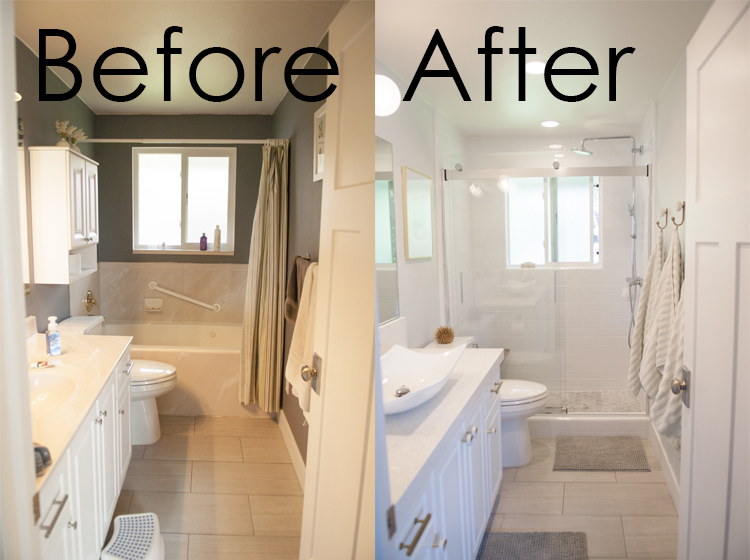
 We have been in our home for 6 years now, and we FINALLY completed phase two or the final renovations on the bathrooms. (except the master which is getting started this fall) I LOVE the way they came out but they were a big project and doing 2 bathrooms at the same time was a lot of work. We were the contractors for the job so I have our tips for taking on a project like this yourself and all the products we used at the bottom of this post.
First you can see from the before and after above that it’s a pretty drastic difference. I wish I had pictures from before phase one. In phase one we replaced the pink carpet with the tile shown, and we had put in a new light fixture, although we discovered it put off really poor lighting so when we did phase two we replaced the light again.
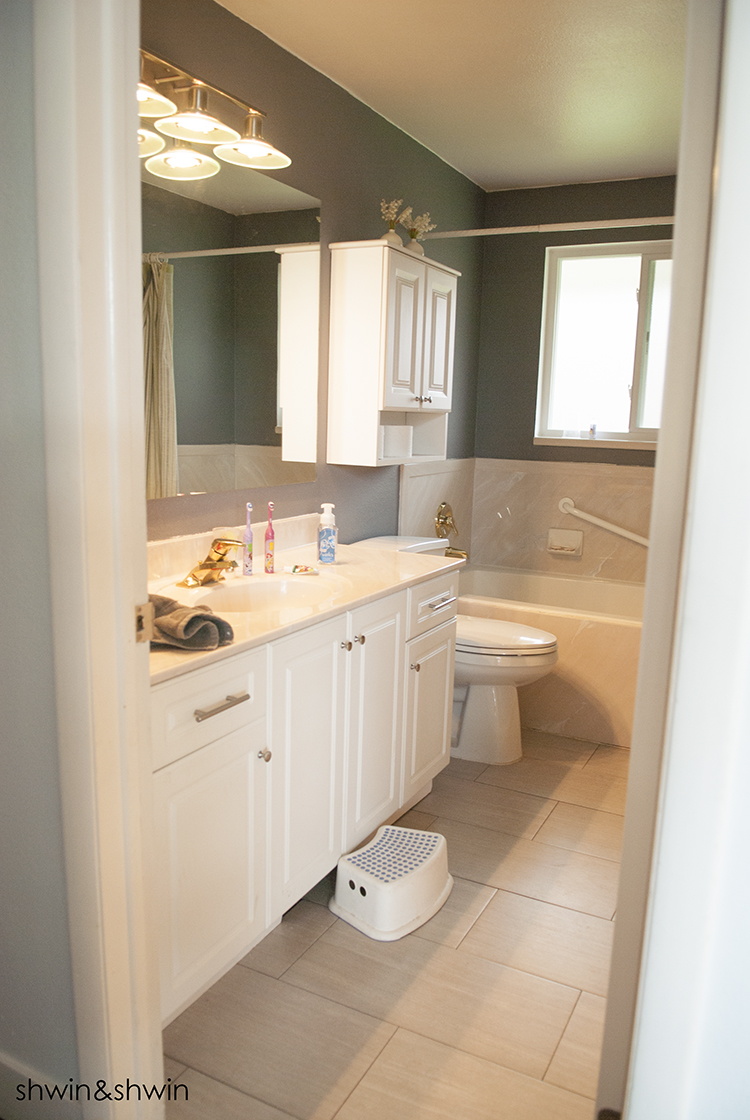 Honestly, the reason the bathroom renovation wasn’t done until now was because it really wasn’t that bad (you know once we got rid of the pink carpet because carpet in bathrooms is gross and pink is just worse) The faux marble sink and tub surround was dated, yes but not the worst thing we have seen, same with the brass fixtures. The bathroom really just had poor lighting, and no shower. Since our kids are all about taking showers these days we really needed to add another shower.
 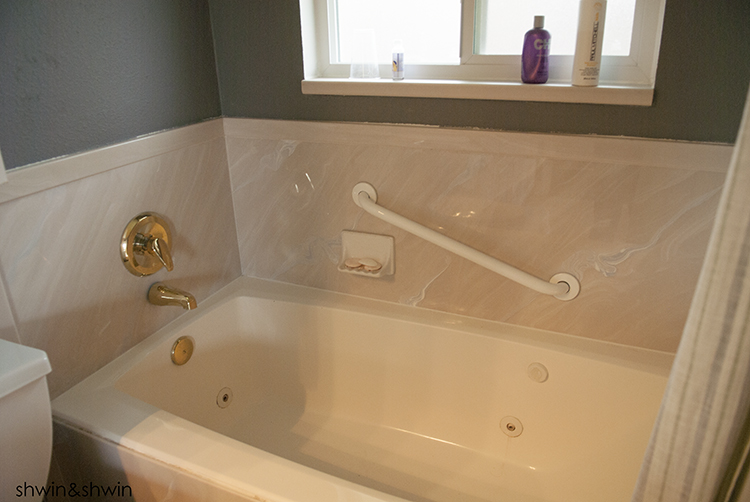 It had a jetted tub which was nice and deep. We knew we needed to put in a shower but we went back and forth on taking out the tub, replacing the tub, or just leaving the tub. Ultimately we decided to take out the tub, and install a walk in shower. Our kids no longer bath, they just like taking showers. With a tub downstairs incase we need one we didn’t mind not having one upstairs. When we were talking to our tile guy about the tub and leaving it he was discussing the fact that older jetted tubs could have the motor go out in which you would have to take the tub out to work on the motor (since there wasn’t any access panel) and that would damage the new tile we were about to put in. Another factor was that it’s a fiberglass tub without a lot of support under since it was not intended to be stood in as you would a shower tub combo. We didn’t want the tub to crack over time again leading to having to rip it out. When we saw the cost of replacing the tub versus tiling in a shower and shower door the shower was about the same cost so we decided to just go for the shower we really wanted.
 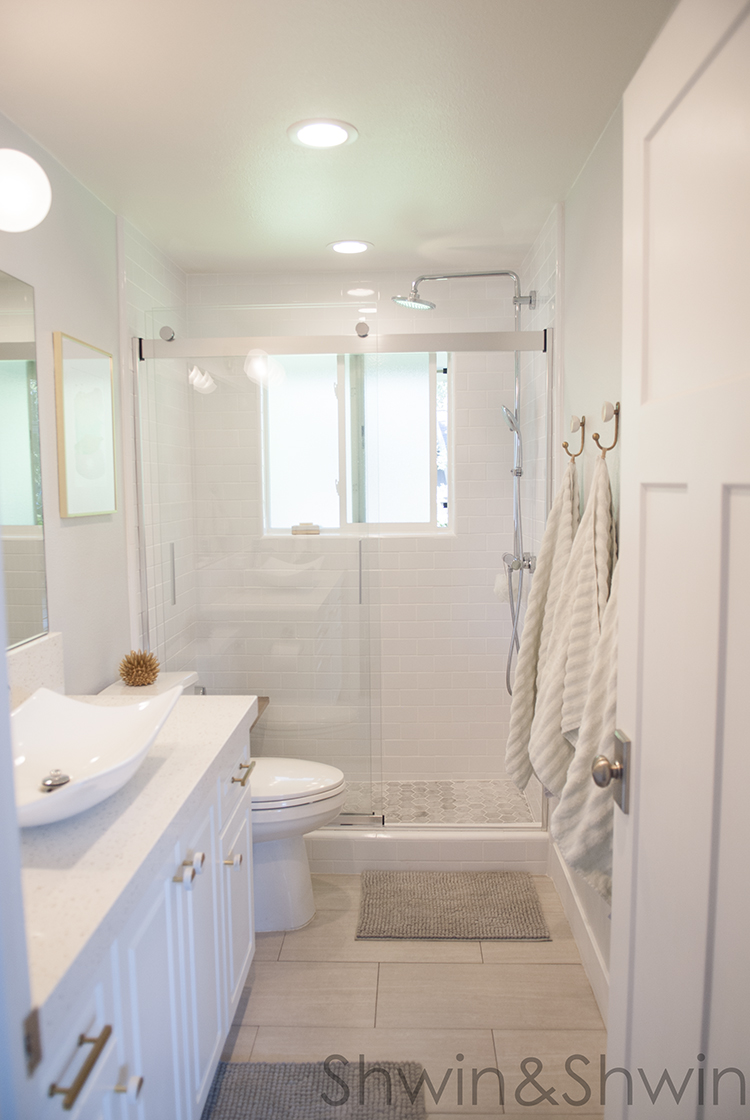 The after for the bathroom is like a breath of fresh air. Considering the before was really not that bad, in fact most people who came into our home assumed we had already redone that bathroom. I wasn’t expecting such a dramatic change in the bathroom. The plain white subway tile and new cool gray paint really brightened the space up. We also installed 3 canned lights across the ceiling which really helped brighten the whole room. Even though the bathroom is small and threre is a window, it always felt dark and drab, I LOVE a nice bright space so the canned lighting was a huge help.
 For the shower floor we used hexagon Carrara marble tiles. I really love the touch they add to the floor. The shower was replacing a bathtub and in an already tight bathroom space so unlike a typical walk in shower we didn’t have room for a full shower bench so we had to start looking at some other options. We knew we hated the idea of a corner tile shelf, but the floating shelf we wanted just wouldn’t work with the size constraints. Then we found this perfect teak shelf that folds up and out of the way whenever we want but it can be down when we want to, and I love the look it offers.
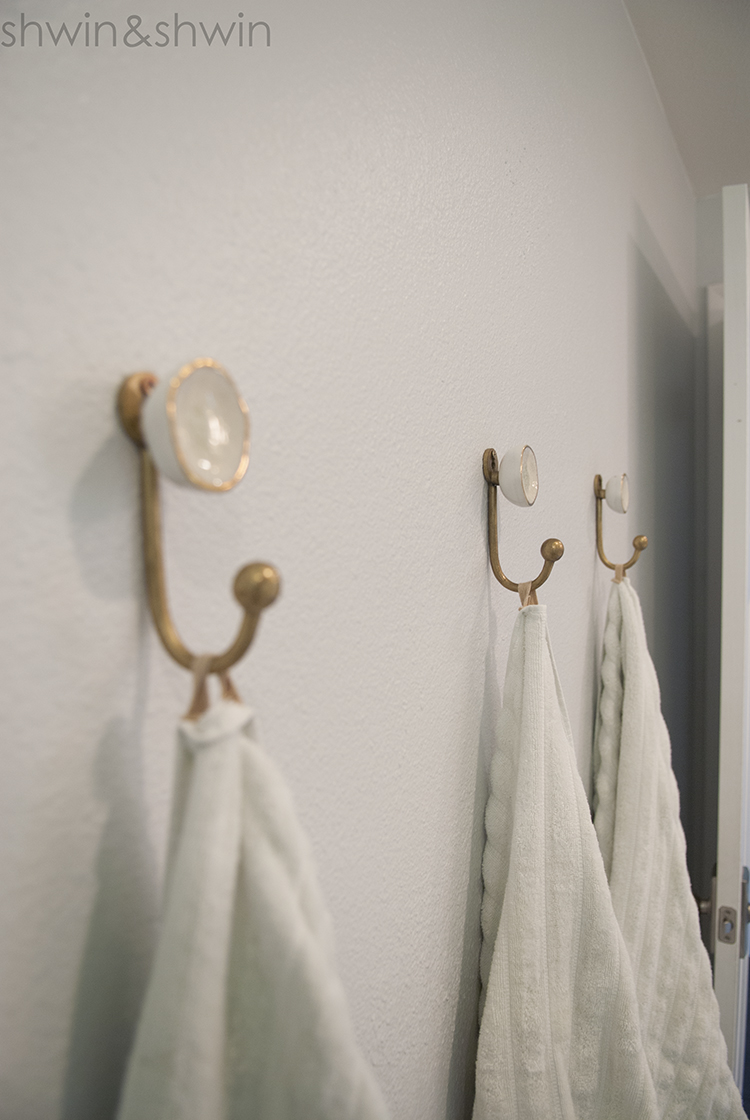 For the wall with the towels, instead of the towel rack we replaced it with hooks. Mainly because it is easier for our girls to hang a towel on the hooks, rather than folded neatly on the towel rack. I was getting tired of constantly fixing and refolding the towels so this was a way better option. I found the towels at TJ Maxx and then I simply sewed some loops on them using some ribbon.
 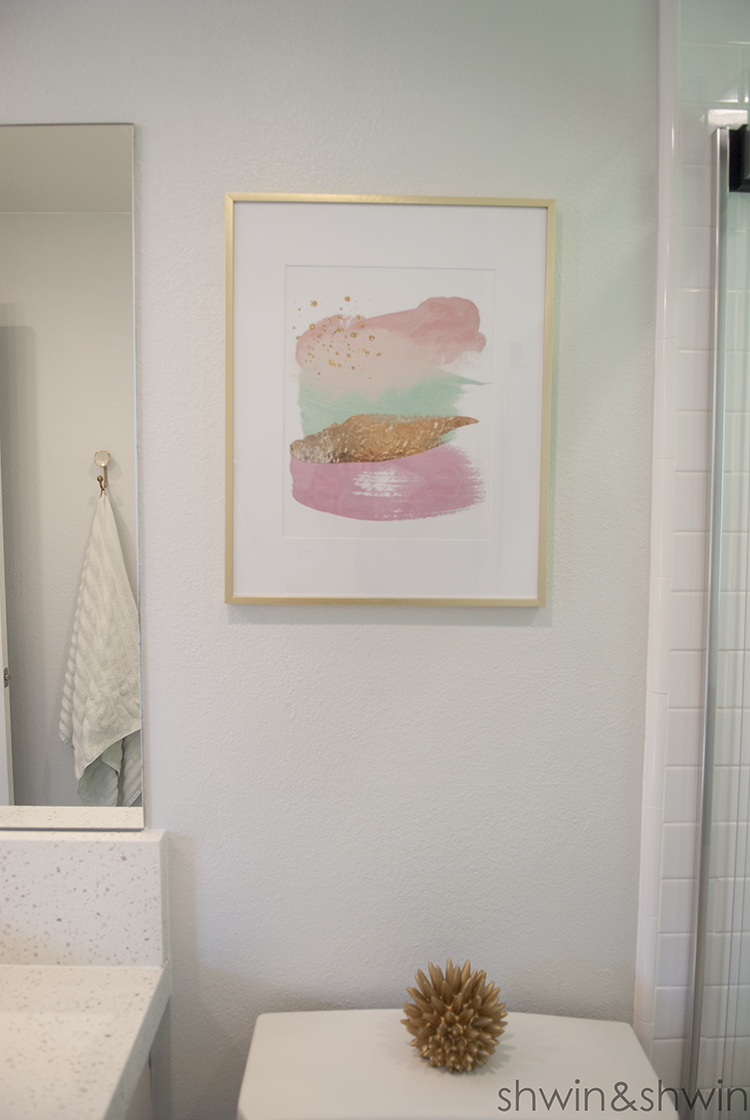 For the art for the bathroom, I struggled finding the perfect print until I finally found one I wanted. It was a PDF print that I ordered off Etsy, printed at costco and then framed in a simple gold frame from target. It was exactly what I was hoping for. I was happy to be done with the above the toilet cabinet. The sink cabinet has plenty of storage space so we decided to do away with the cabinet. I love how open the bathroom felt without the cabinet.
 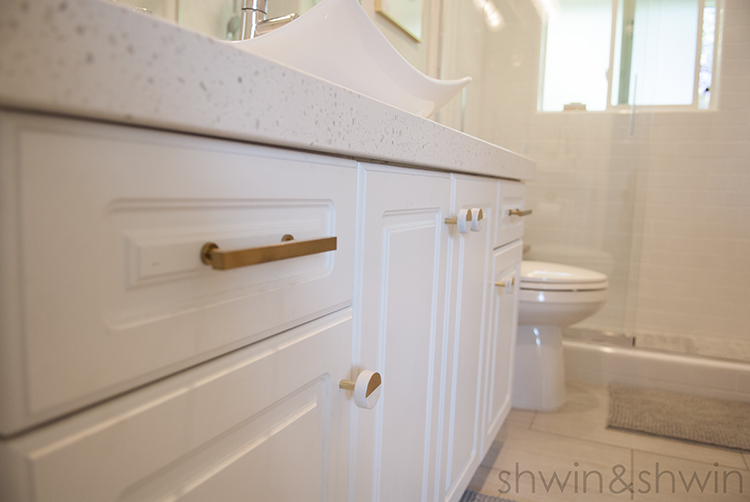 Although we already replaced the handles and knobs once with phase one we found these knobs and knew we wanted them. Since we were mixing metals in this bathroom with touches of gold and chrome we needed to get rid of the brushed nickel knobs anyway and these gold handles and knobs were perfect, especially since the knobs were marble and gold which ties into the tile as well. For the counter we had a custom quartz slab made with a 2 1/4″ height, and 6″ back splash. I really love the substantial feel of the thick slab, and I love the look of the speckled quartz.
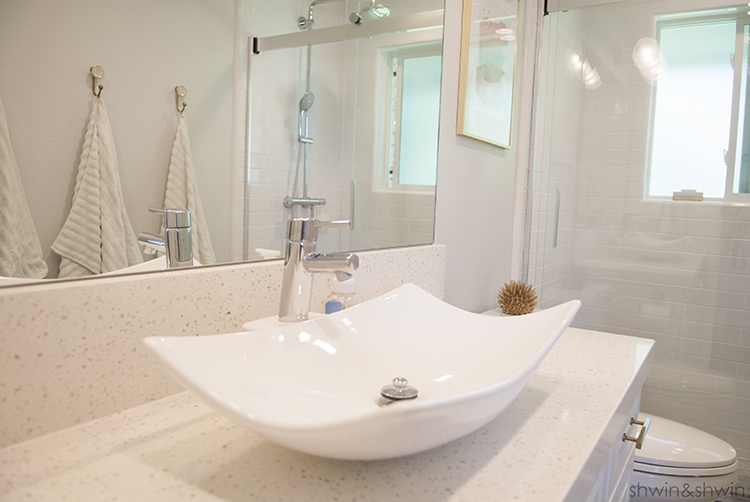 For the sink, we found this vessel sink bowl and it was the perfect touch to the bathroom.
 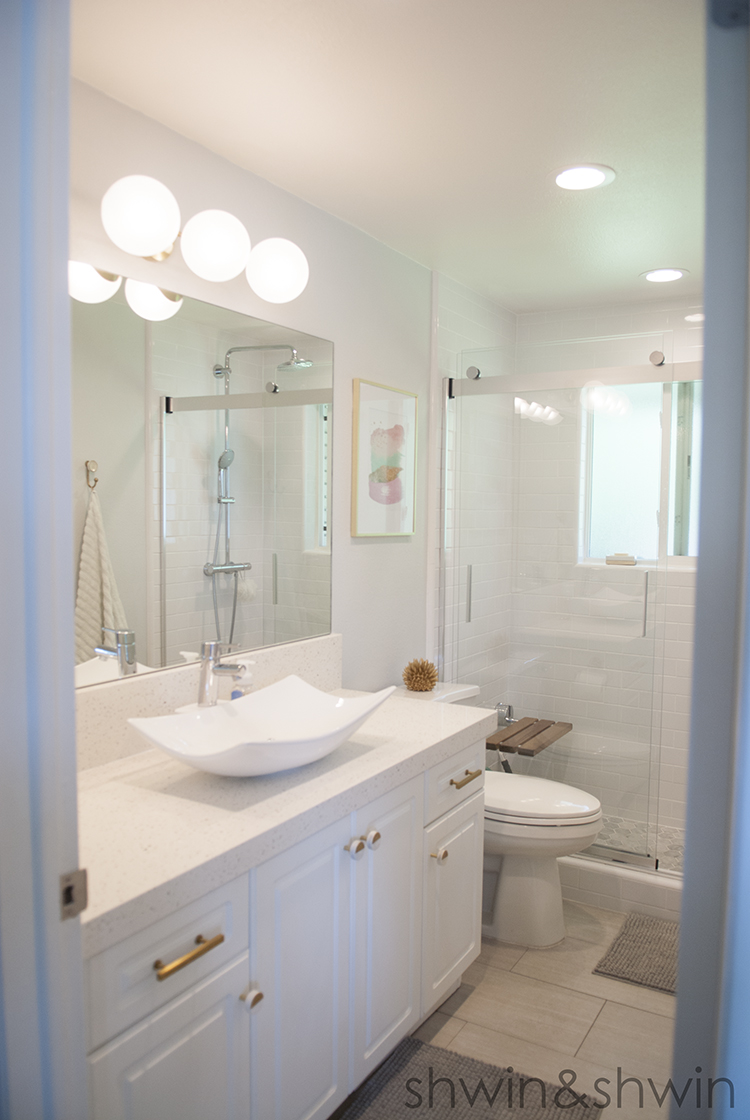 Aside from adding the canned lighting across the ceiling we also swapped out the light fixture. I liked that this one goes with the look of the lights we added in the living room and dining room (and since the bathroom is just off the hall from those rooms it offers a nice flow) it also added even more light to the bathroom. I love that the bathroom feels like a daylight bathroom both day and night now.
Our best tips if you are taking on a project yourself:
- Hire the right people for the job. Knowing the tile was more than we cared to take on we found a one man operation who has been tiling for 35 years and he was great. He gave us a plumber recommendation which was great since they already worked well together. When you have more than one worker coming in on the same job it’s nice to know they already know each other and work well together. We had to have the plumber come in and move the plumbing for the shower and move the fixture to the other side of the wall before the tile guy could start, and then he needed to come back when the tile guy was done to install the fixtures. We also hired an electrician to install the canned lights.
- Work out a schedule. Find out from all the workers when they can get a job done and get it on the books. Leave extra time if needed incase something runs over and find out if there is any flexibility, so if someone gets done early or late if dates can get moved at all.
- Make sure you have everything ready for the workers so you don’t hold anything up. We made sure we had the tile and plumbing fixtures ready and delivered before the work began so that we wouldn’t cause any delays on out end. This also means ordering materials with plenty of lead time.
- Know what you can do and the value of your time. Even though I know how to tile, and have tiled in the past I knew that this was a big job and it would have taken me twice as long as a professional, and since my time with work or with my family is worth something to me it made paying a professional a better deal. Where as hanging the shower door, seat, and painting, those are things that are well worth my time over paying someone to do it.
Products used:
- Wall tile 3″X6″ Subway tiles
- Carrara Marble hexagon floor tile
- Dual Shower head
- Shower Seat
- Shower Door
- Towels and Rugs from TJ Maxx
- Quartz Countertop
- Vessel Sink
- Sink Faucet
- Art Work from etsy
- Light
- Towel Hooks
- Knobs for cabinets
