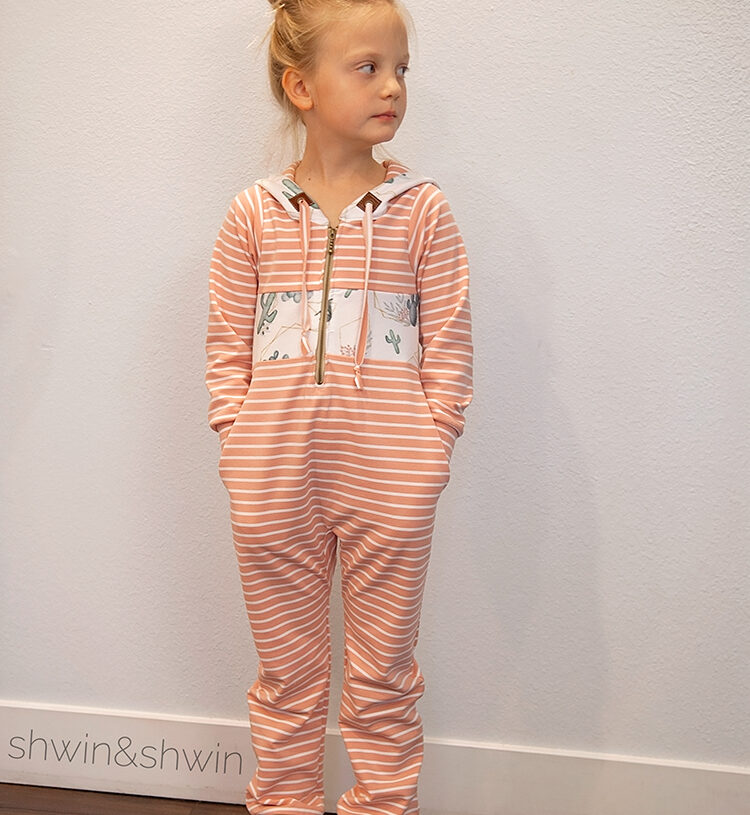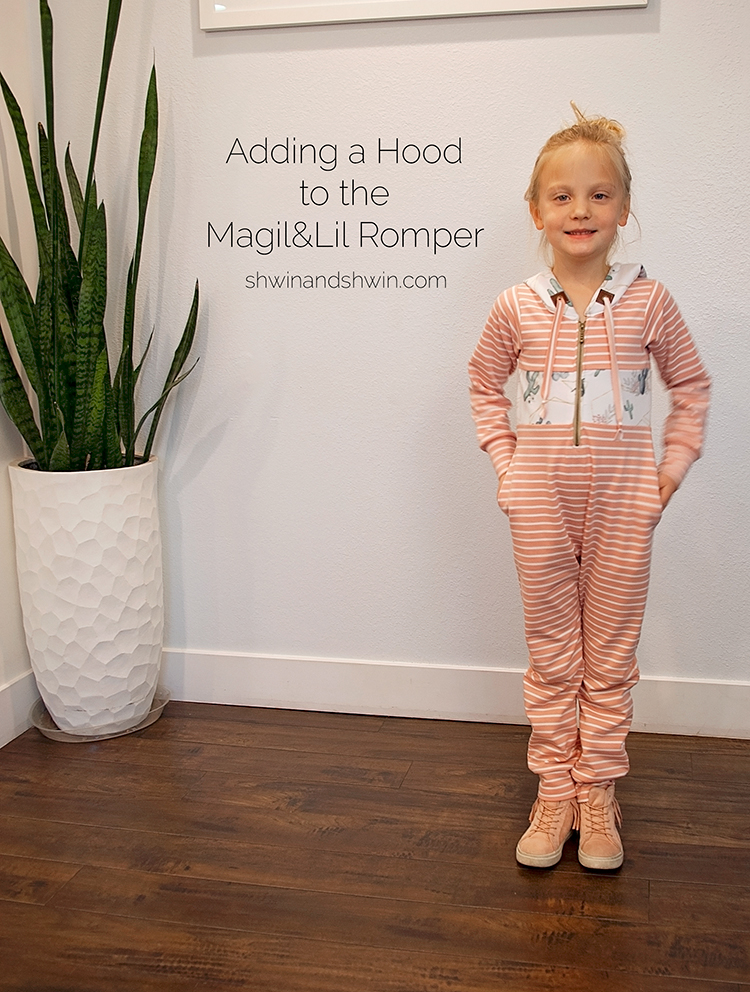
I love the Magil&Lil Romper, it’s a favorite around here. I wanted to make one that was a little cozier for winter, so I decided to add a hood. Since adding a hood meant raising the back up I also added a front zip so dressing would still be easy.

Penny LOVES the new romper. I mean she loves every Magil&Lil romper she has, but she has been wearing this one EVERY chance she has since I made it. Since I wouldn’t let her wear it to school two days in a row instead she changed back into it the moment she came back from school. I want to make some out of a cozy sherpa now for extra cuddle on the soon to be cold days.
For the hood I used the FREE hood for the ringo add on. I did have to shorten the neckline of the hood a little to fit, since the free hood is meant the cross over in front and it won’t with the romper. I just measured the neckline and shorten as needed.
For the back, I raised the neckline up using the neckline of the racer back option for the pattern, but used the regular back sleeve line.
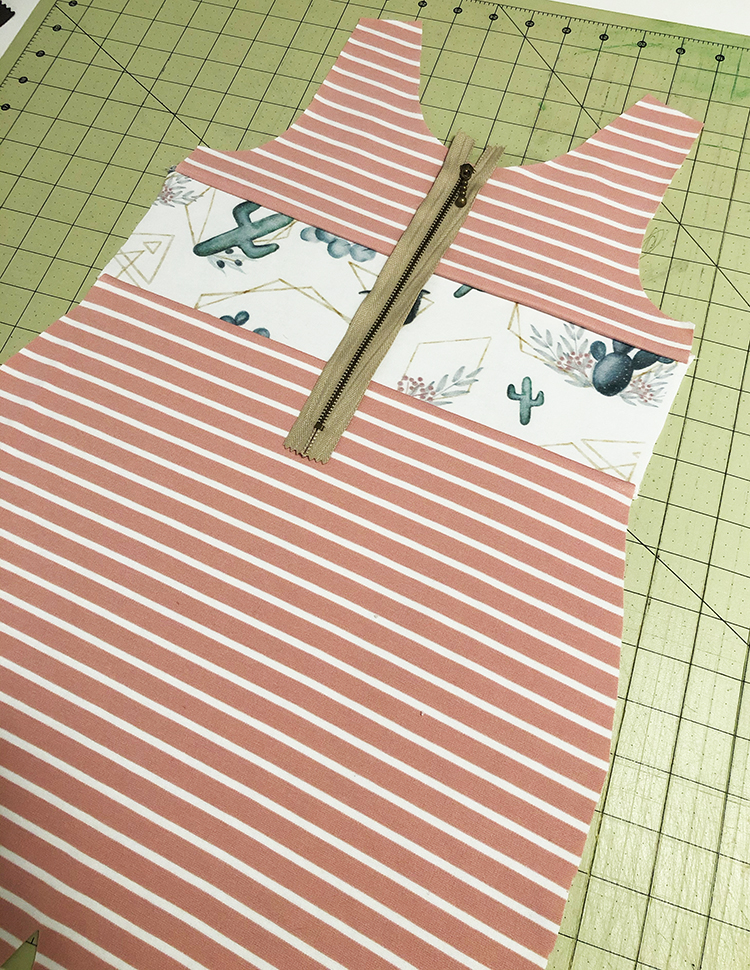
How to add a zipper
I used a 10″ zipper (found on amazon) You can use any length you want really I just liked how this one matched. As long as it’s around 8-10″ (or longer) it should be fine for dressing. Then, place your zipper along the center front ad with the top of the teeth 3/8″ from the top, mark the bottom of the zipper on the pattern. Also it should be noted, I color blocked the bodice, I did this for 2 reasons, 1 so I could fit the whole pattern on the fabric, and 2, I wanted the hood to be out of this cute cactus print so I wanted to bring a little more of it into the bodice as well. I just cut the pattern up and added seam allowance.
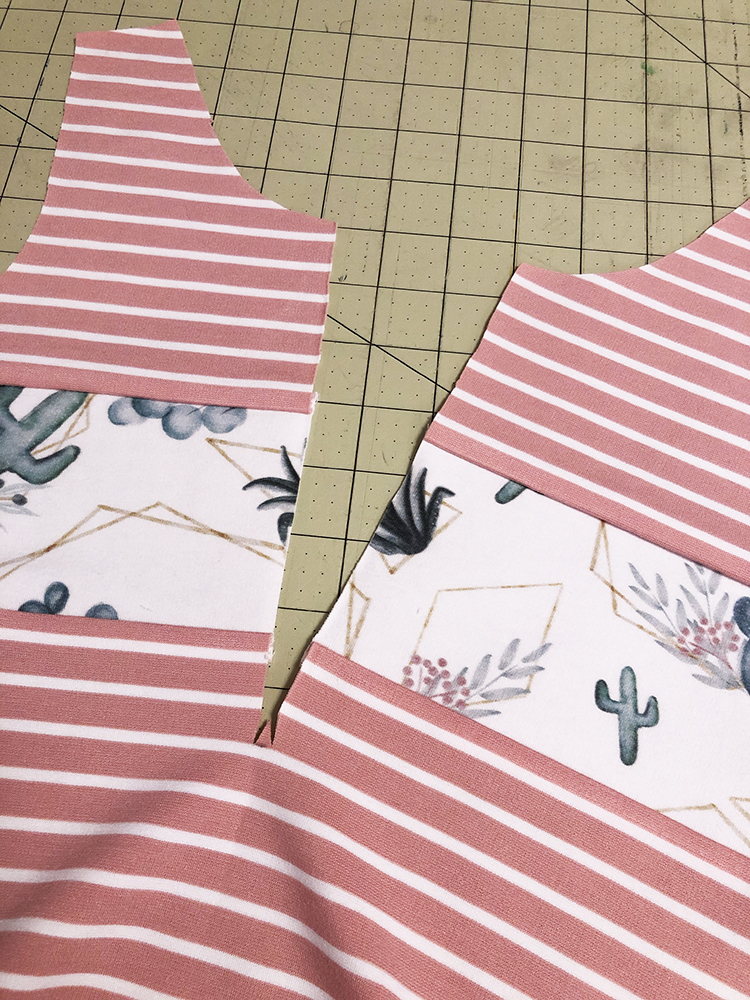
Then, cut a slit down the center to the mark. I cut a small angled cut into the bottom to the point that was marked. This allows the zipper to sit squarely and the width of the angled cut should be the width of the zipper teeth.
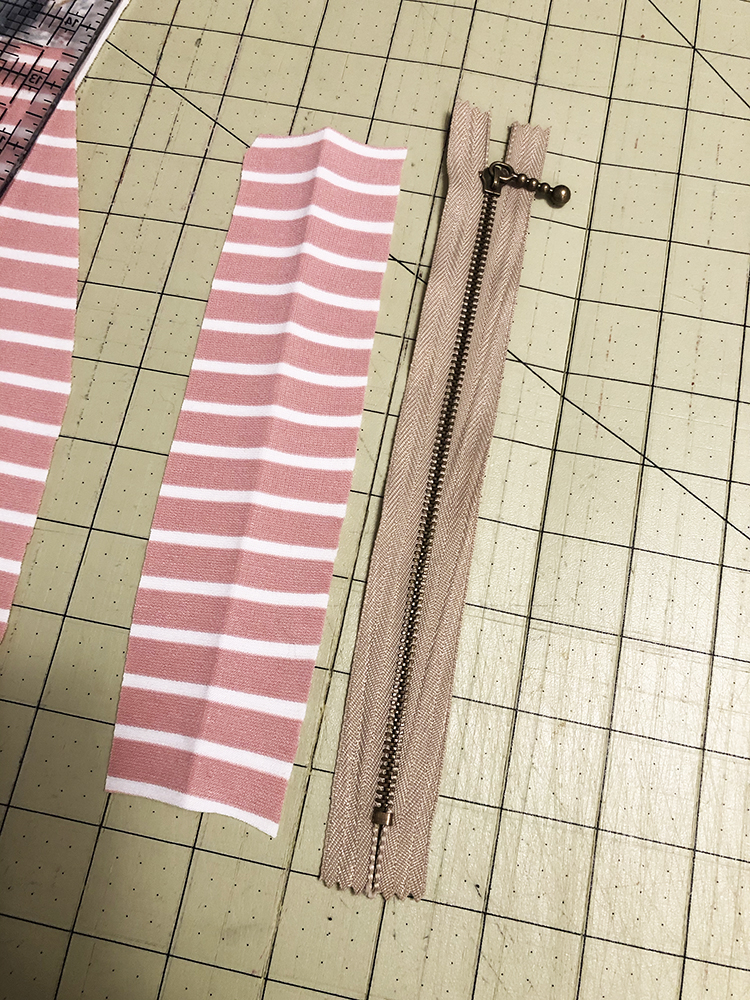
Since I was adding a zipper, I added a zipper shield because no one wants a metal zipper against their skin, and forget about getting pinched. To make that, cut a fabric strip that is 3/8″ longer than the zipper teeth and 2X the width of the zipper (so 2″ in this case)
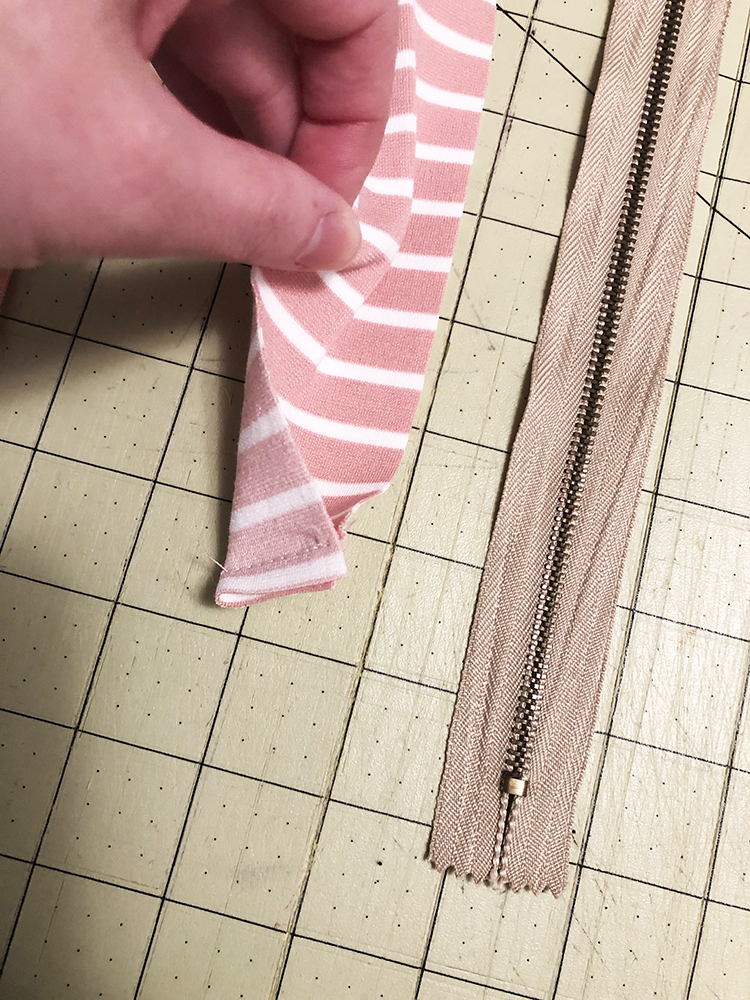
Then fold it in half so right sides are together, sew across the bottom. Then turn it right side out.
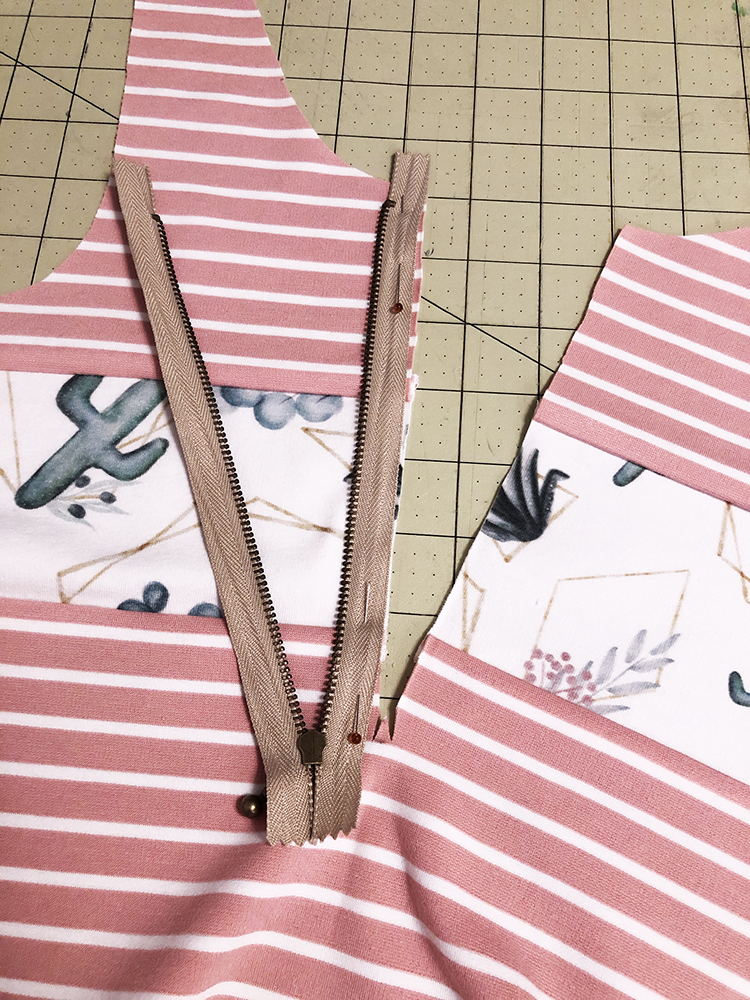
Then, with right sides together, sew the zipper to one side of the front. Again so the top of the zipper is 3/8″ from the top edge.
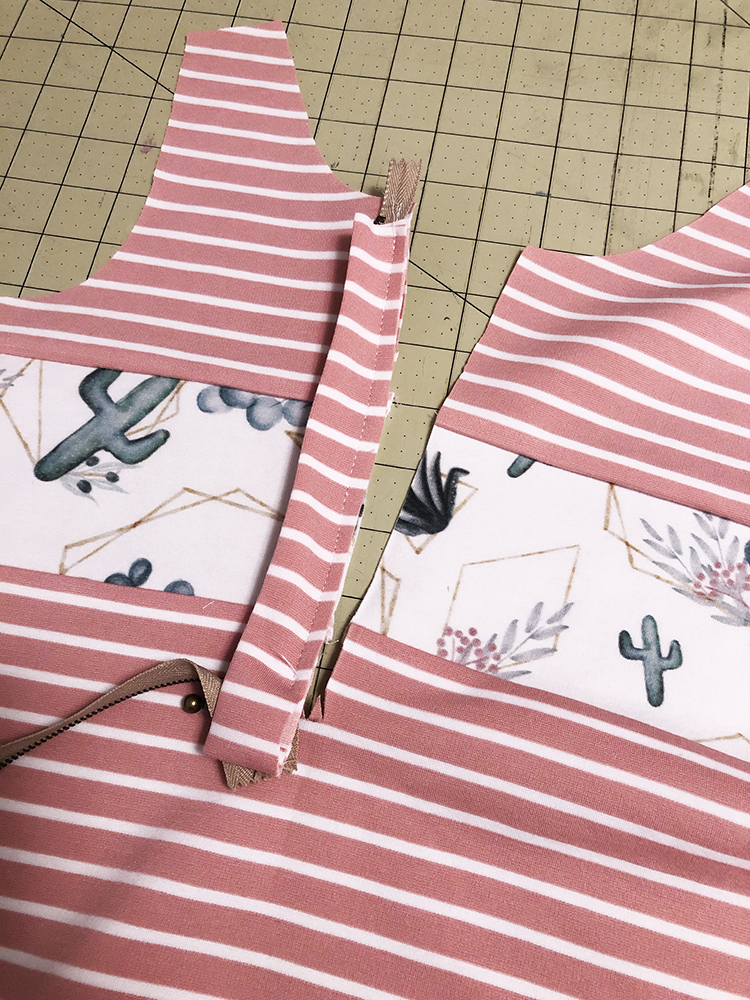
Then sew the zipper shield over the zipper so the sewn edge is at the bottom.
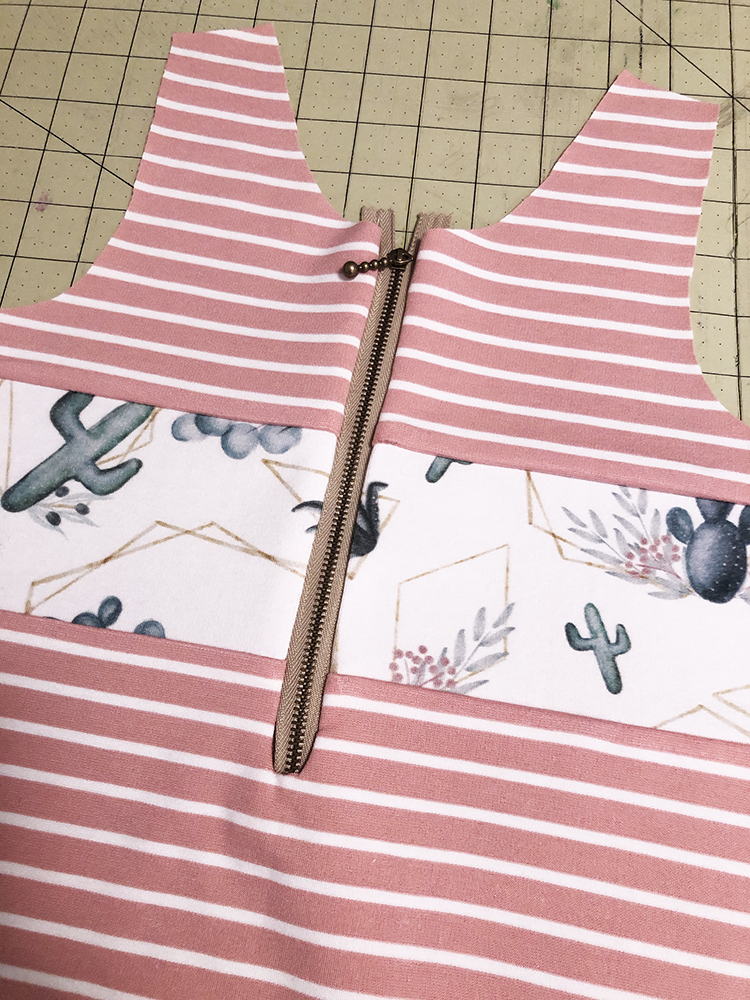
Sew the other side of the zipper right sides together to the other side of slit. Then press well and tuck the bottom edge (and angled cut) under so it tucks around the end of the zipper.
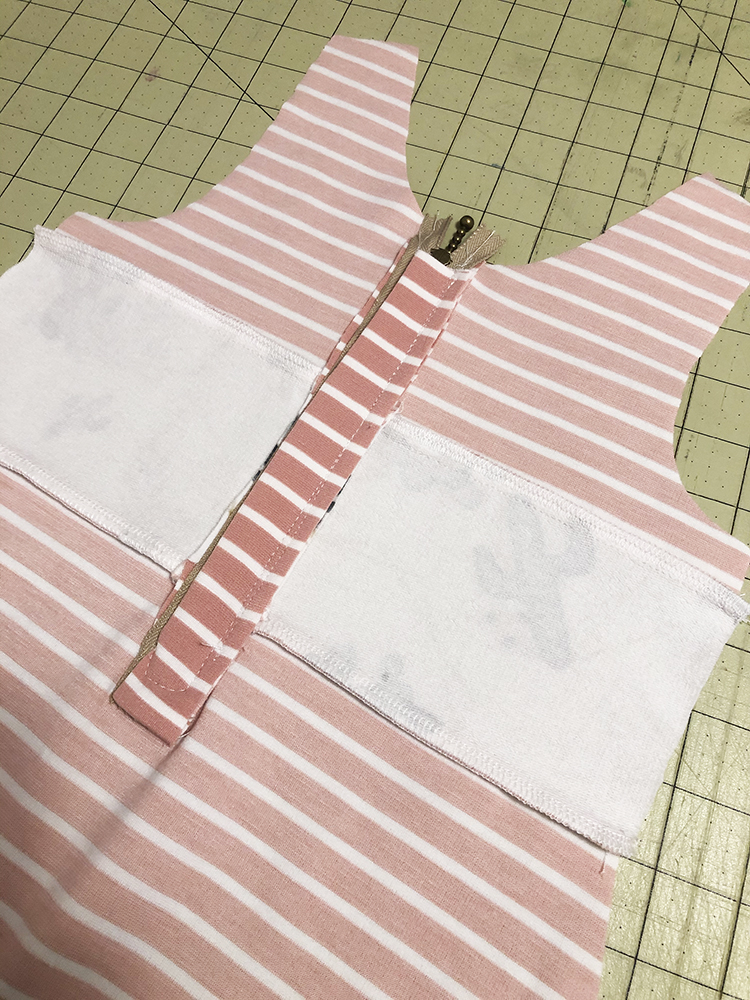
Then, top stitch all around the zipper across the bottom as well which will secure the zipper shield in place. *Finish the seams as desired*

Sew the hood following the instructions for the hood. A few small additions, I wanted to add a drawstring, so I added some little leather squares to the outer hood and then added eyelets to the center. Then above the rectangle I stitched the two hoods together using a 5/8″ allowance from the hood edge. For the drawstring I cut a 1/2″ wide strip of the fabric, fed it through the eyelets and casing, then tied knots in the end
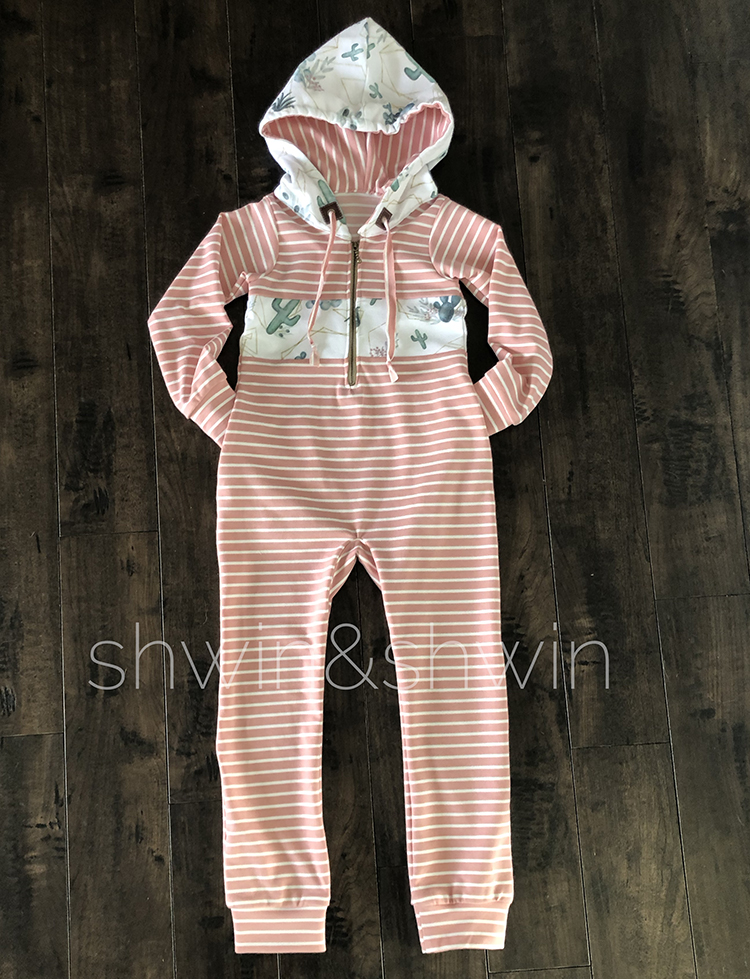
That’s it, everything else was just the pattern as instructed.

I love the cozy fit of the Magil&Lil, and I always love when I can make even more style options out of the same pattern (which already has a ton of options)
