
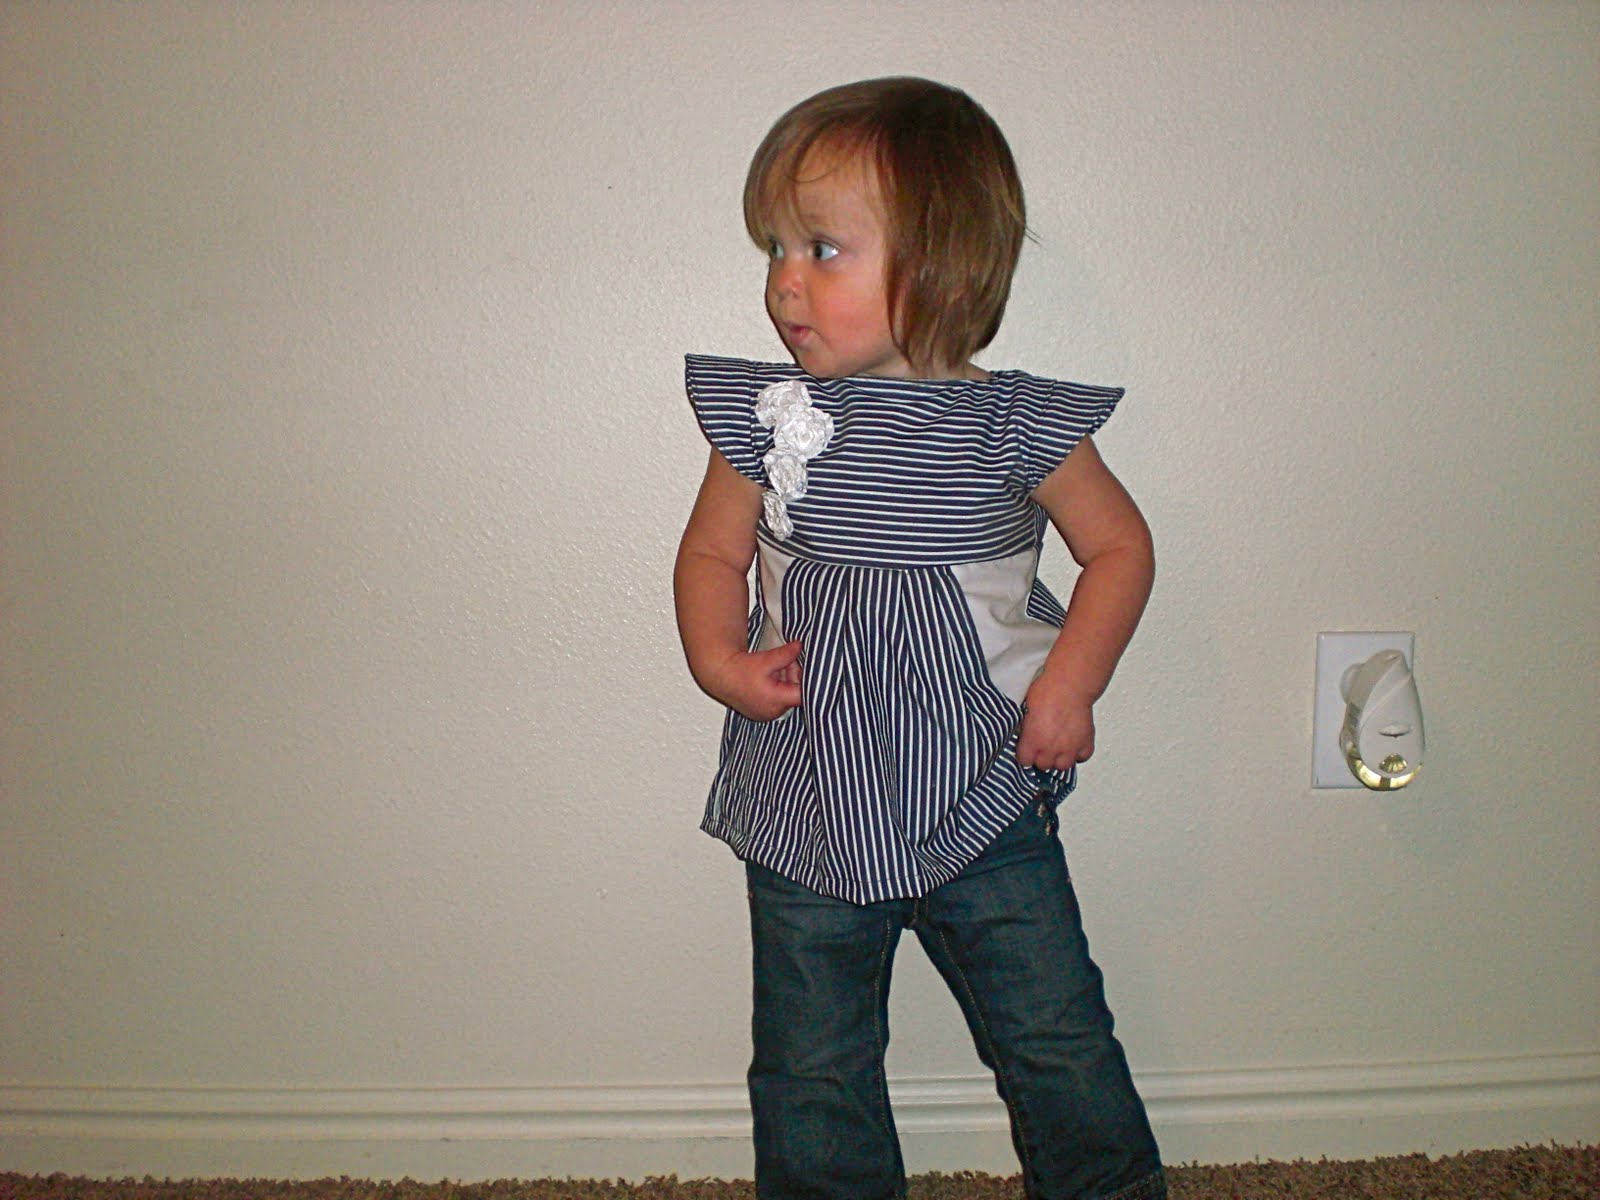
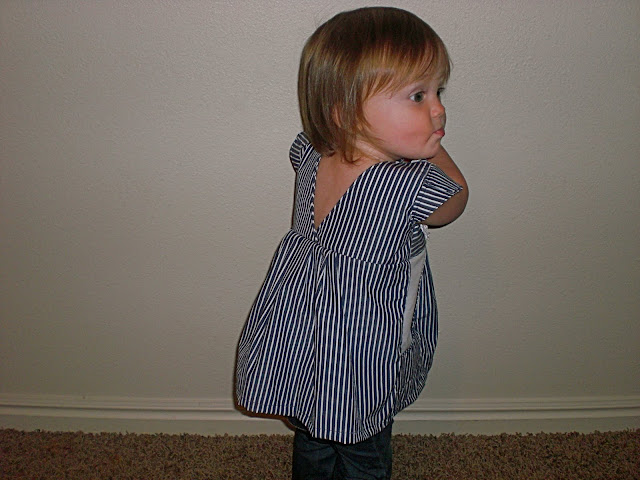
The time has come! It is time for the petal sleeve top tutorial! I am asked all the time where did I buy the top the Little Miss wore in our family pictures. Well I didn’t buy it, I made it and it was super easy to make. So today I will share how. This was really just an alteration from my favorite basic pattern. (which I will share later) This free flowing top has a V cut back and awesome flair in the petal sleeves. Today’s tutorial has added pockets to the top but you can easily skip that if you don’t want them, I will walk you through both ways. The directions may seem a bit long but I made my first one in about 2 hours and now I can crank one out in about an hour. It is that easy.
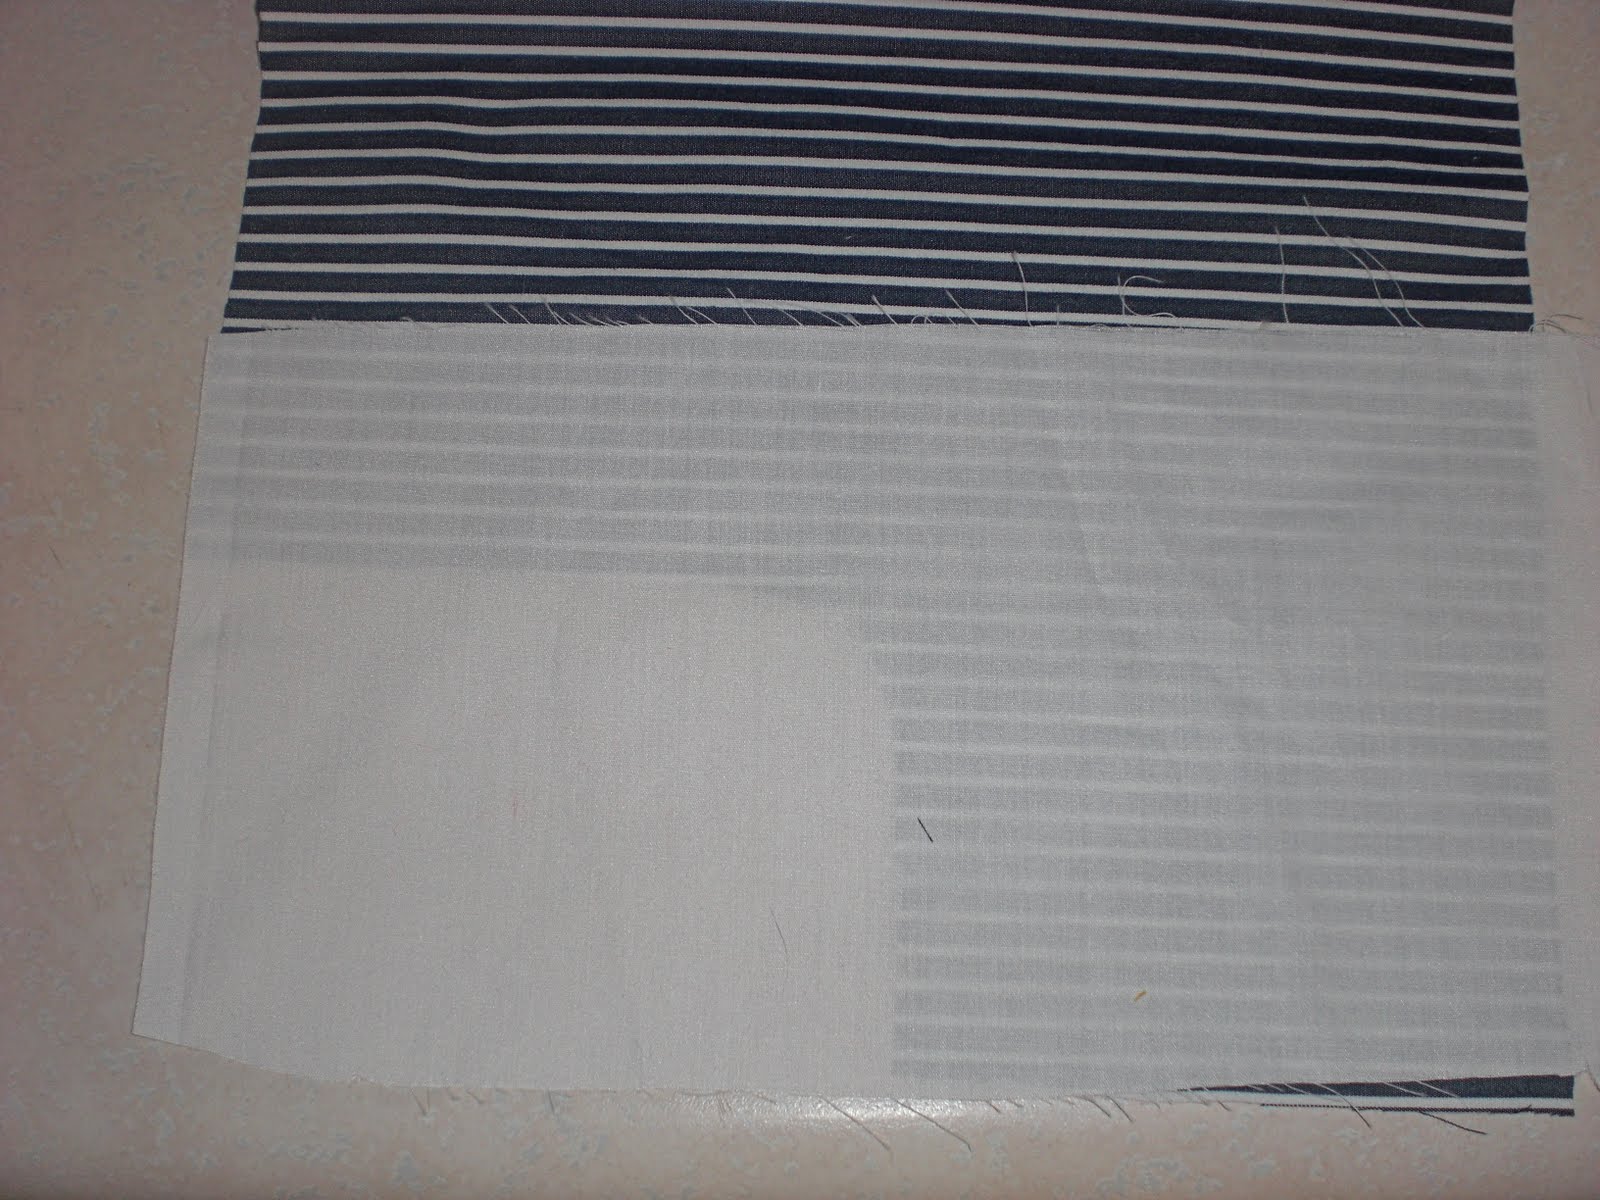
- Fabric (the amount will vary depending on the size you make it in, for my daughter I use 1/2 a yard or for the blue stripes above I used one of my husbands old dress shirts)
- Contrasting fabric (optional if you want pockets)
- Thread
- Paper to make the pattern
Lets get Started!
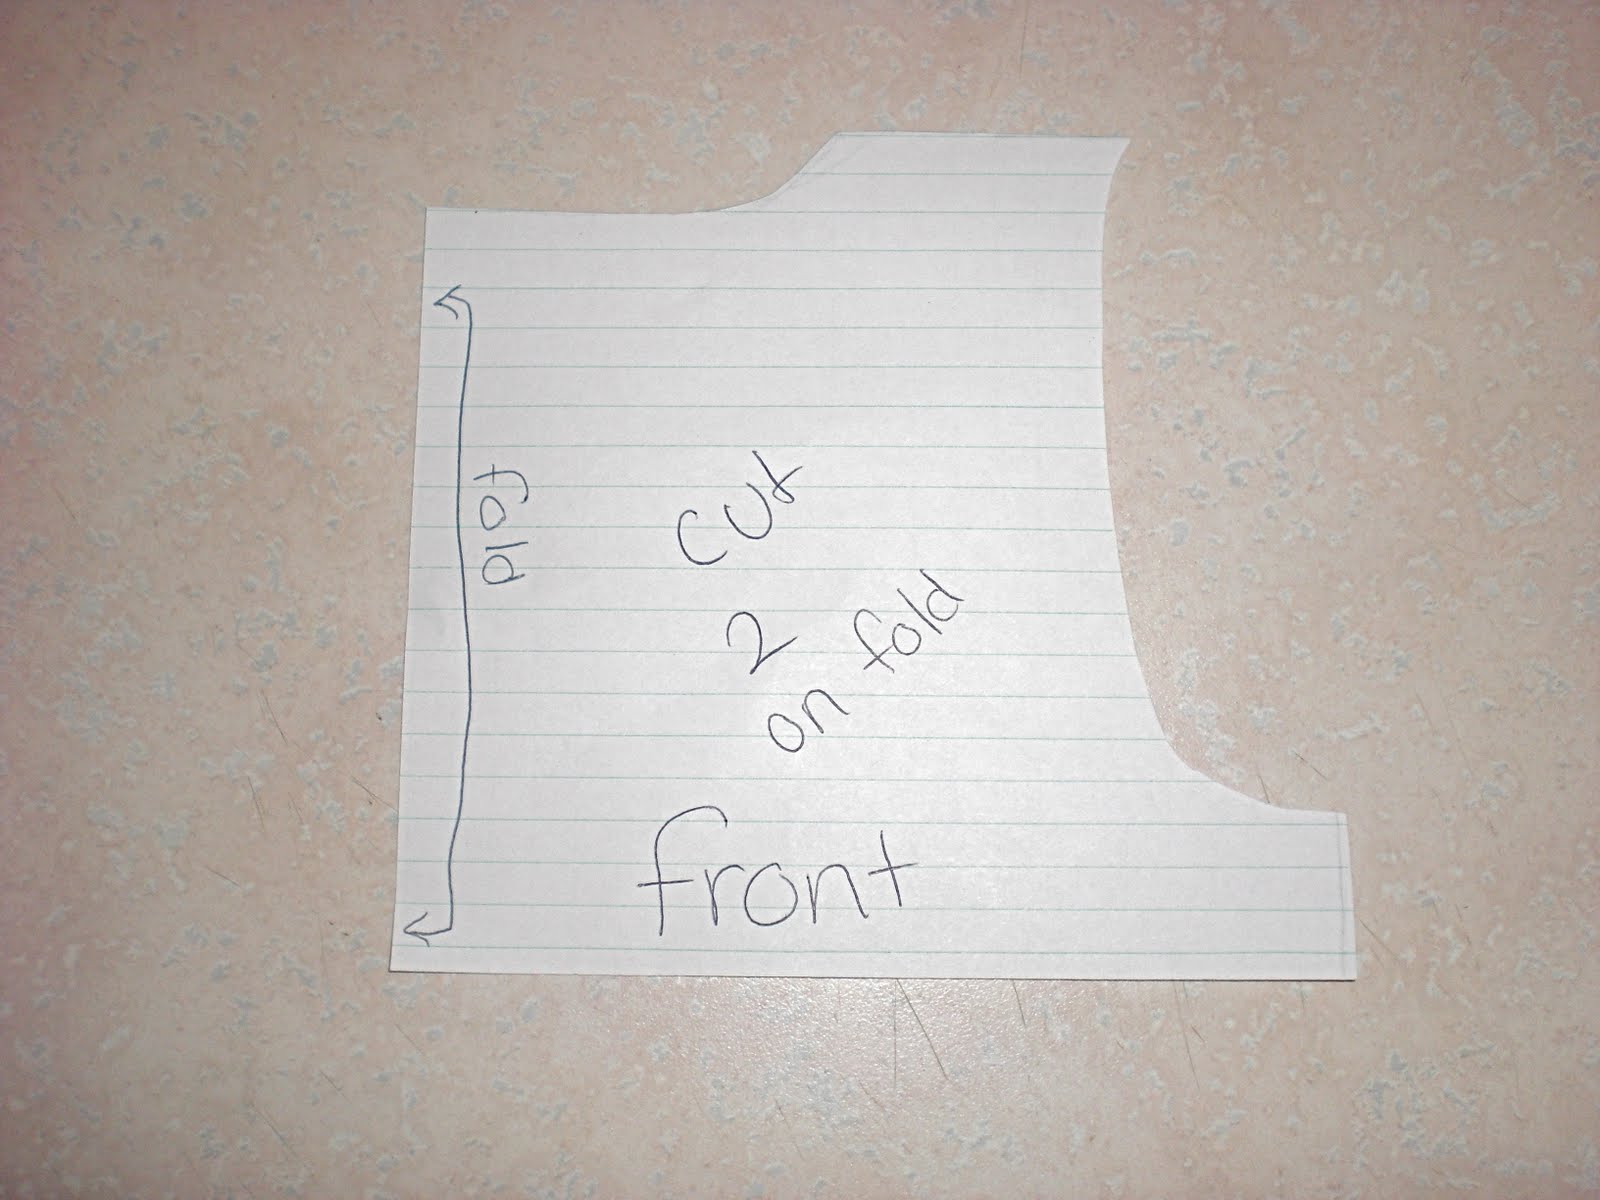
Step 1: To make the front pattern piece for the bodice, measure the largest part of the models chest, (wrapped around the chest) For my model this was 20 inches. Half of this amount will be the front so for my model that measurement is then 10 inches and the pattern will be on a fold so the bottom edge of that will be 5 inches. Then measure from the middle of the shoulder down about 3 inches under the arm pit. (make sure you measure over the largest of fullest part of the bust, if there is one) This will be the length of the pattern. How you make the neck line is up to you for me since the back is a deep V I like the front to be high, more of a boatneck, so I make a shallow slope about 1 inch down from the top. to make the arm opening you can do this one of two ways, you can trace the arm opening line in a shirt that fits well or you can measure from the middle of the shoulder to under the armpit add about 1 inch for give room and that is how far down from the top you should start your curve. For my model this was 4 1/2 inches so I measured 5 1/2 inches down and that is where my curve started. The best way to know if your pattern will work is to hold it up to your model and see if it reaches the middle of the shoulder and the middle of the side under the armpit. If it does success! (the ending piece should look something like the picture above)
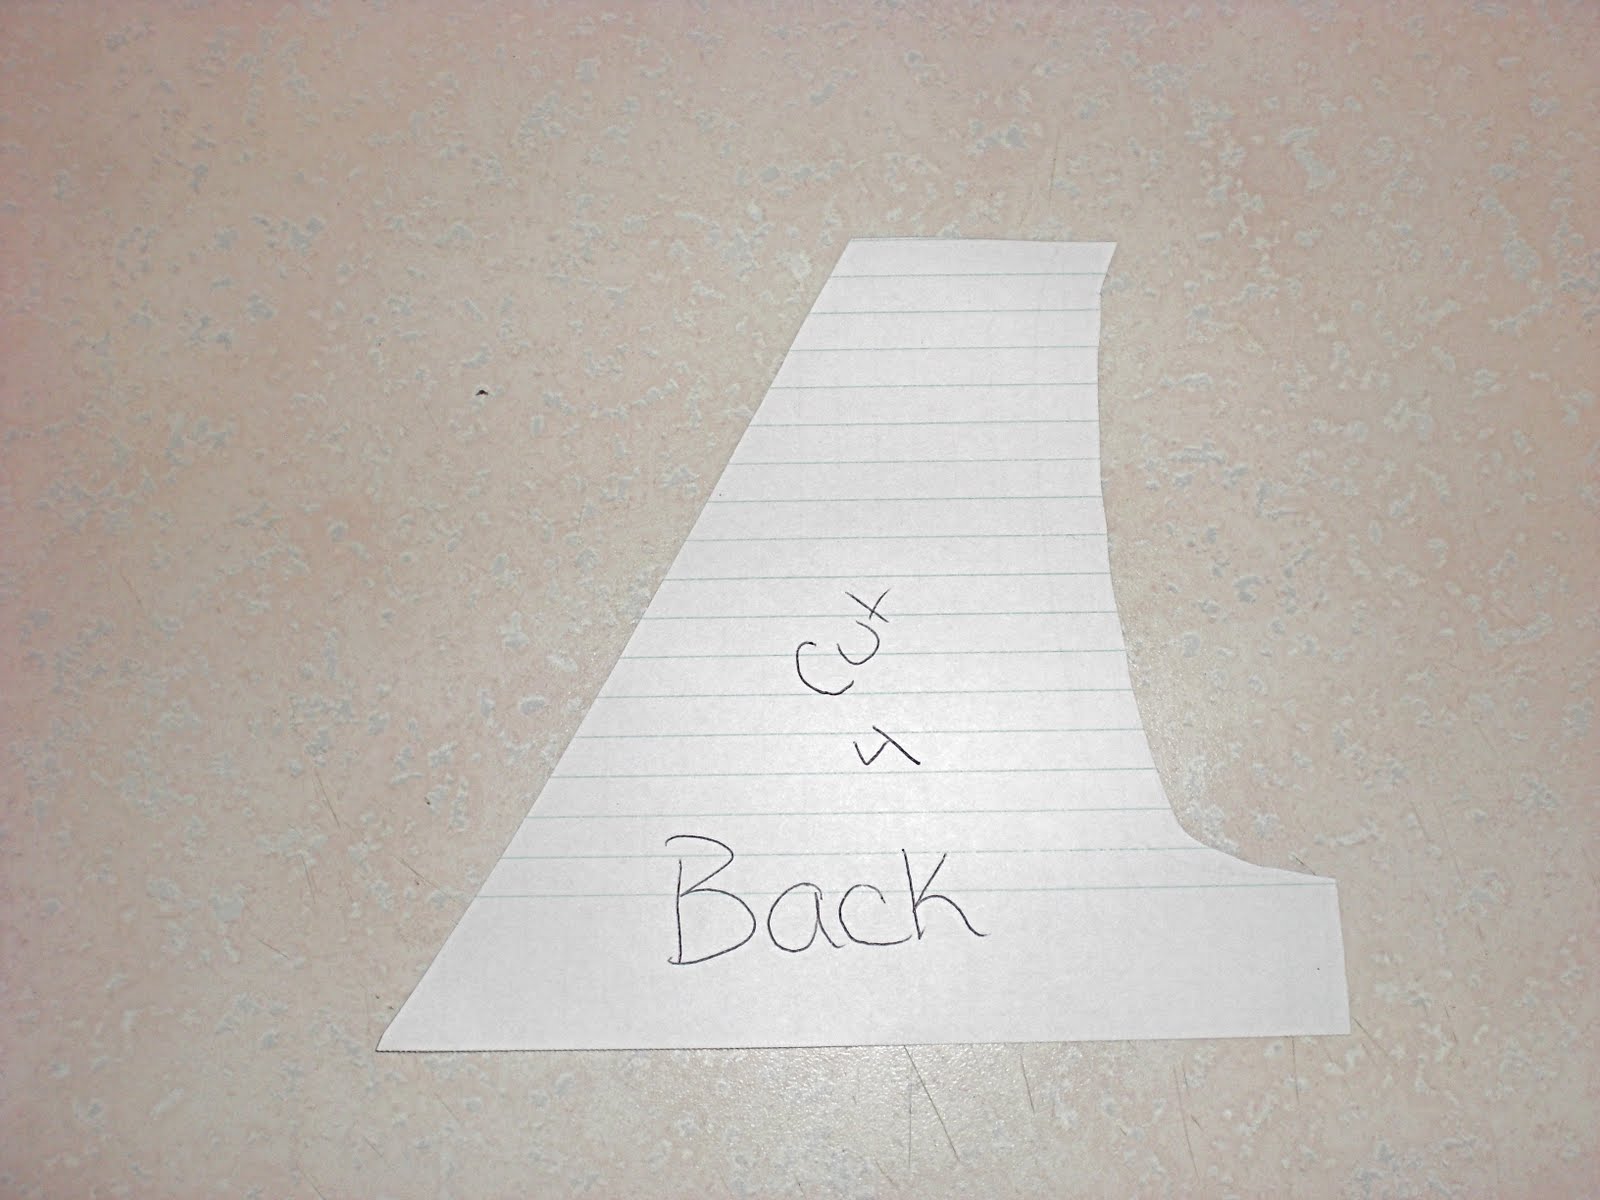
Step 2: Trace the front piece onto paper, add 1 1/2 inches onto the edge where the fold was on the front piece. Then from the shoulder cut an angle straight down to the bottom. Done!
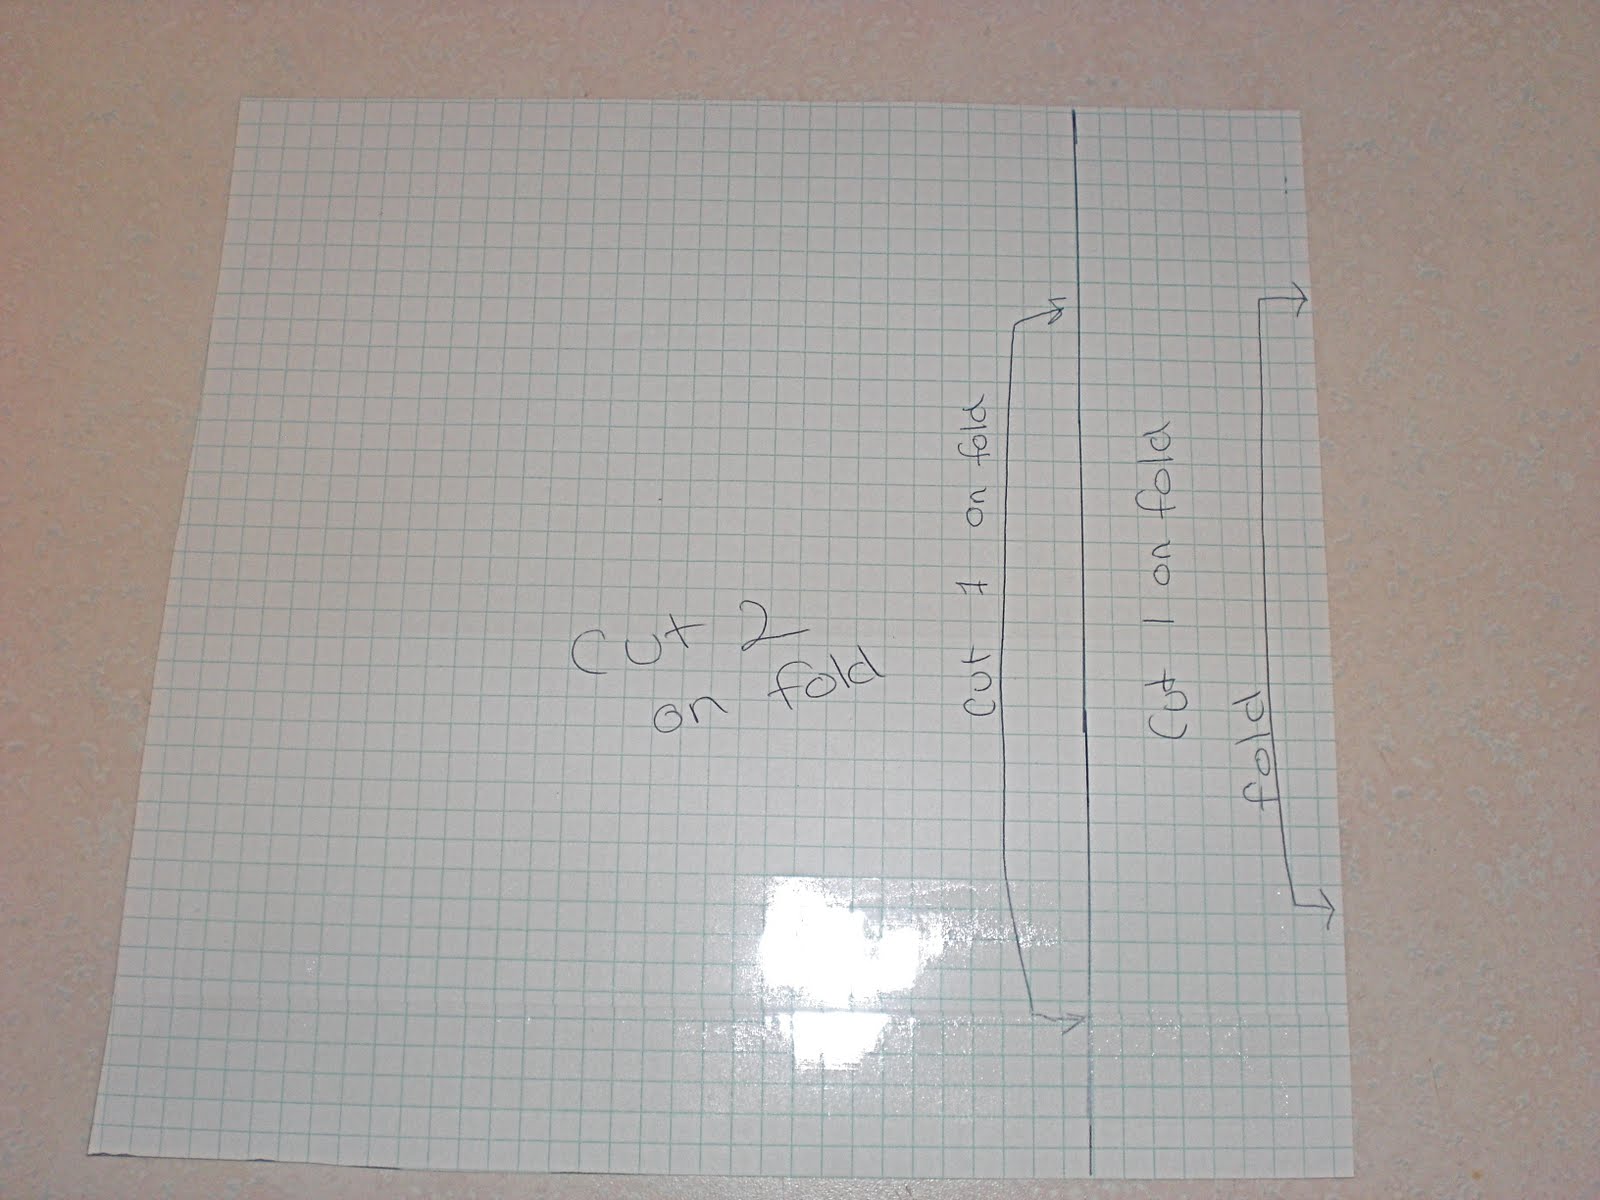
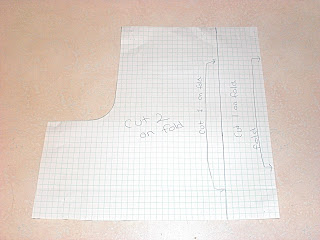
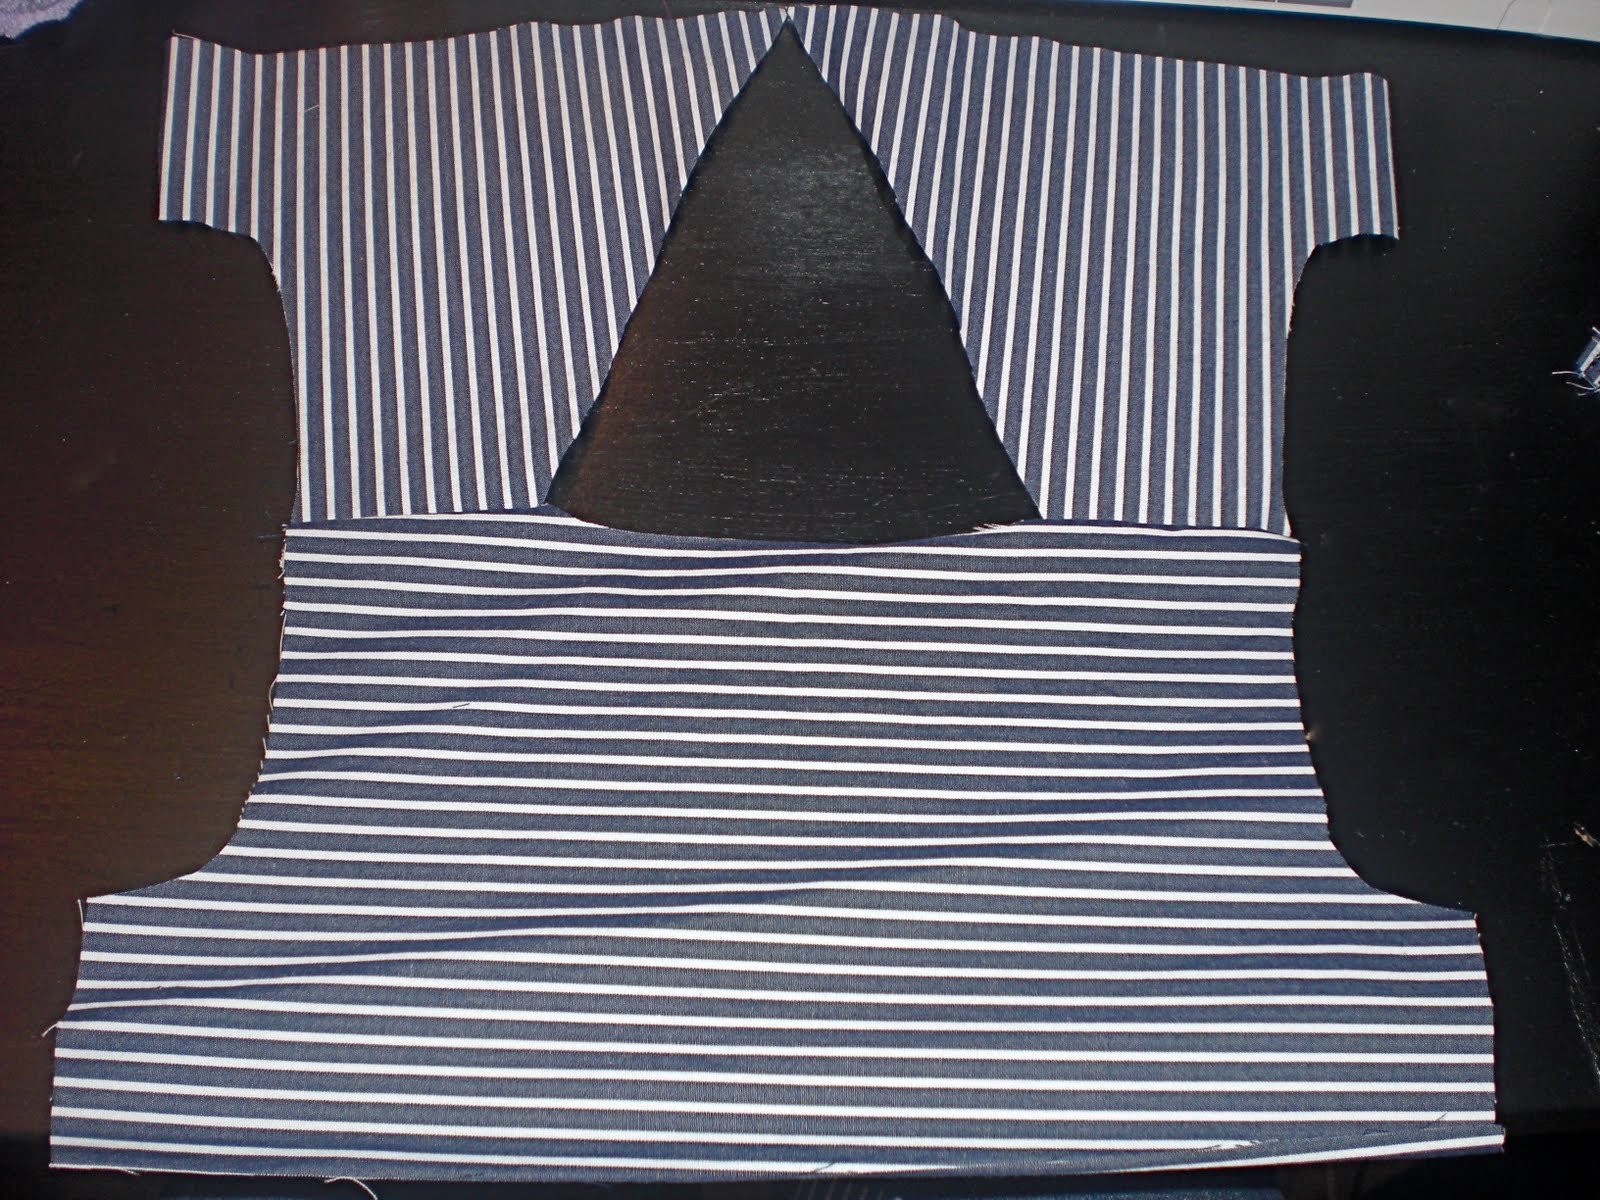
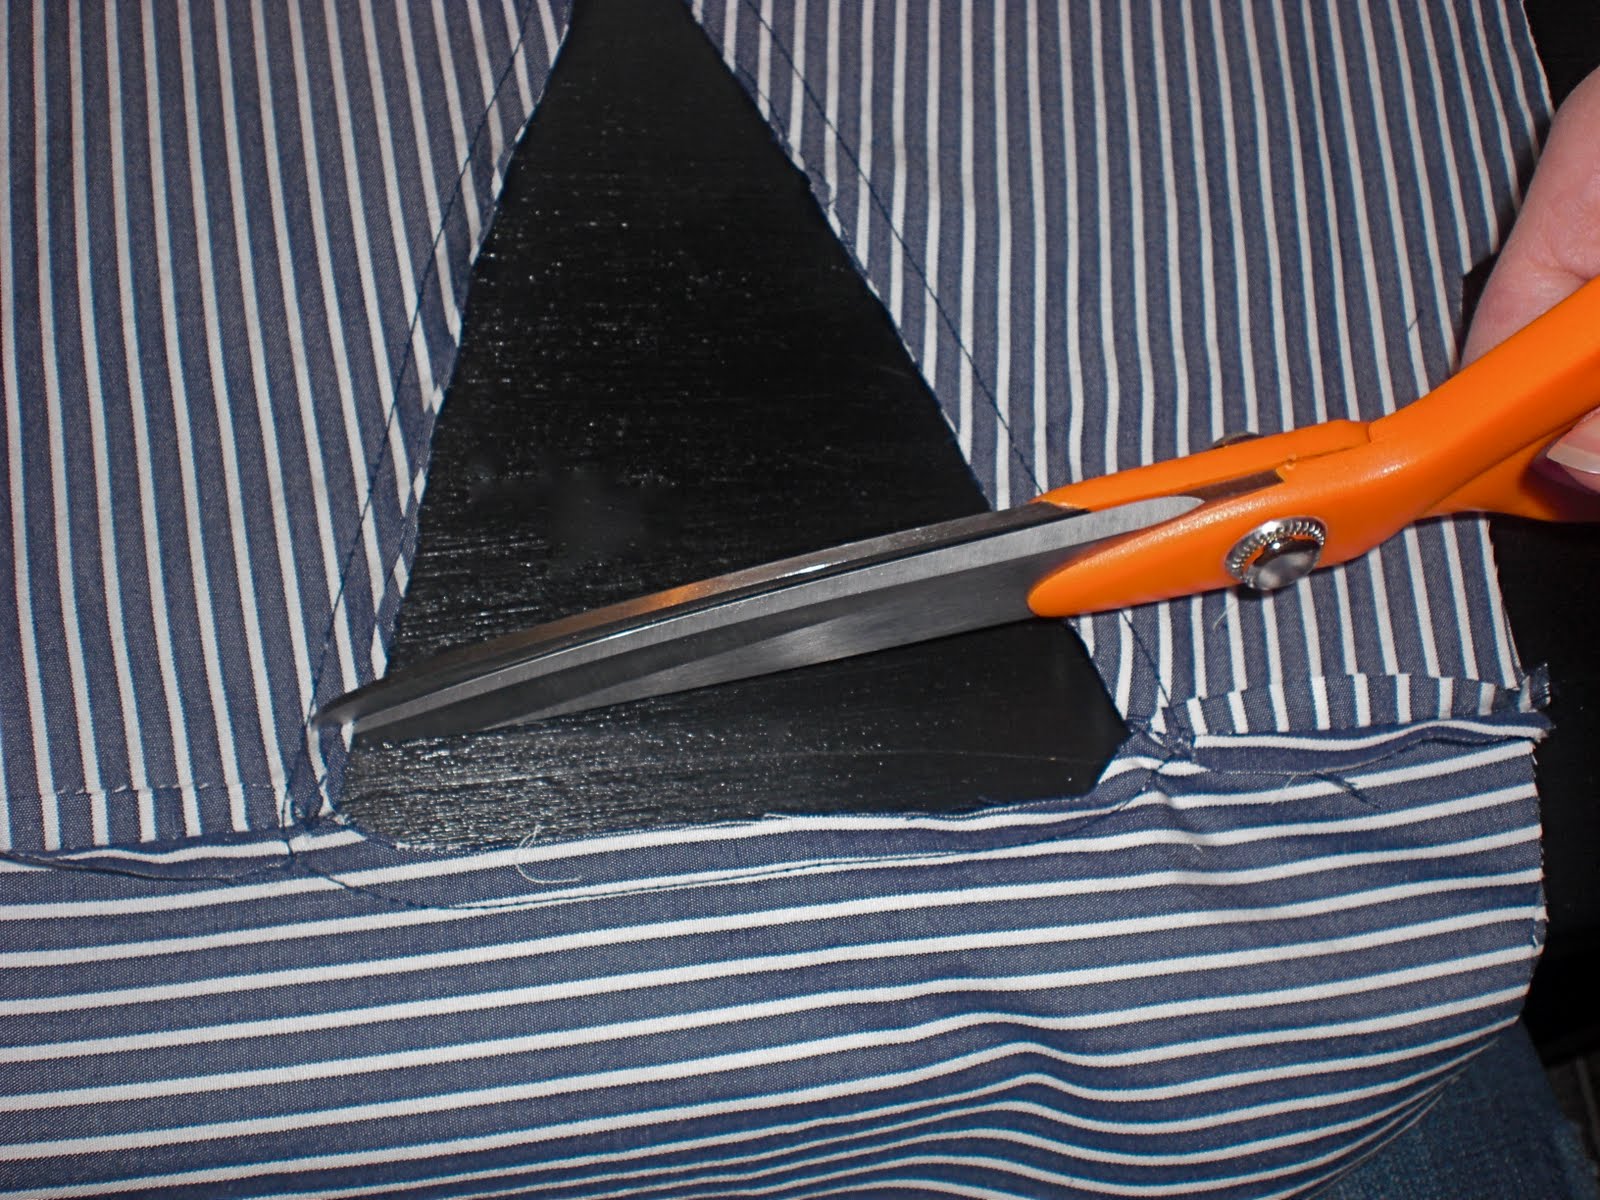
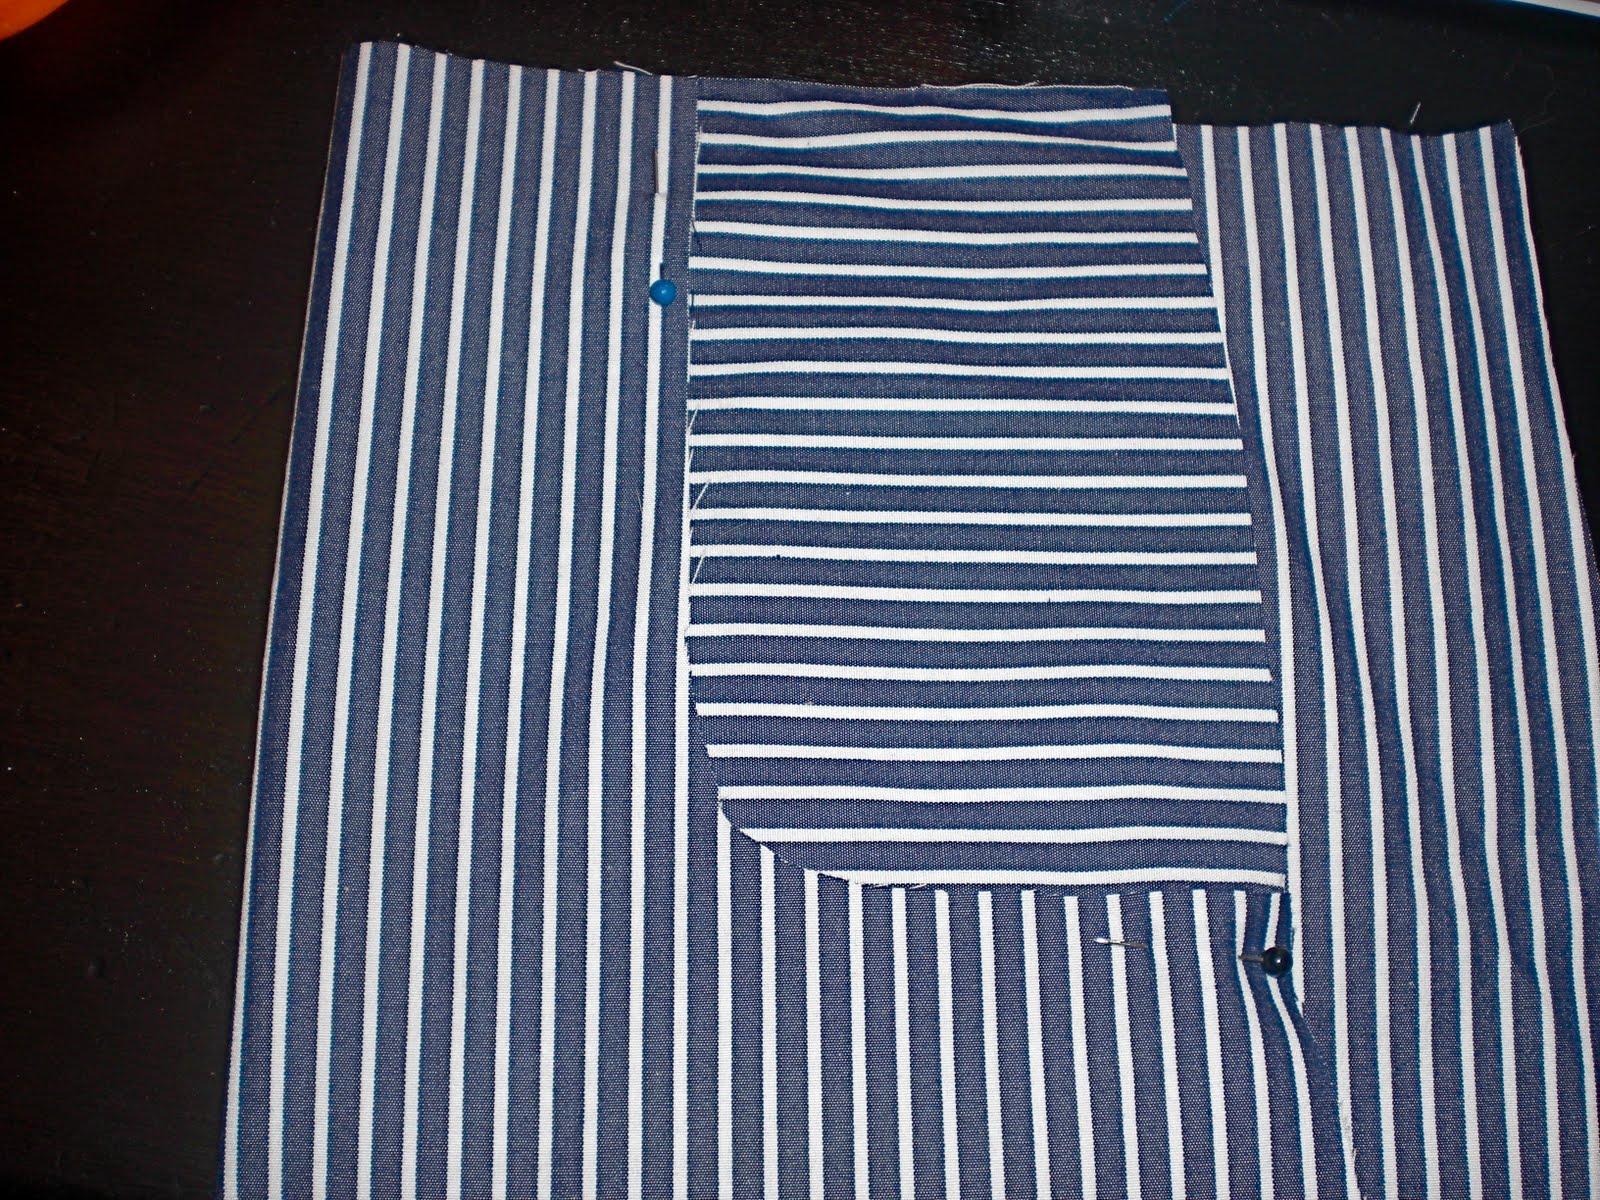
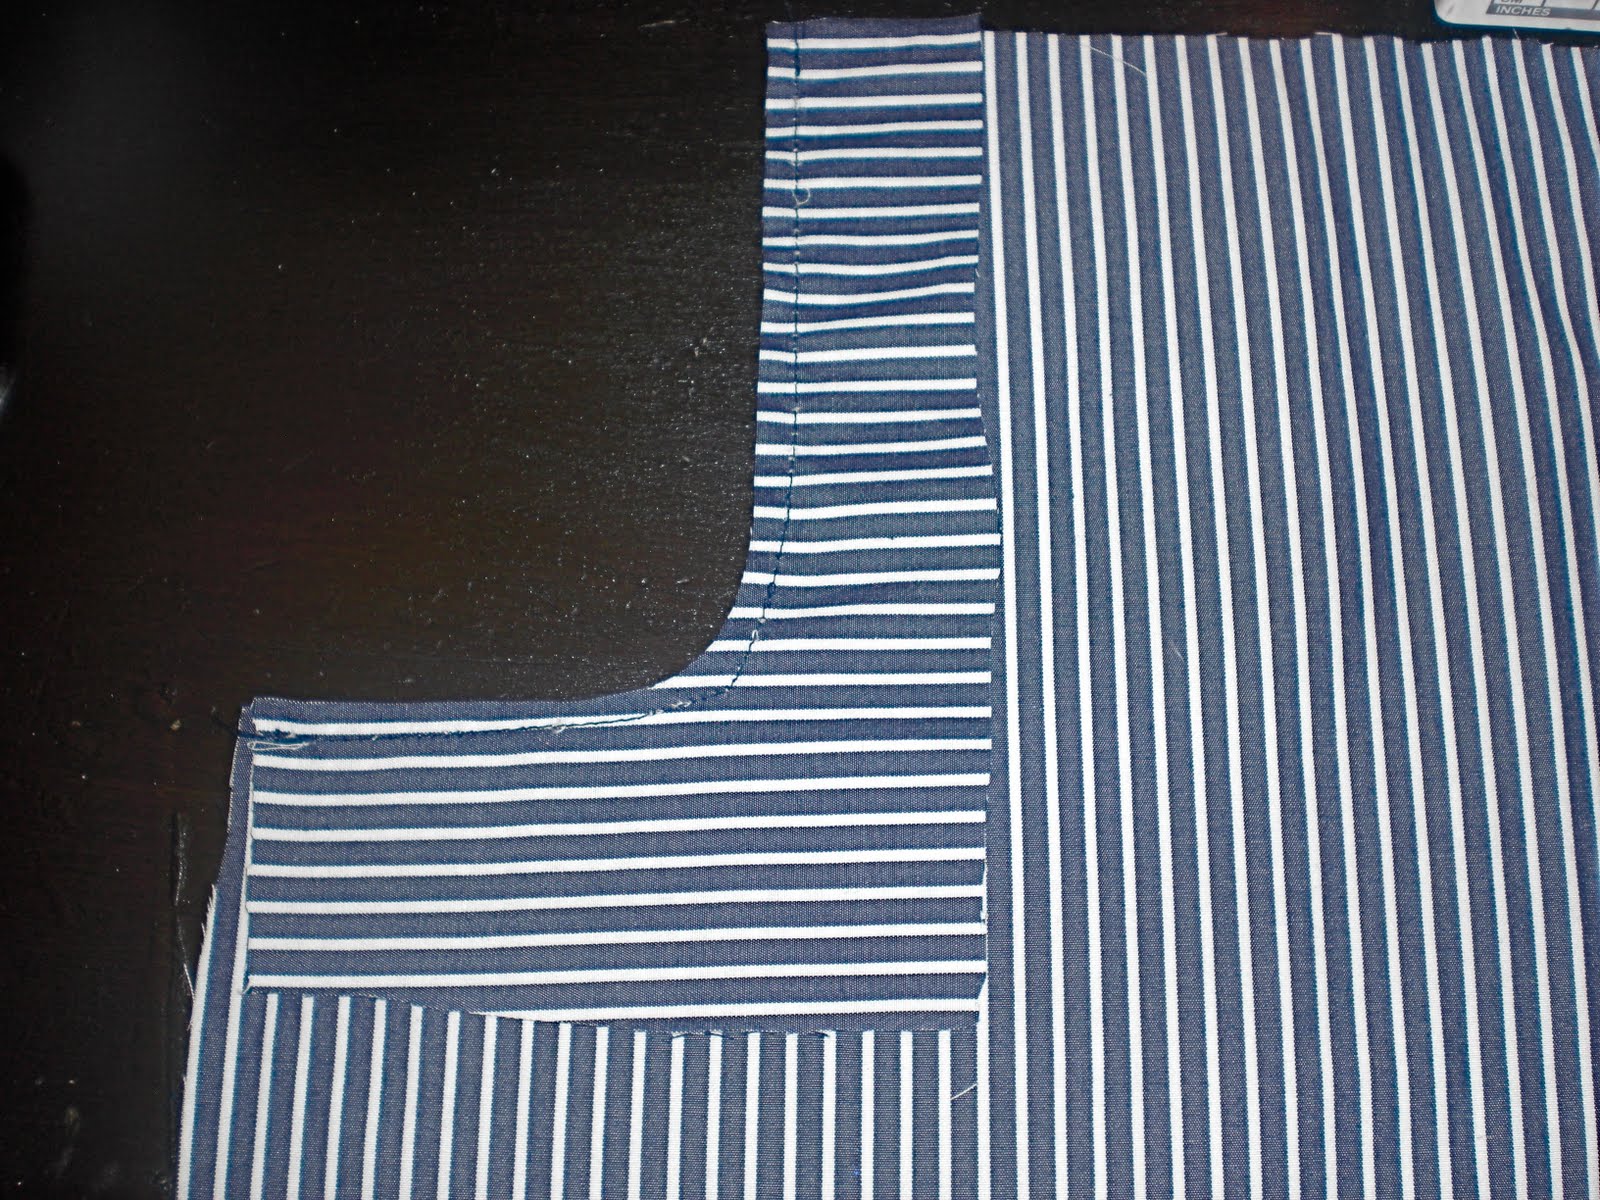
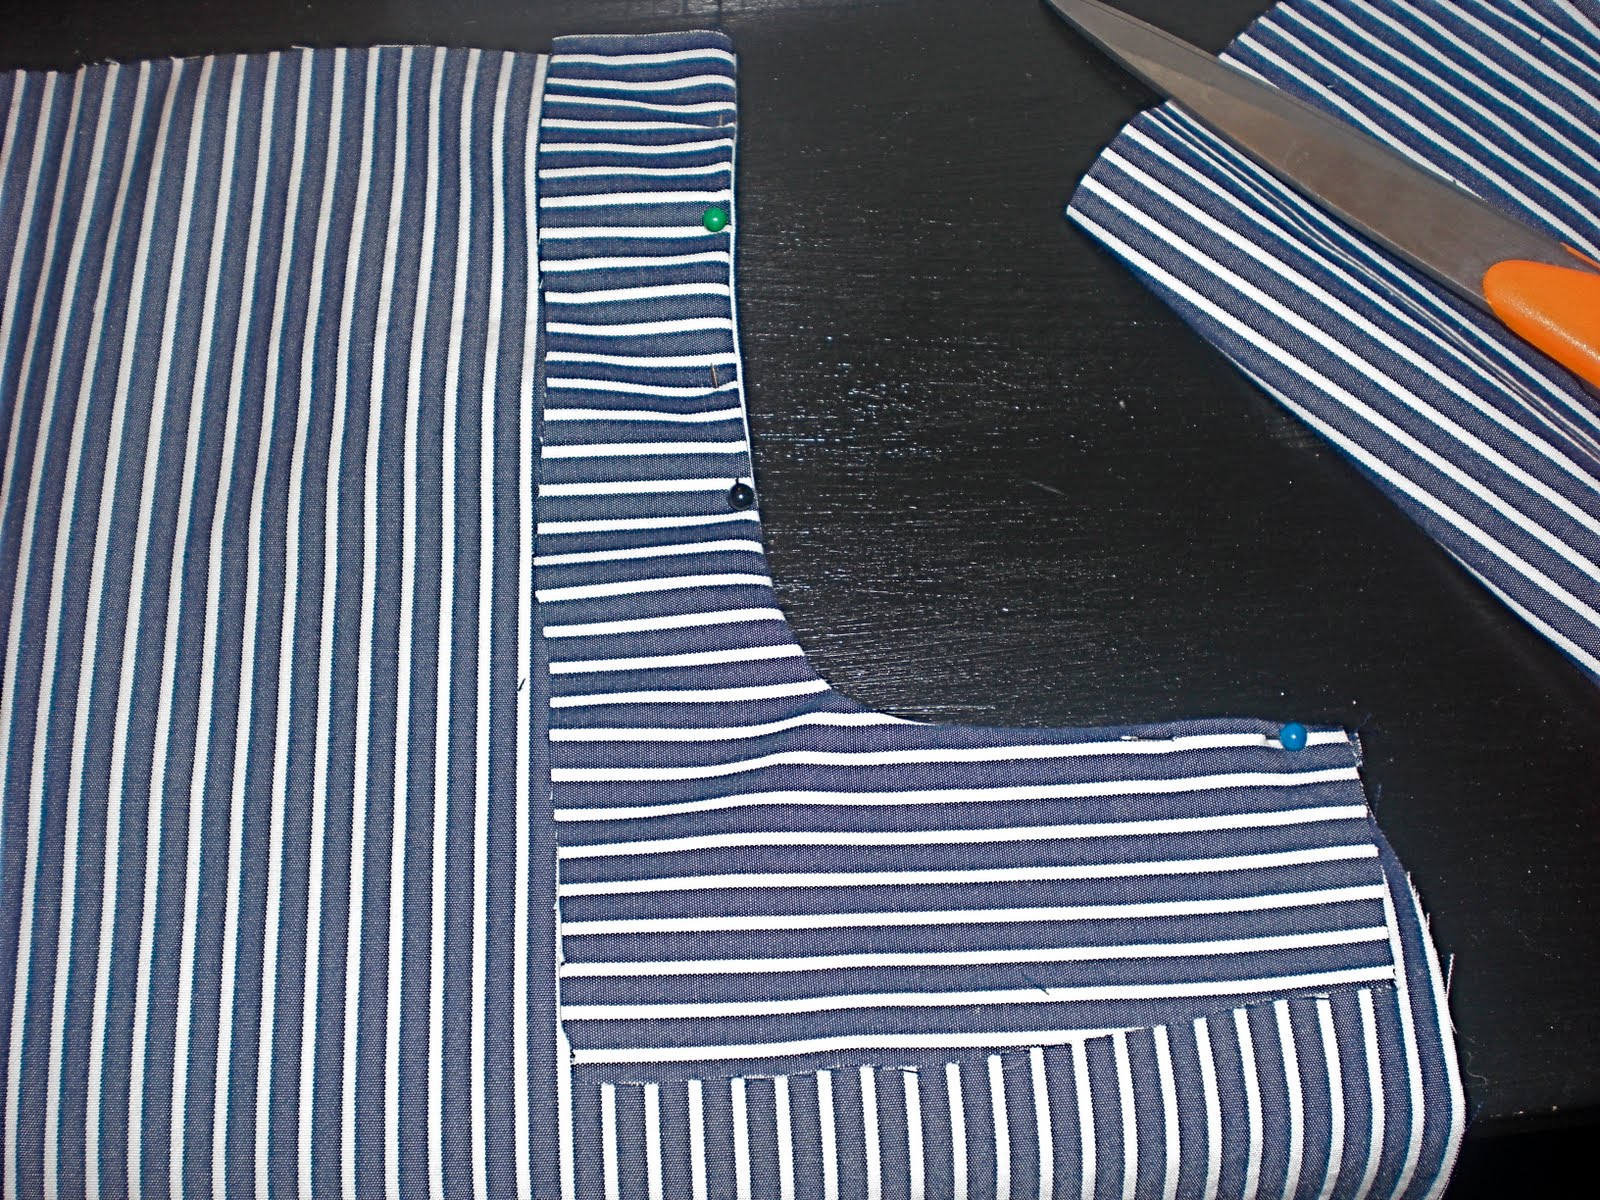
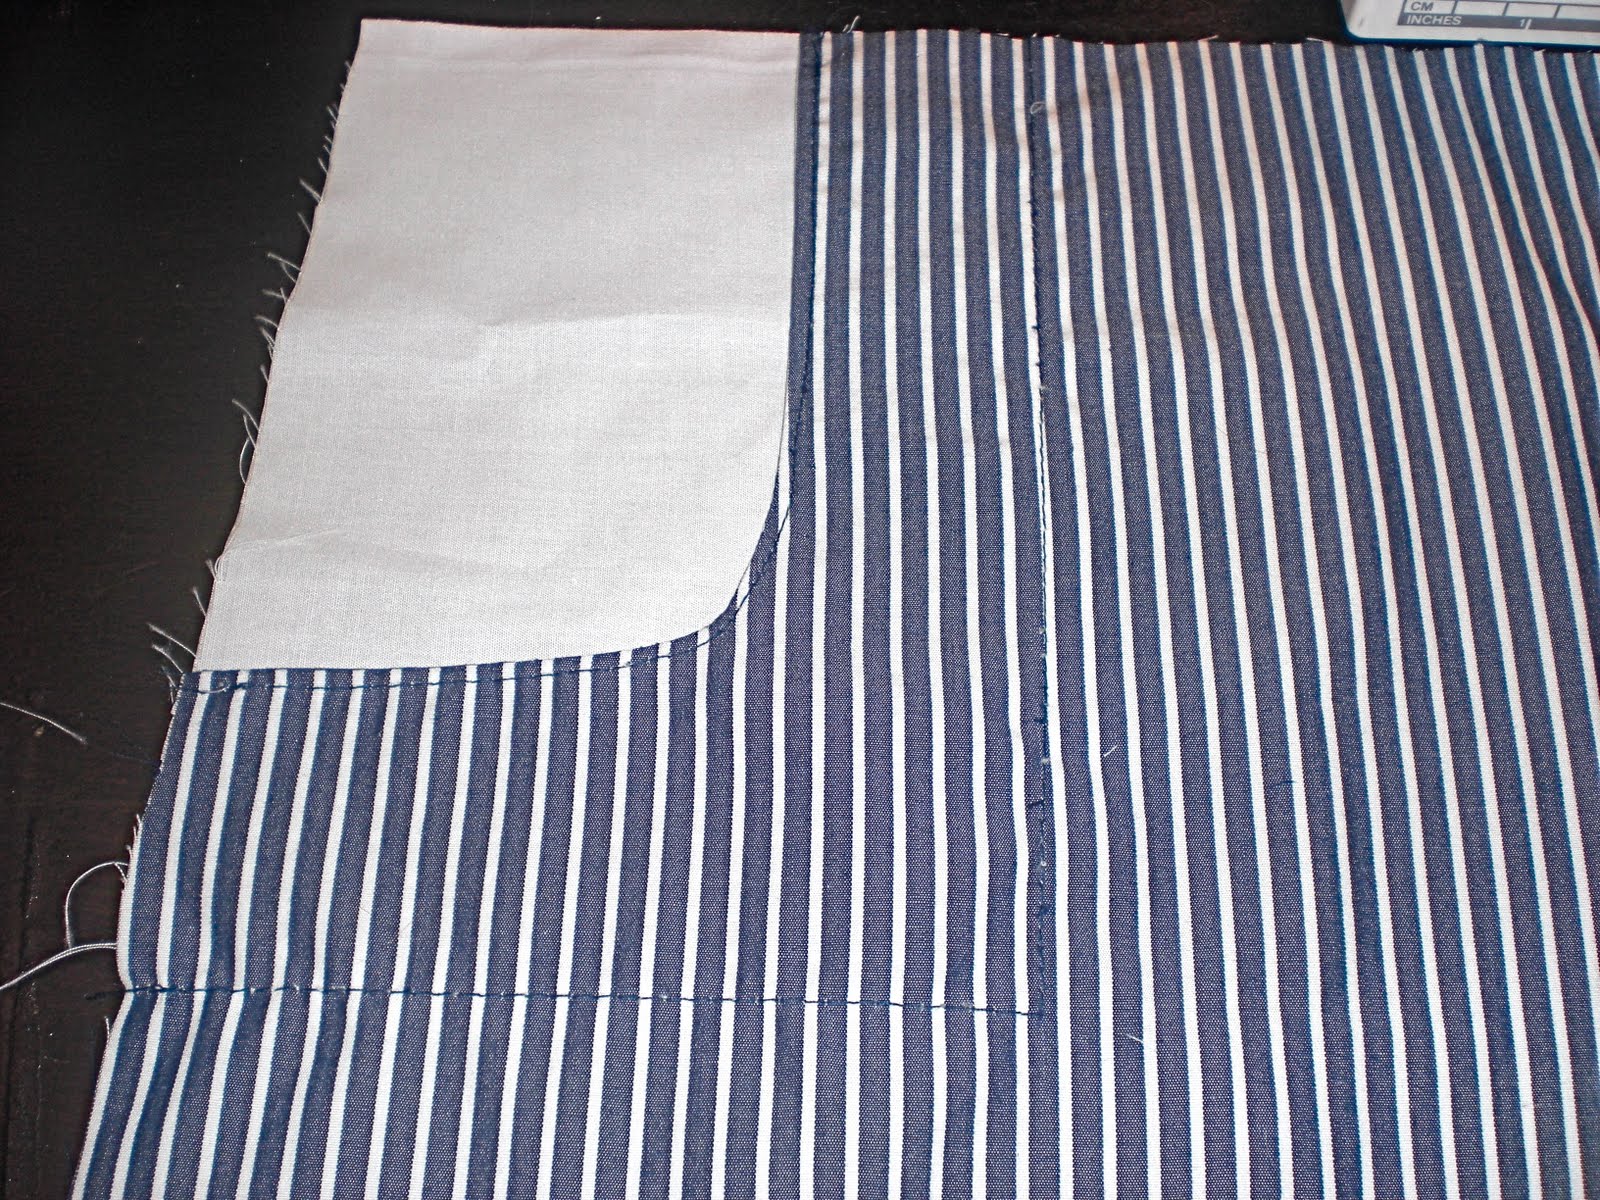
Step 3: The full part of the top. This is more or less a rectangle. The width will be two different lengths that you will cut on the fold. This is because I like this top to be less full in front and more full in back but you can do them the same width if you want them the same fullness front and back. The width is double the width of the top half. So for my model that is 10 inches. (it will be cut on a fold so the total width will be 20 inches) On the same pattern I draw a line 2 inches in which is where the front piece will be cut on the fold. (make sense?) The length is determined by how long you want it. Measure from 2 inches below the armpit to how long you want the top to go, and add 1 inch for a hem. For my model this was 10 inches. Then the option you have is if you want to add a pocket. (which I did for the navy stripe but not on the yellow) To add a pocket cut into the side that is not on a fold. I started 3 inches in and about 5 1/2 inches down, and I added a slight curve. You can do the pocket as big, or small as you like. (You will only cut the pocket cut-out on the front piece so the back will not have pockets, you may want two pattern pieces if this confuses you)
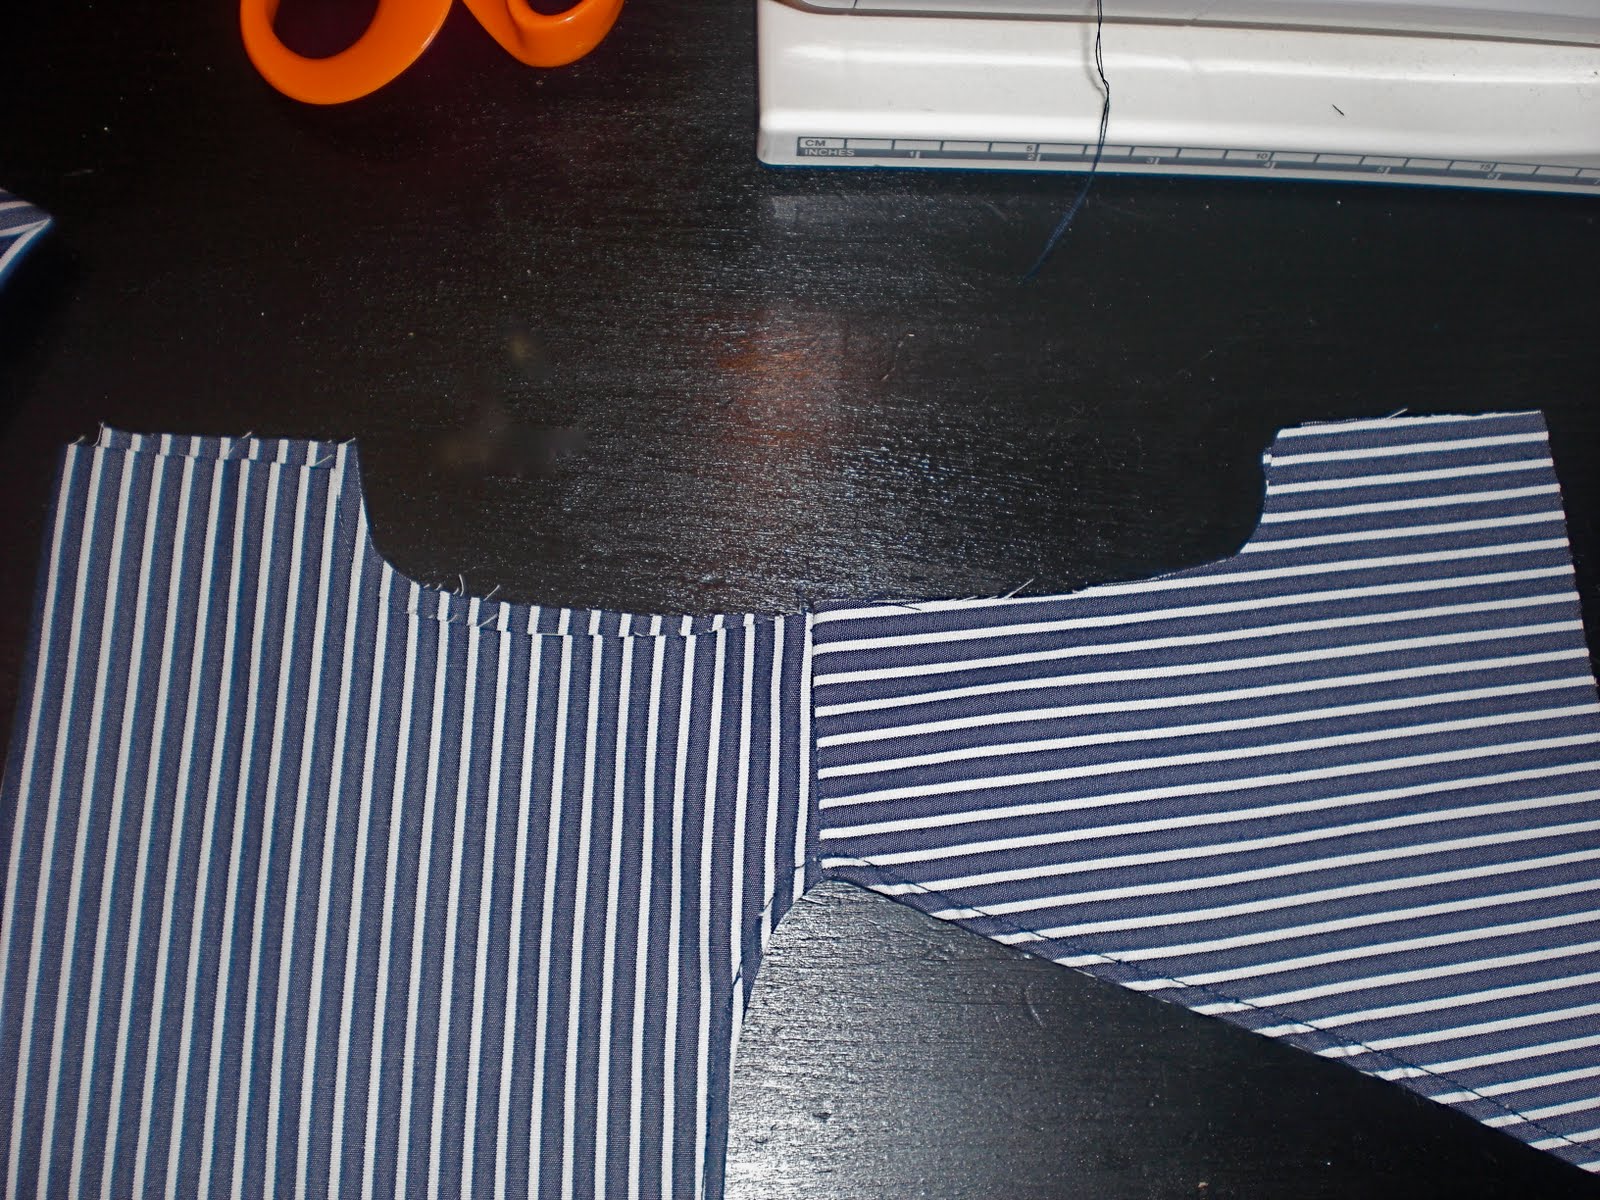
Without a pocket you pattern piece should look like the piece above at the left, with the pocket it will look like the one above to the right.
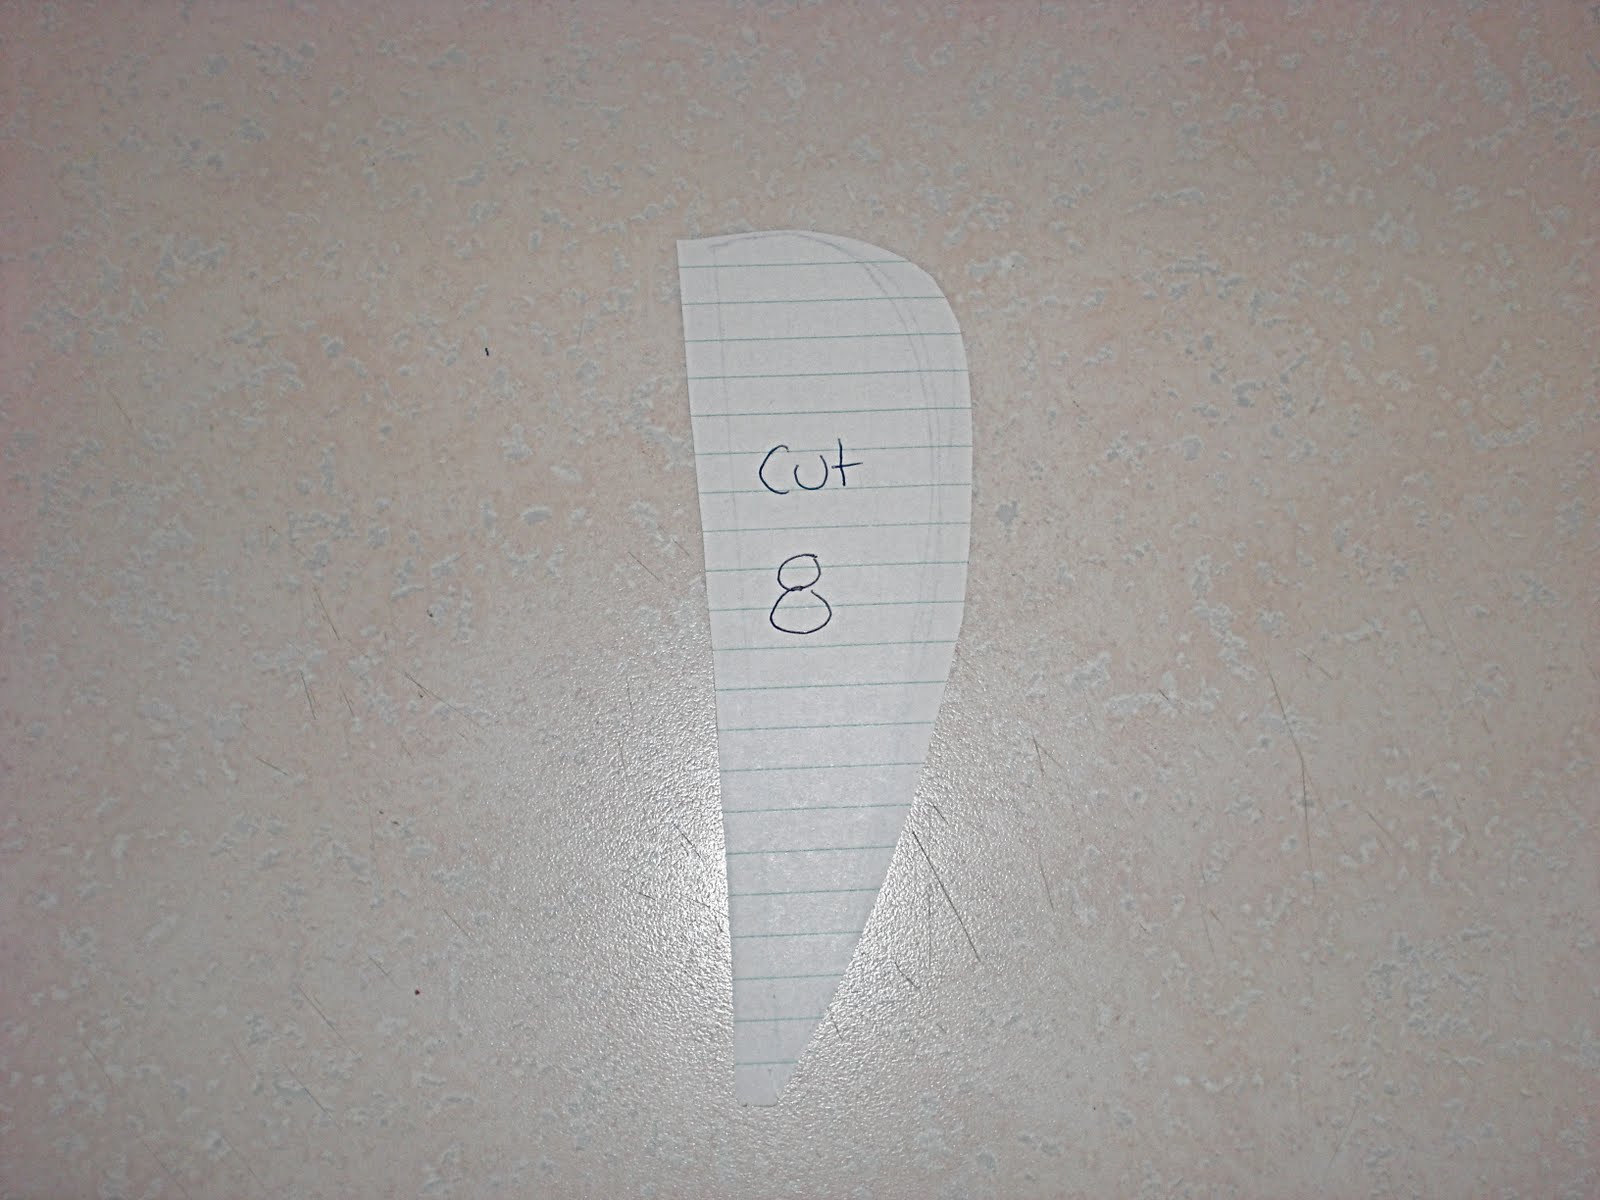
Step 4: To make the petal sleeve pattern you are going to make a rectangle that measures the length of your pattern piece from the top of the shoulder to the bottom of the armpit (right where the curve begins) The add 1 1/2 inches. That will be the length of the rectangle and then the width will be 2 inches. Then within the rectangle draw an arc that is shallow on one end and gets fatter on the other, so when you cut it out, you will have almost a half a heart looking shape that is flat on one side. (like the picture above)
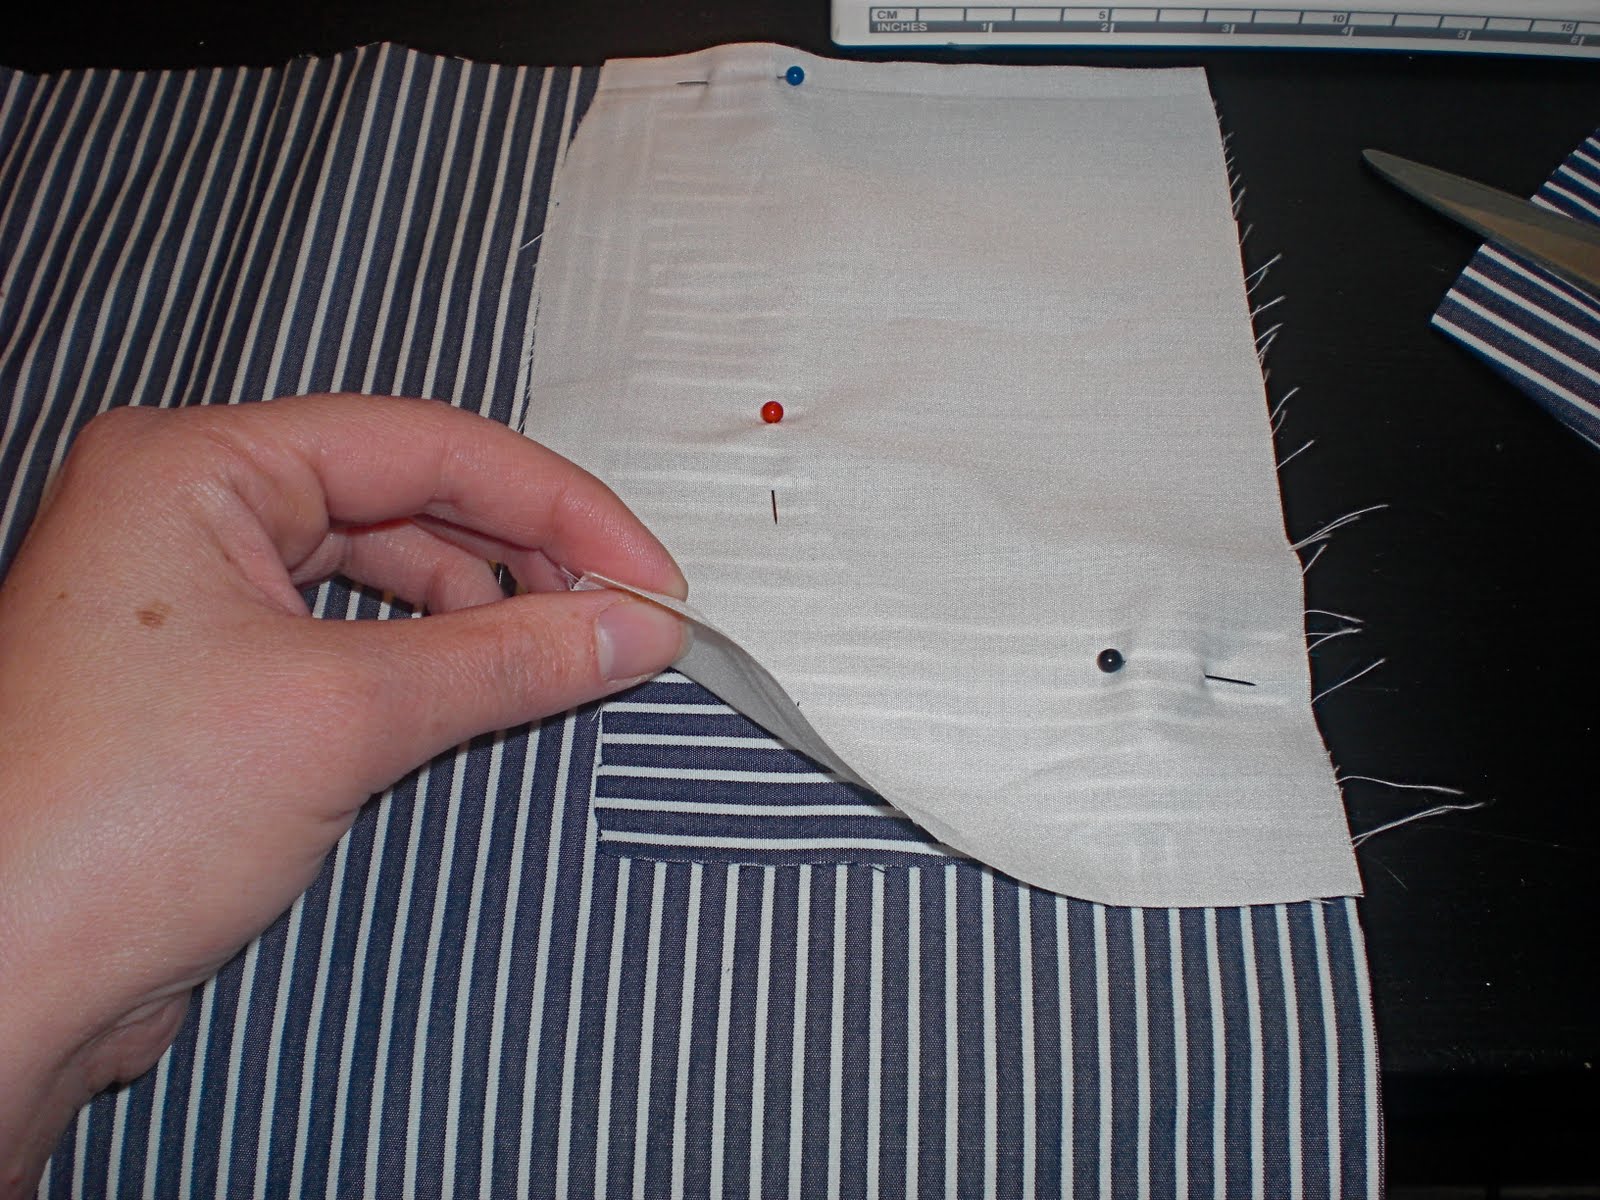
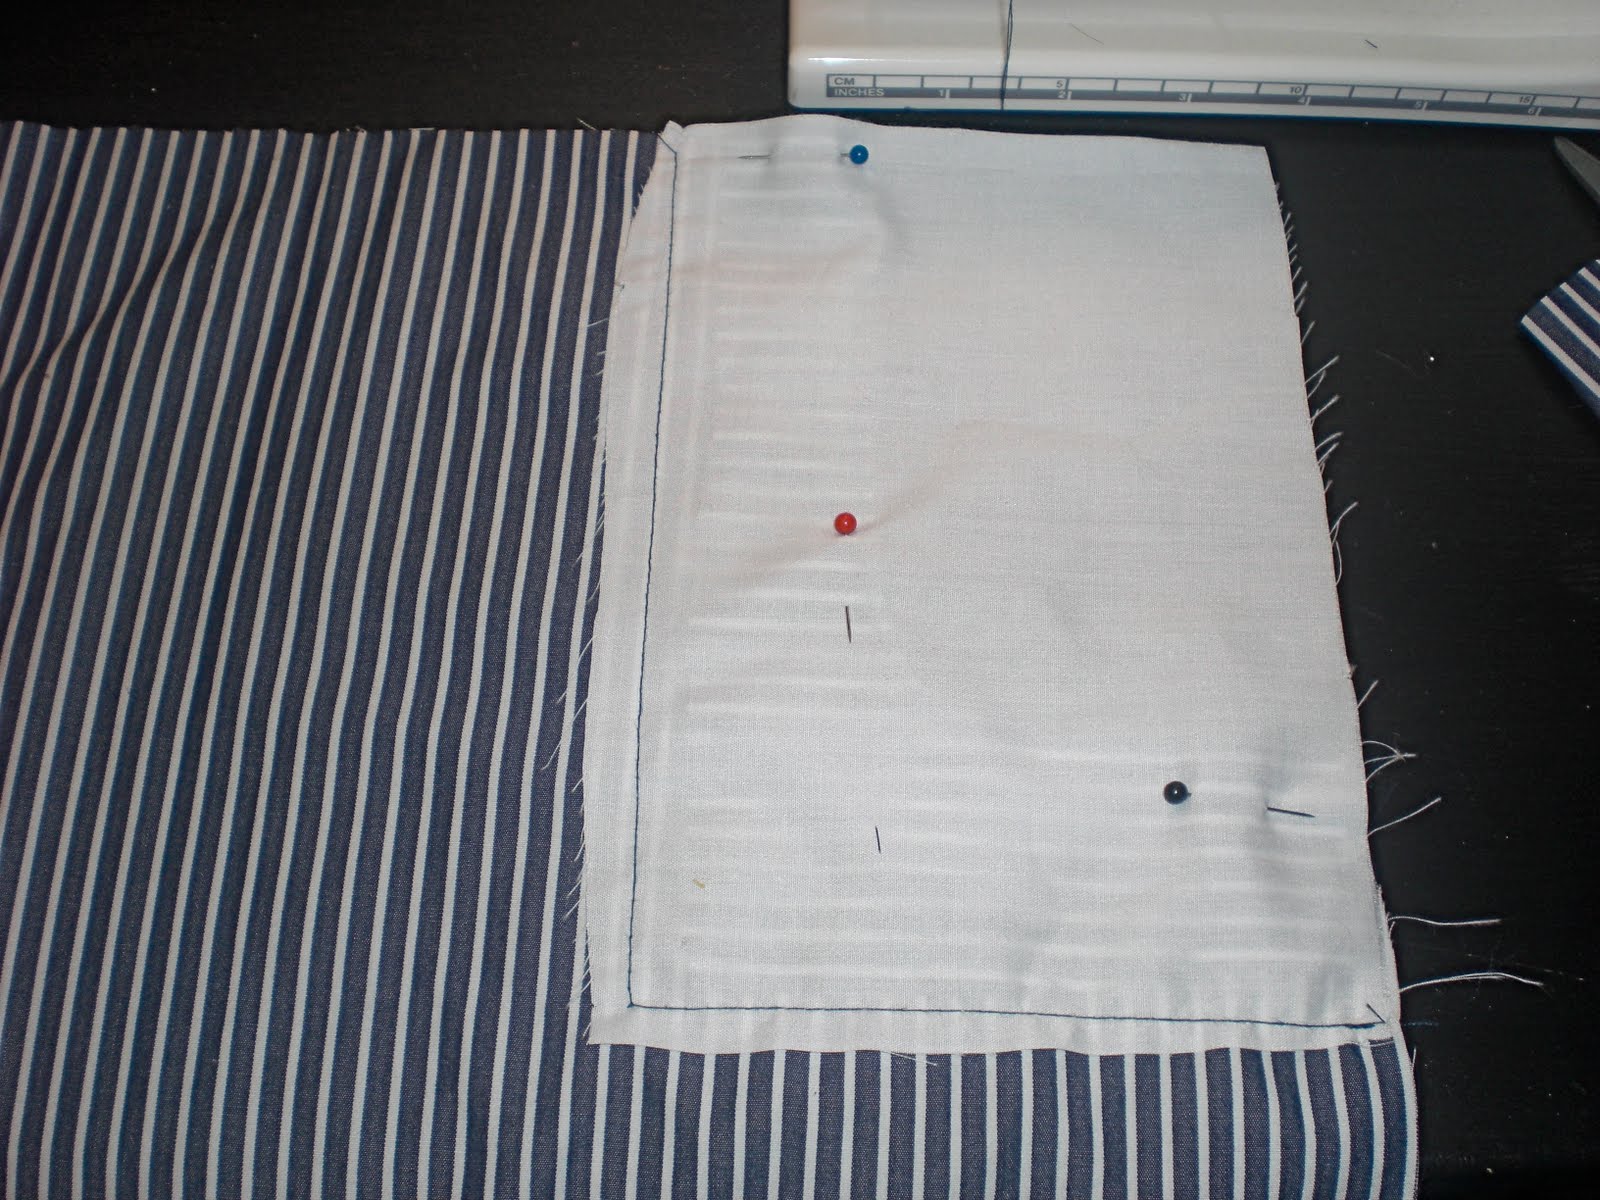
Step 5: Pocket option, (if you are not doing pockets move on to the next step) To get the inside of the pocket take your contrast fabric and lay it over your pattern piece the one with the pockets cut in it. Cut a rectangle the overlaps the opening as deep as you want the pocket to be. For me I cut two inches off the bottom of the piece shown above. That is how deep my pockets will be.
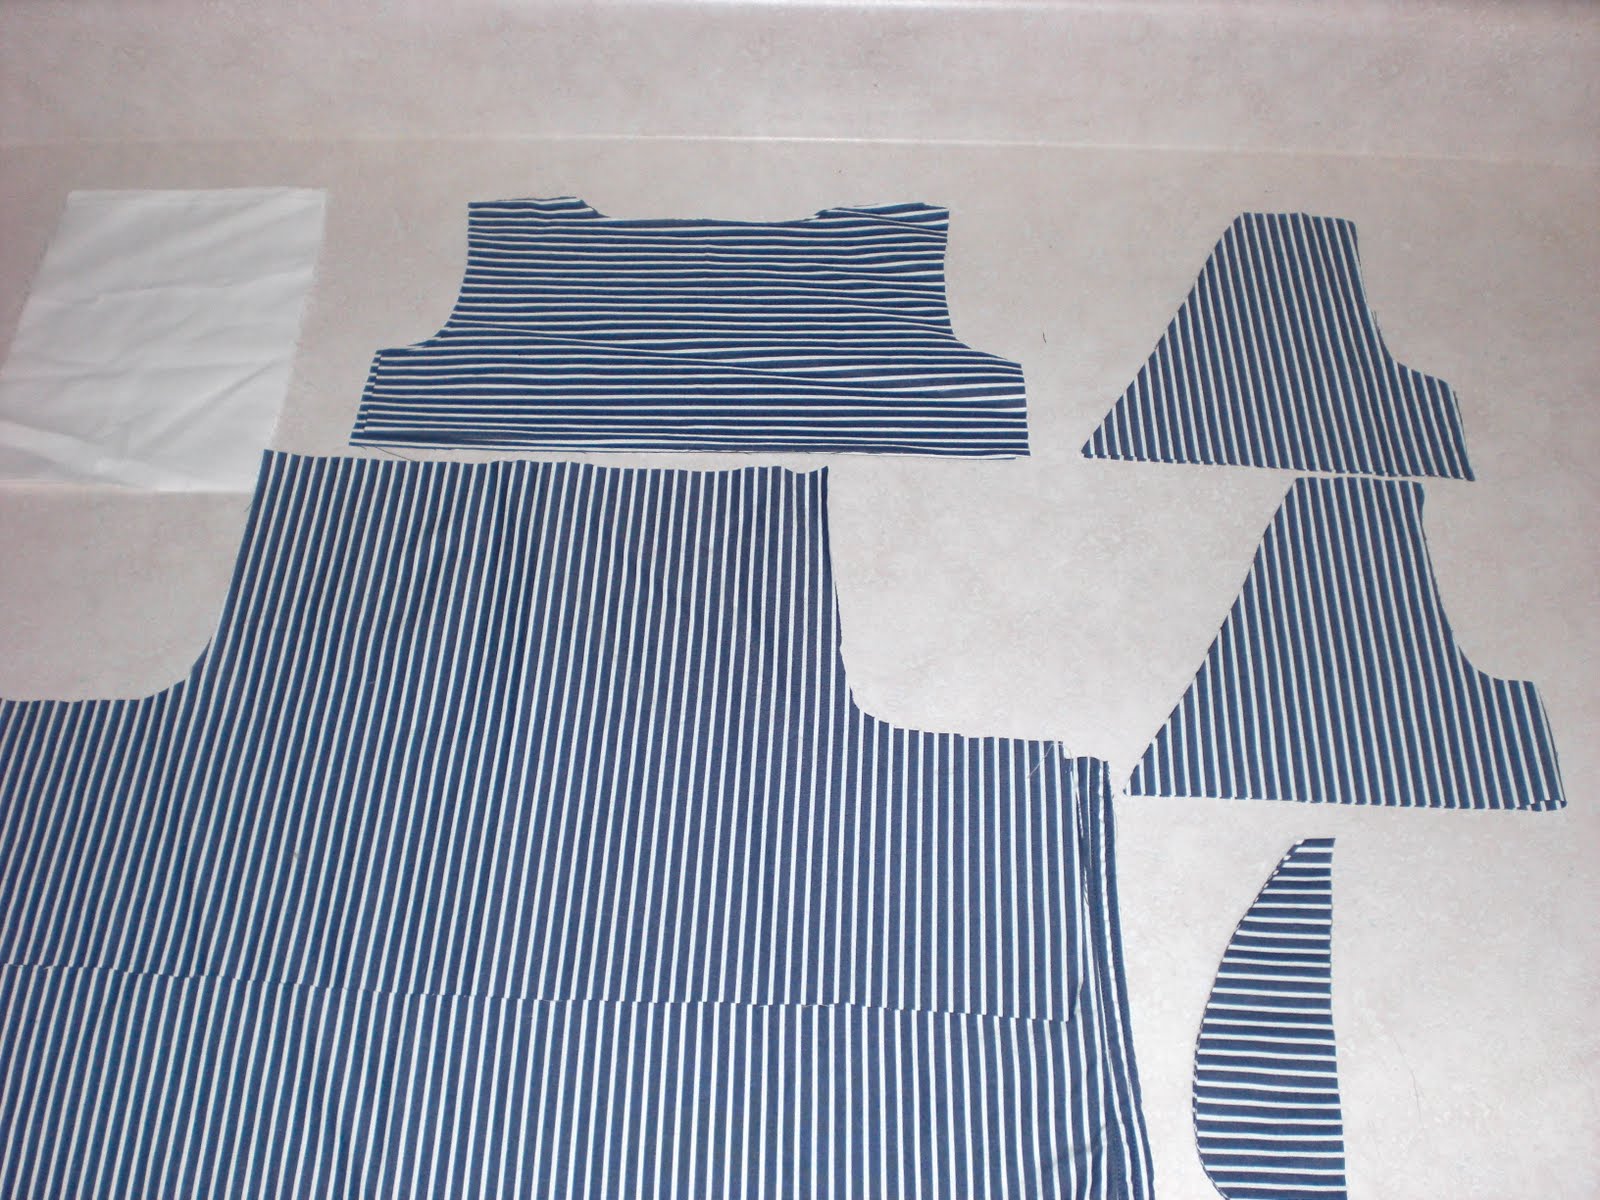
Step 6: After you cut out all of your pieces you should have 2 front bodice piece, 4 back bodice pieces, 2 “skirt” pieces (one with pockets if you want them one without) 8 petal pieces, 2 contrast pocket squares and 2 pocket squares out of your top fabric. If you have all of that pat yourself on the back and get ready to sew.
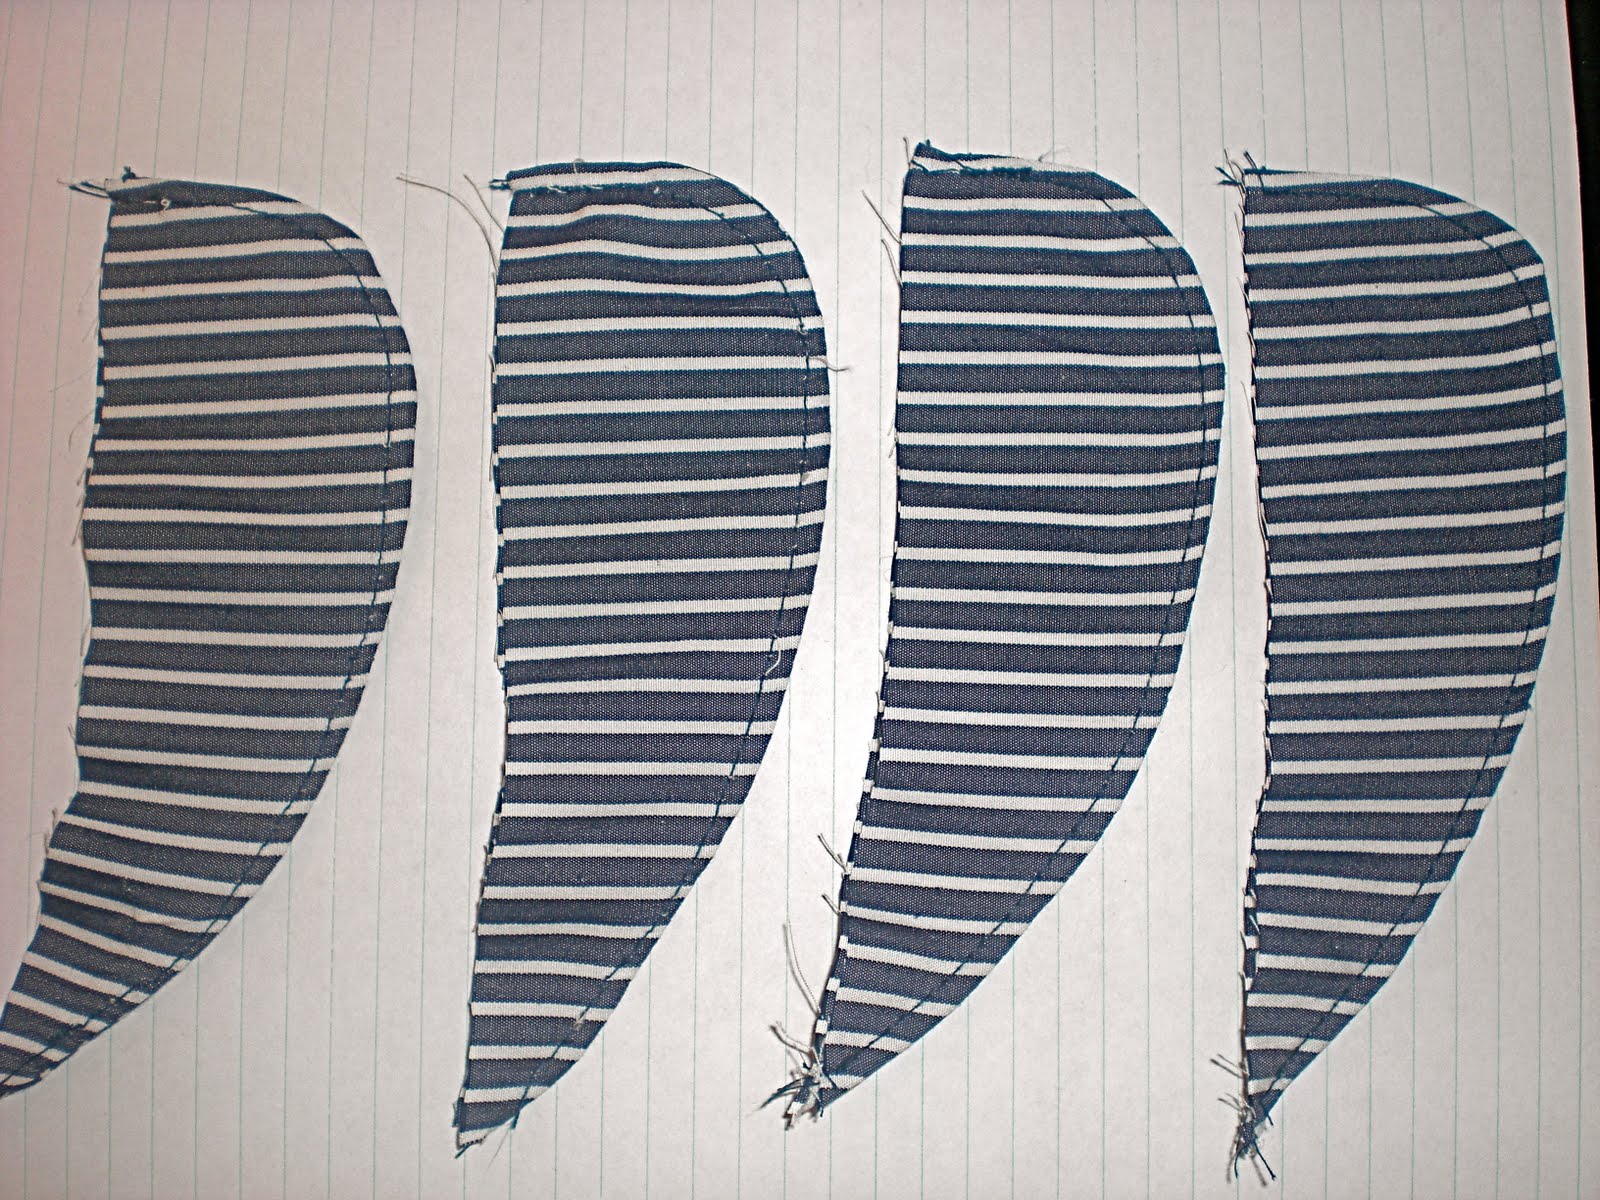
Step 7: First sew right sides together with the petal pieces sew them only along the curve and not the straight edge. Turn them right side out and top stitch them so you end up with 4 perfect little petals. Like pictured above.
Step 8: Sew right sides together at the shoulders, attaching the front piece to two back pieces. Do this to both front pieces so that when you open it up and lay it flat you end up with two pieces that look like the picture above.

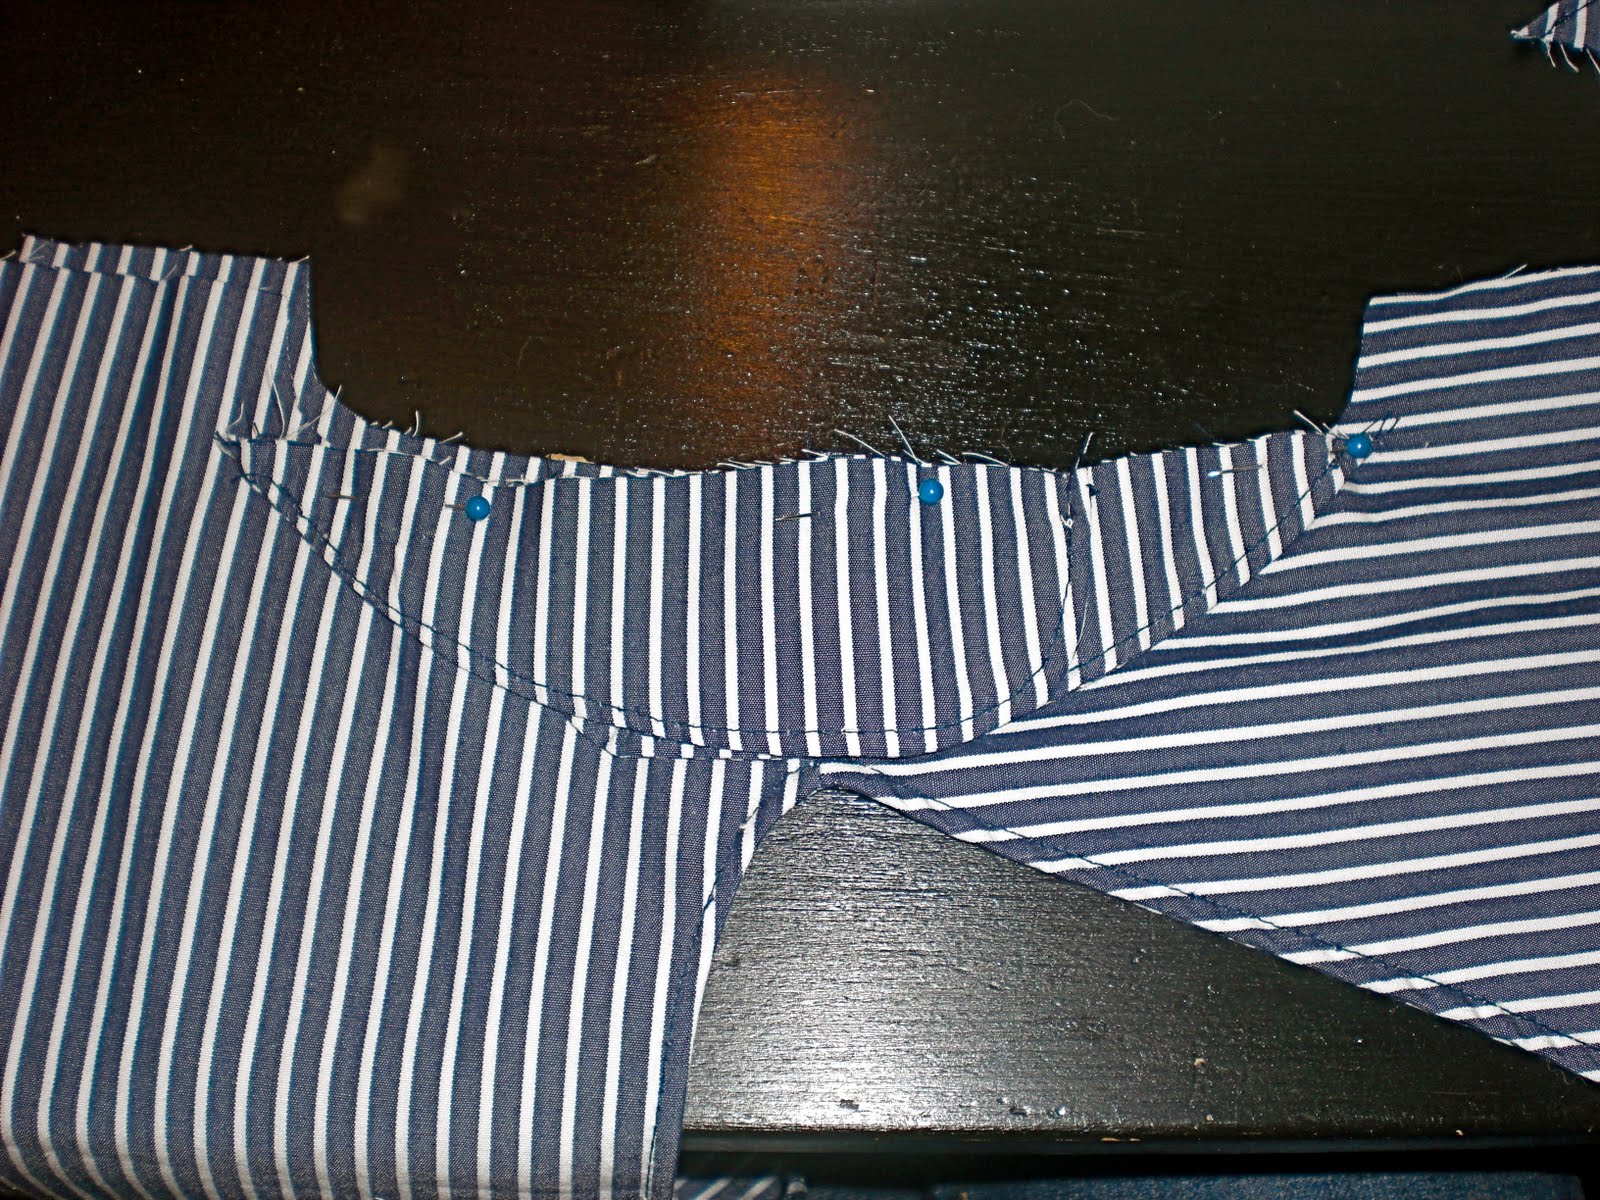
Step 9: Sew the two pieces right sides together starting at the corner of the “V” piece and all around the neckline.
Step 11: Turn it right side out and top stitch starting at the “V” again, and going around the neckline. Then turn it sideways so you are looking at the arm opening.
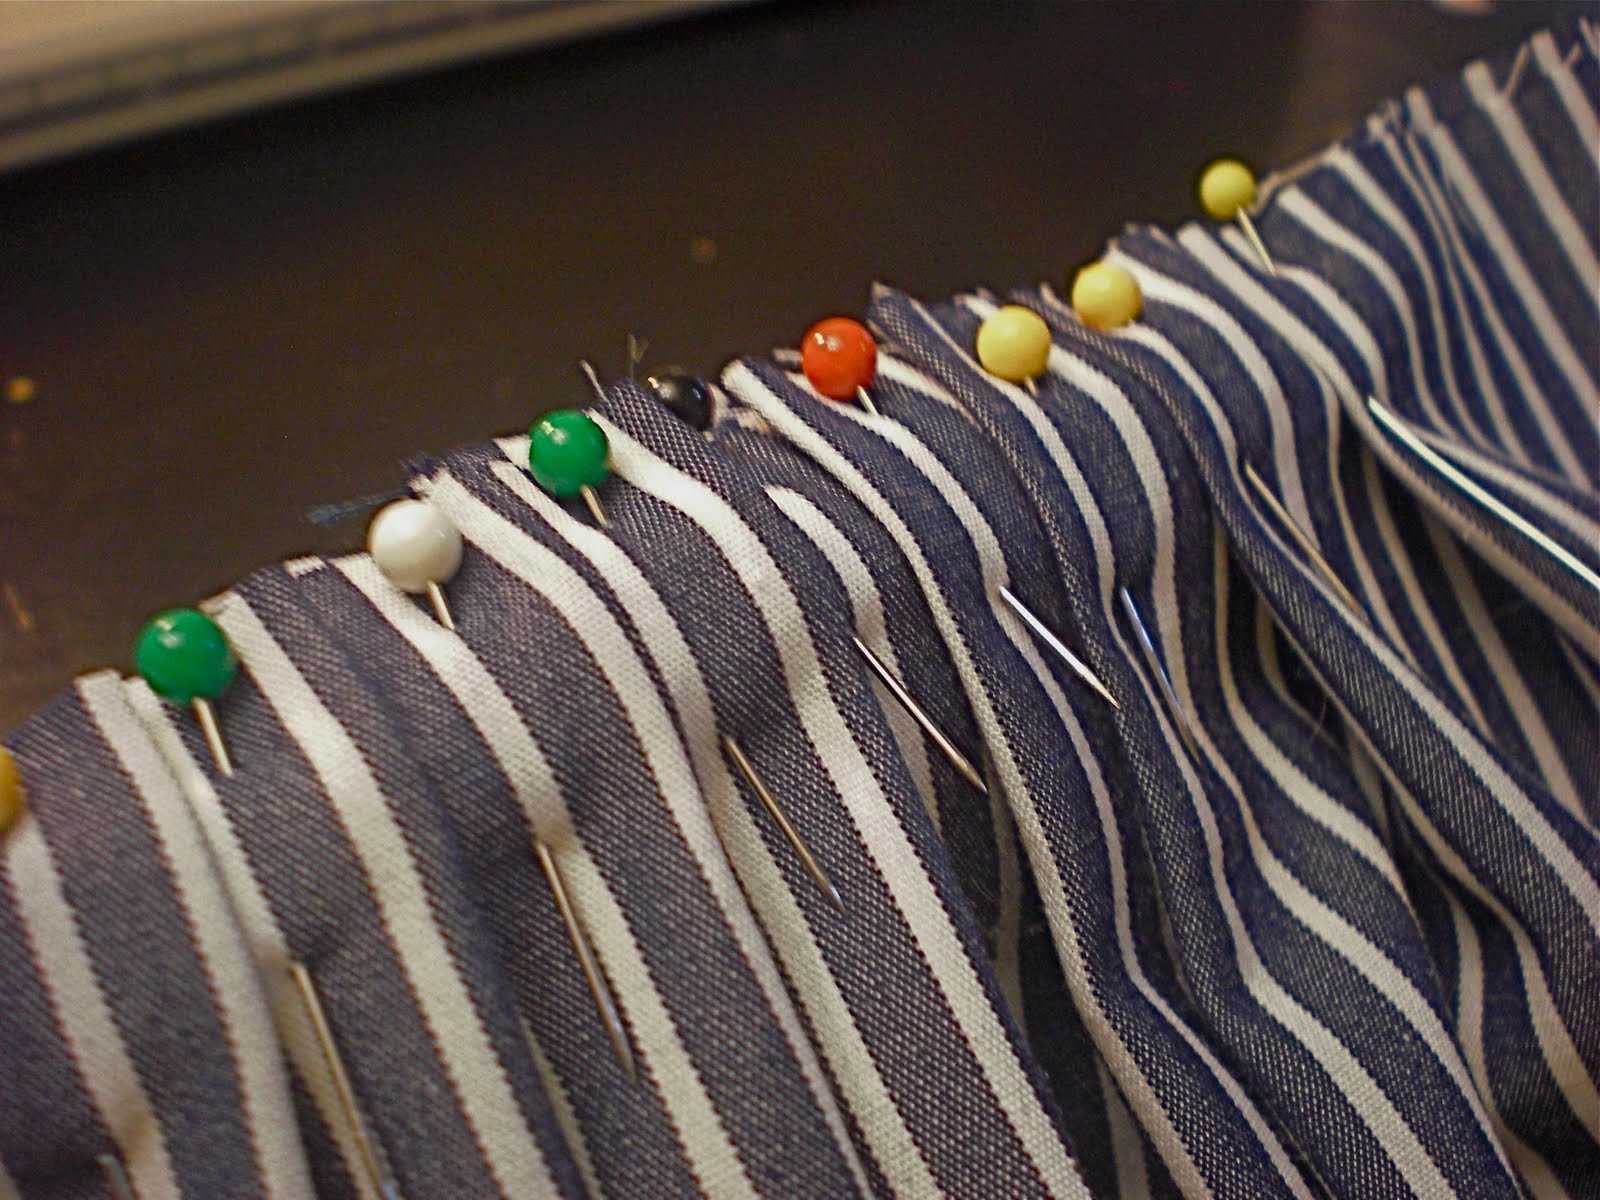
Step 12: pin your first petal in place pinning it only to the top layer starting the shallow end at the bottom and putting the fat end and the top of the shoulder
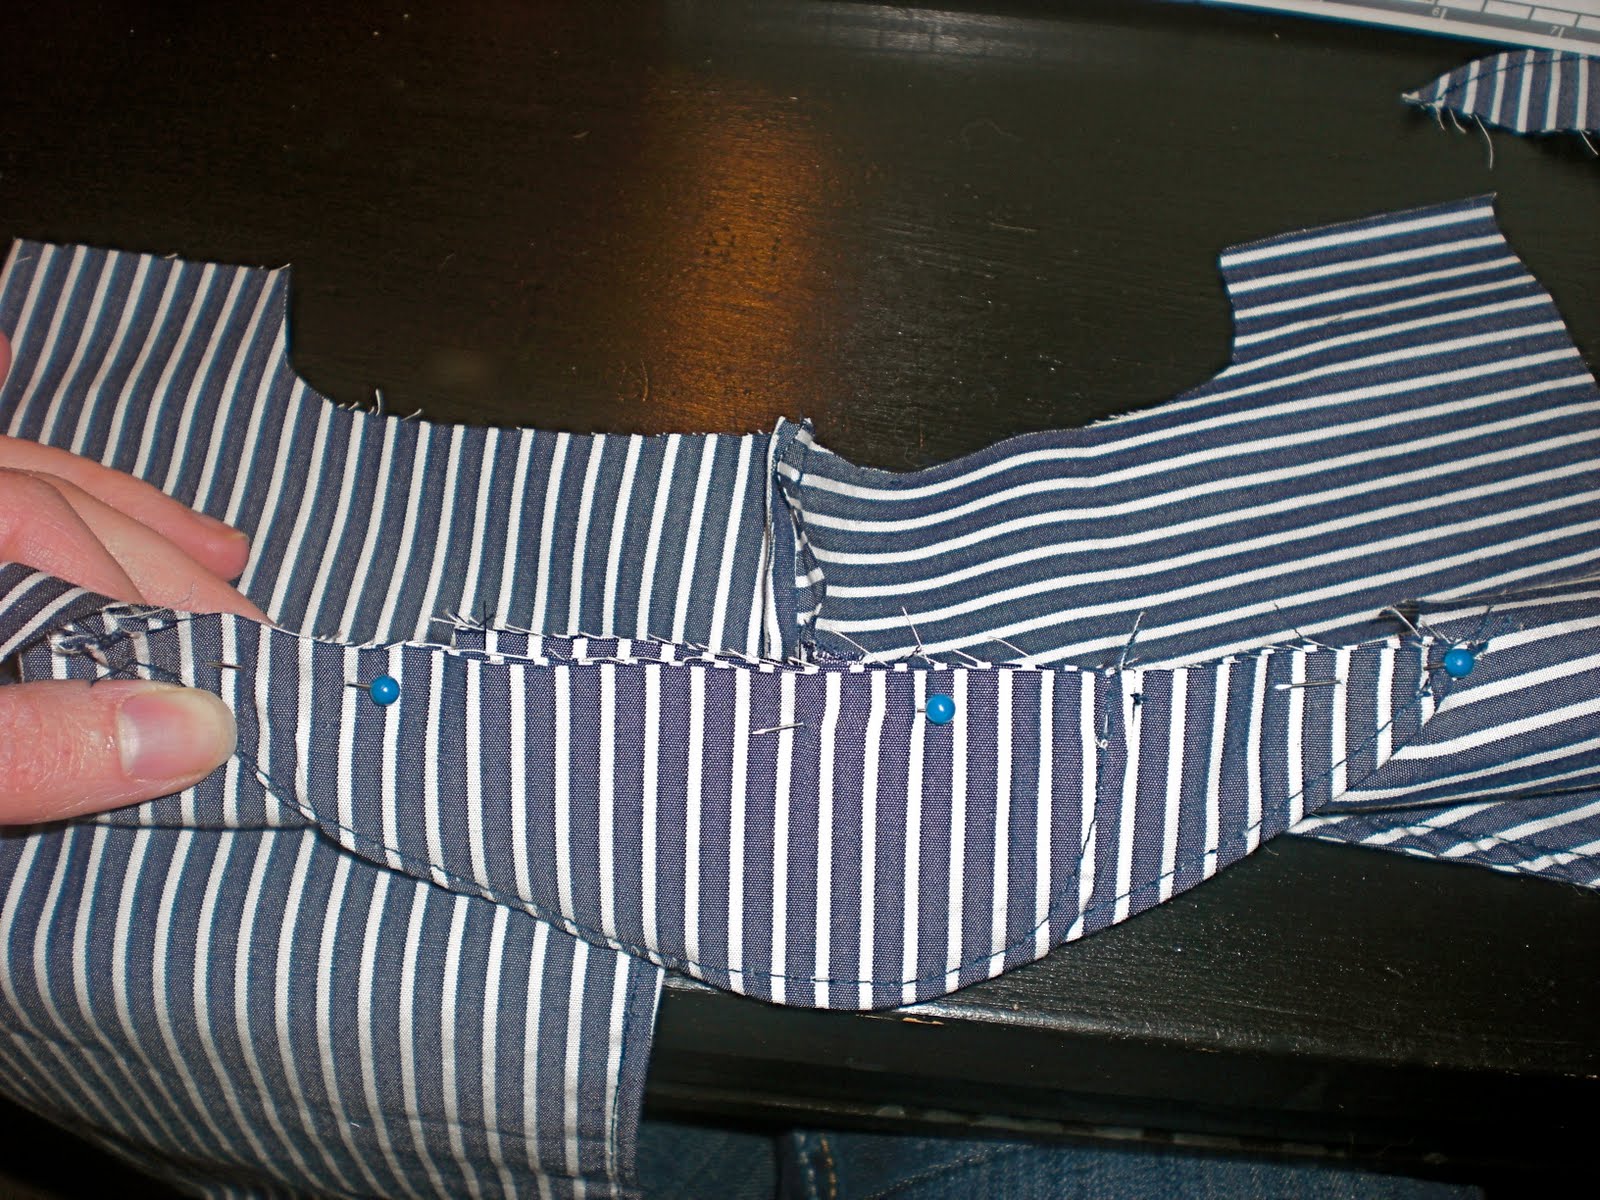
Step 13: Pin the second petal in the opposite direction overlapping the petals at the shoulder. Sew in place. Do this to both sides **It does not matter which petal overlaps which as long as you do it the same way with both sides. You may want to pin both sides in place and check if they are the same before sewing.
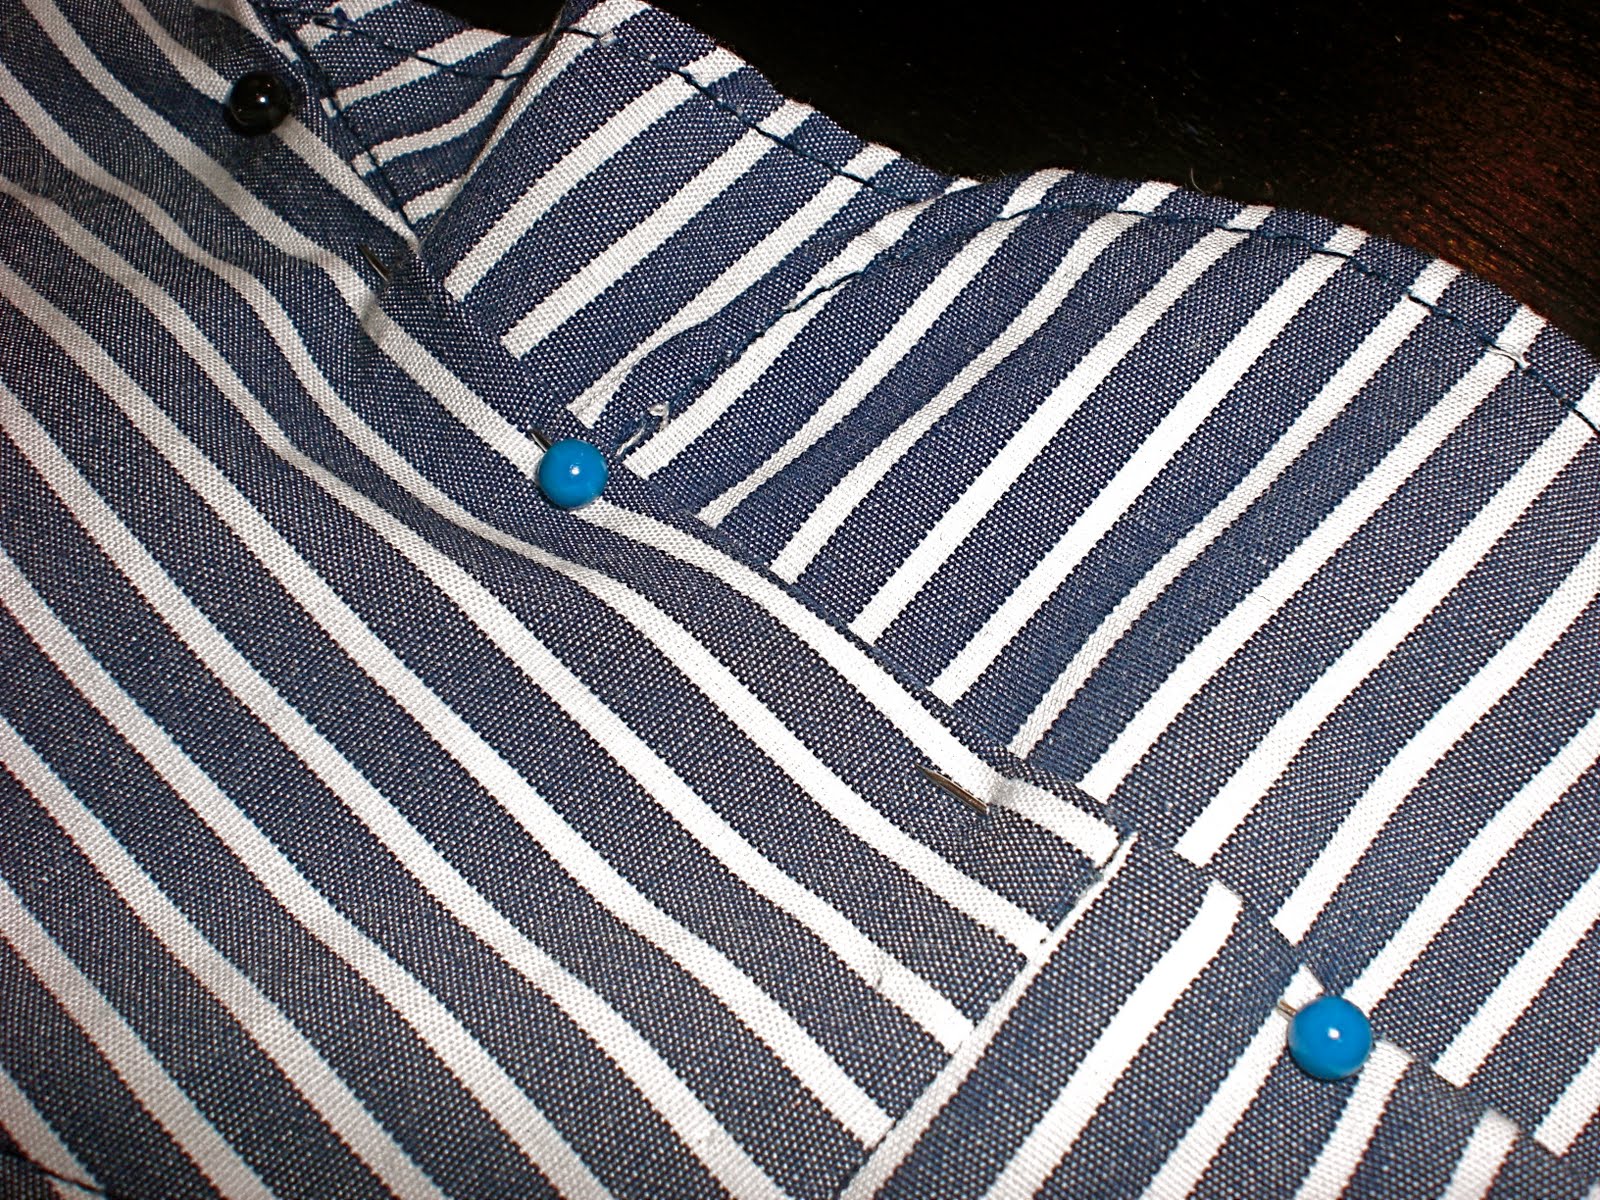
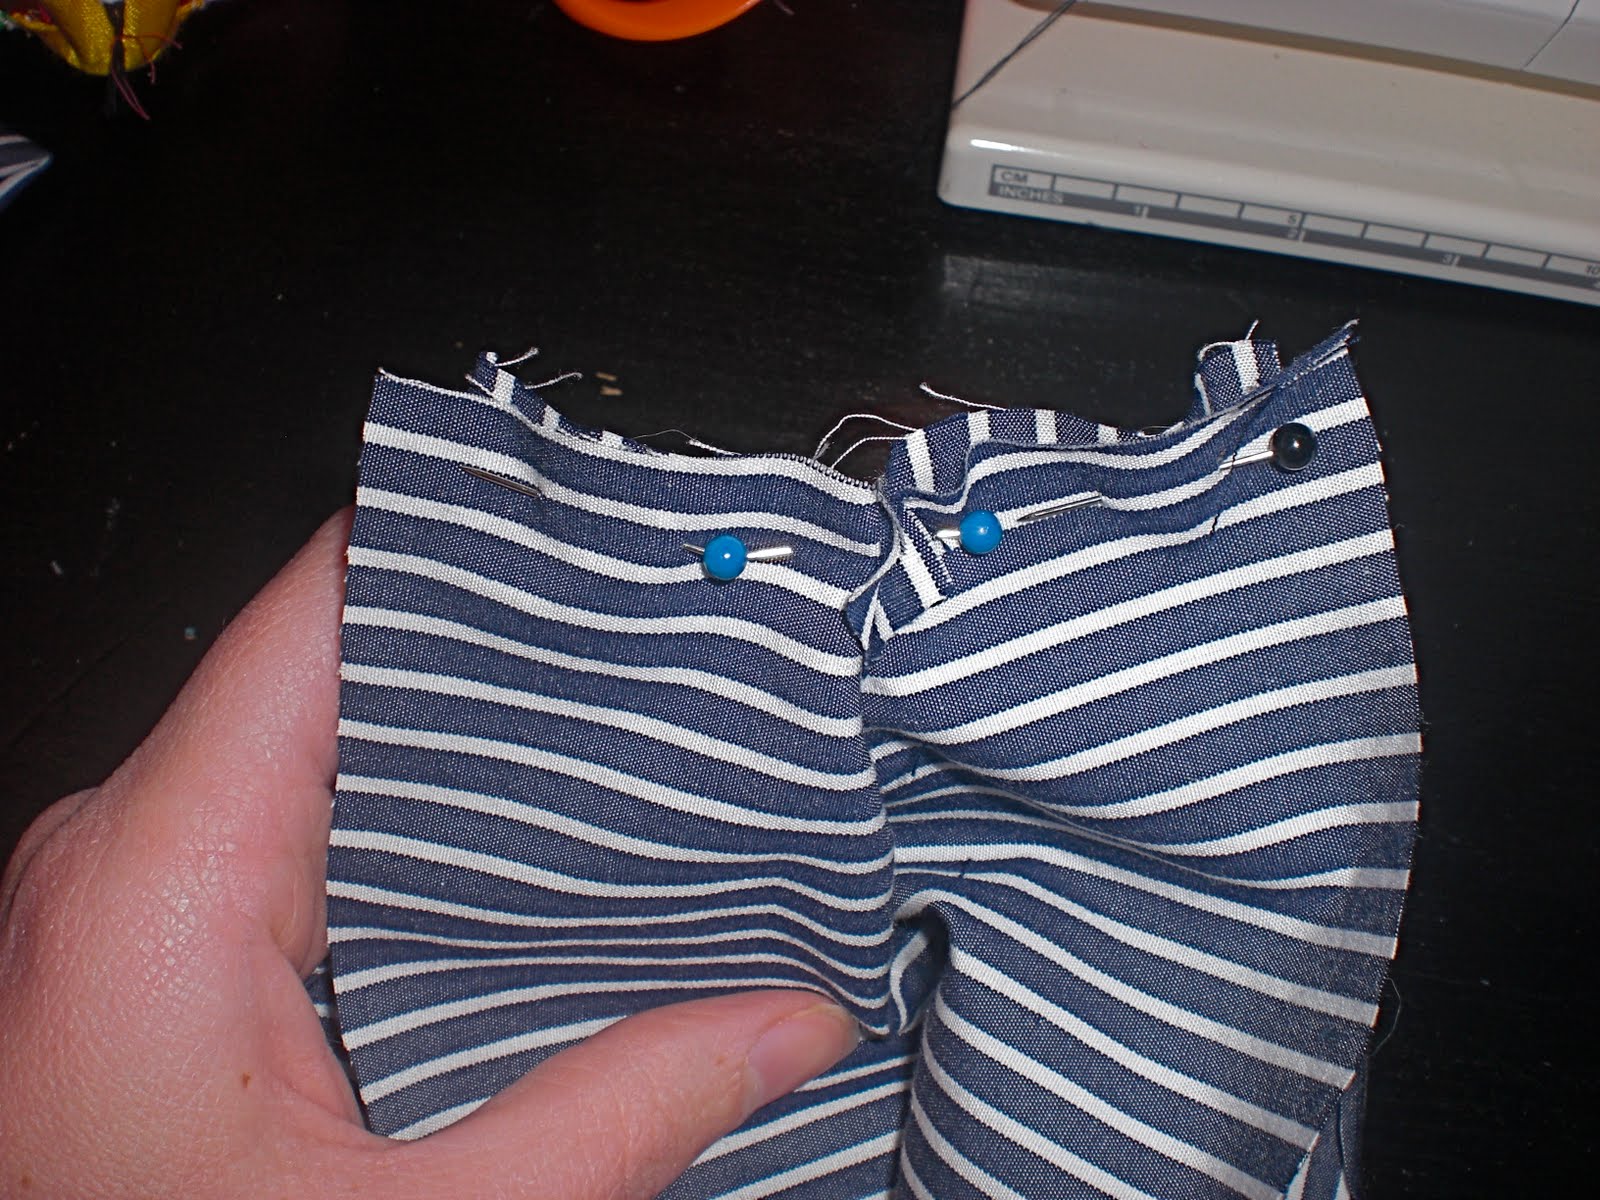
Step 14: Turn inside out and fold over the backing so that it lays along the seam and sew in place. You should fold over all the way along the arm opening, past the petal sleeve and through to the side. Do this to both sides

Step 17: To start the pocket sew the same fabric pocket rectangle right sides together to the pocket along the pocket cut out. as shown above.
Step 18: Cut out the empty space so you end up with the cutout shape. As shown above. Notch the curve so it will lay flat when you turn it ride side out.
Step 19: turn that piece around to the other side and top stitch around the curve. Pictured above should be what the inside or back of the piece would look like.
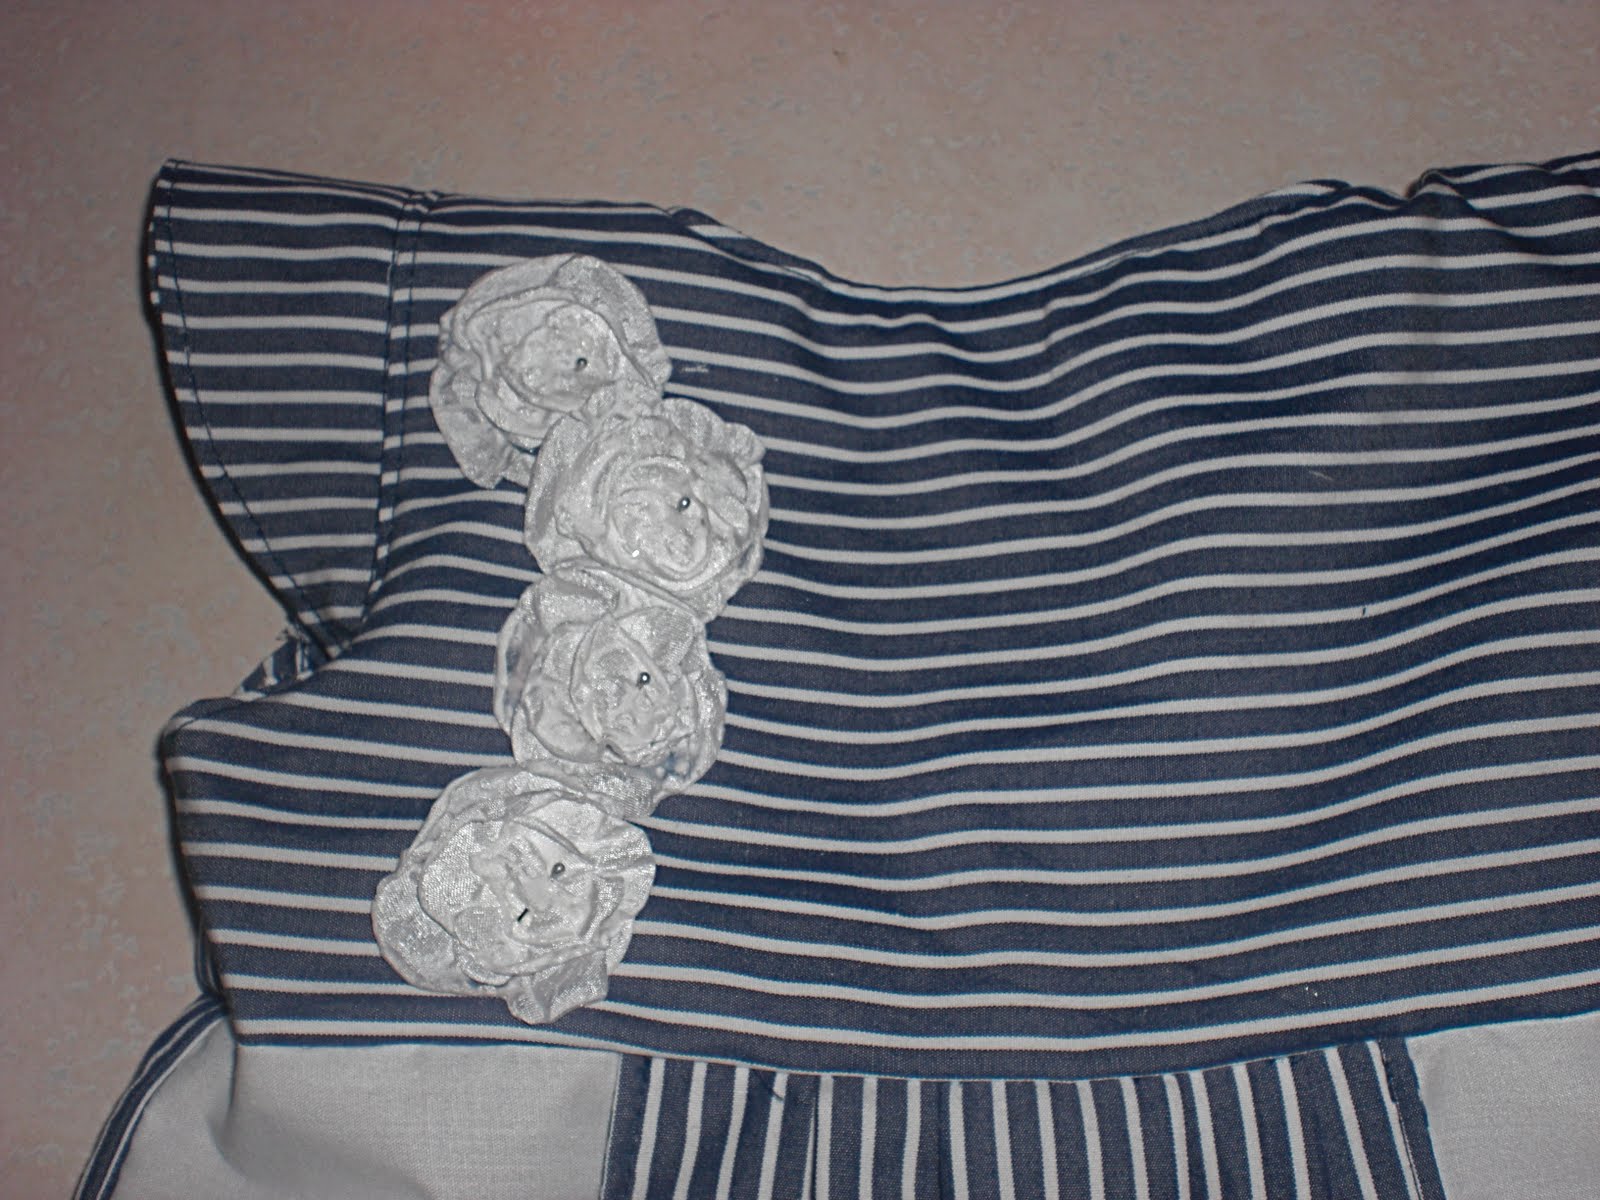
Step 21: Stitch the contrasting fabric in place with a top stitch following the edge as your guide. This creates your pocket. Do these steps to both sides you you have yourself your front piece complete with two pockets
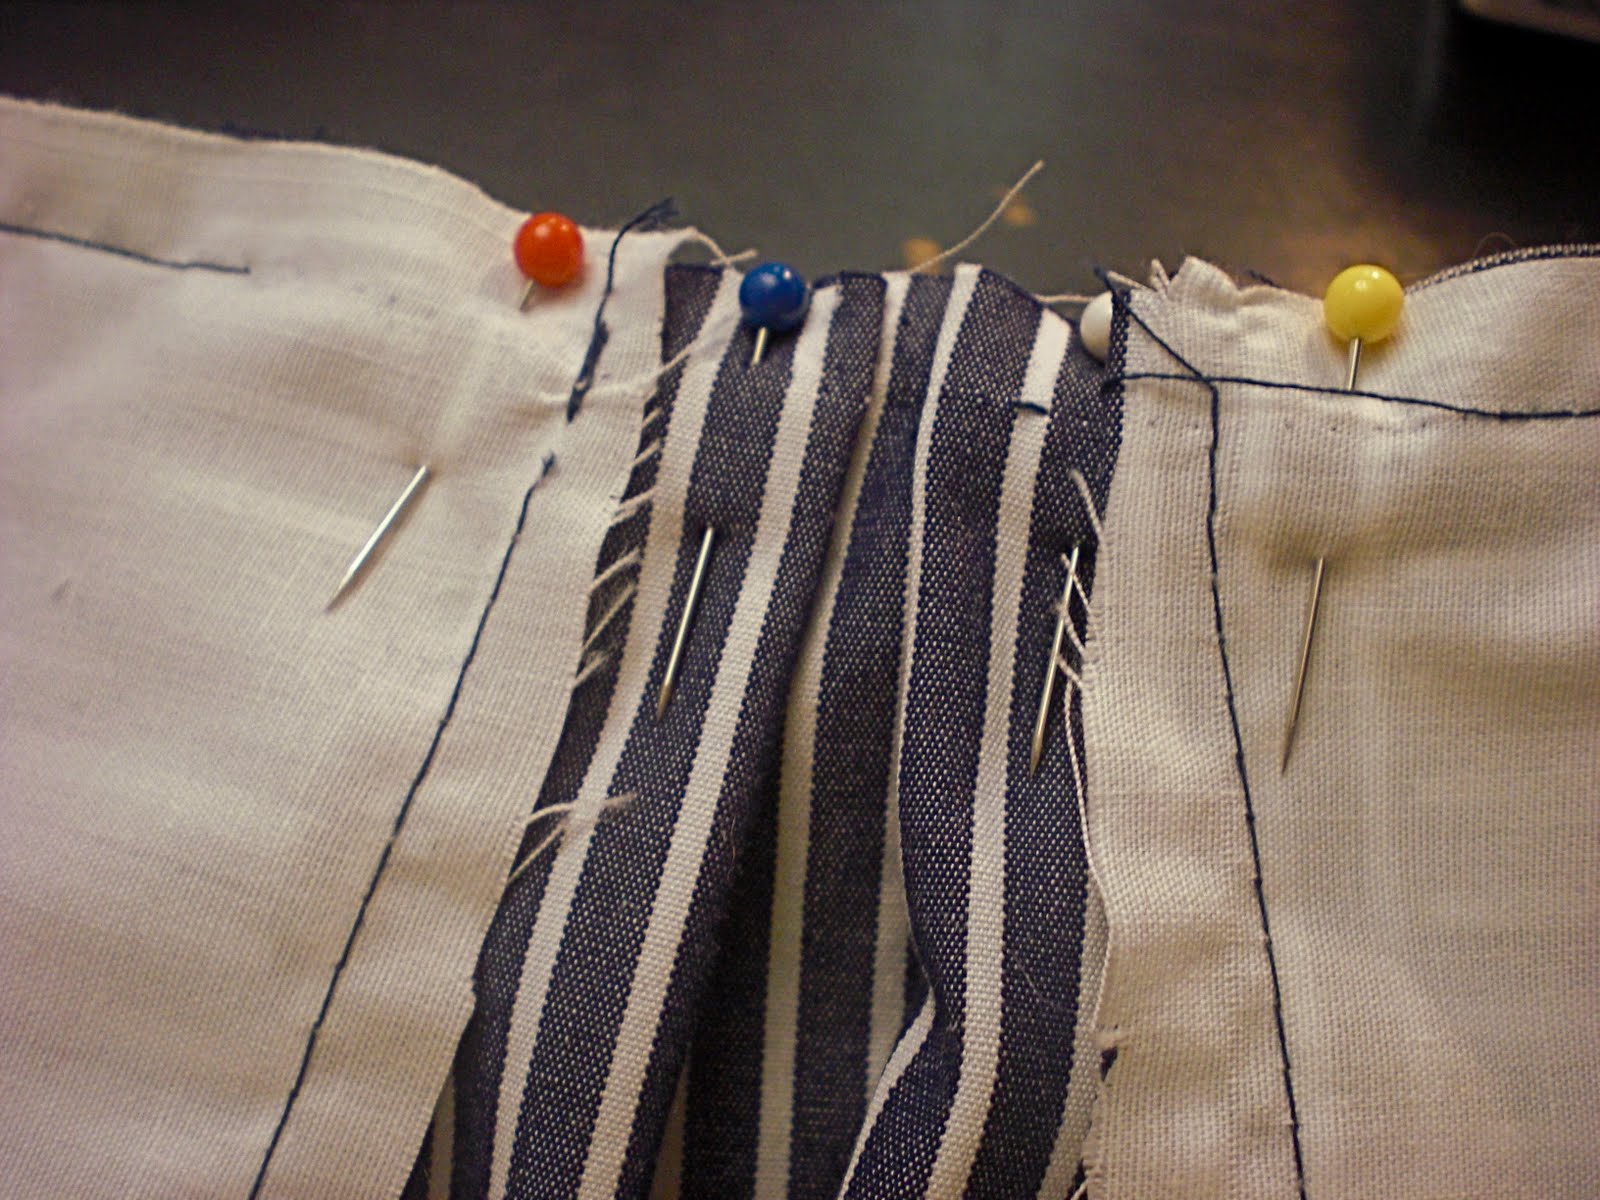
Step 22: Sew your front piece to your back piece right sides together at the side seams. Turn it inside out and line your bodice up to the top line, right sides together pin the side seams together.
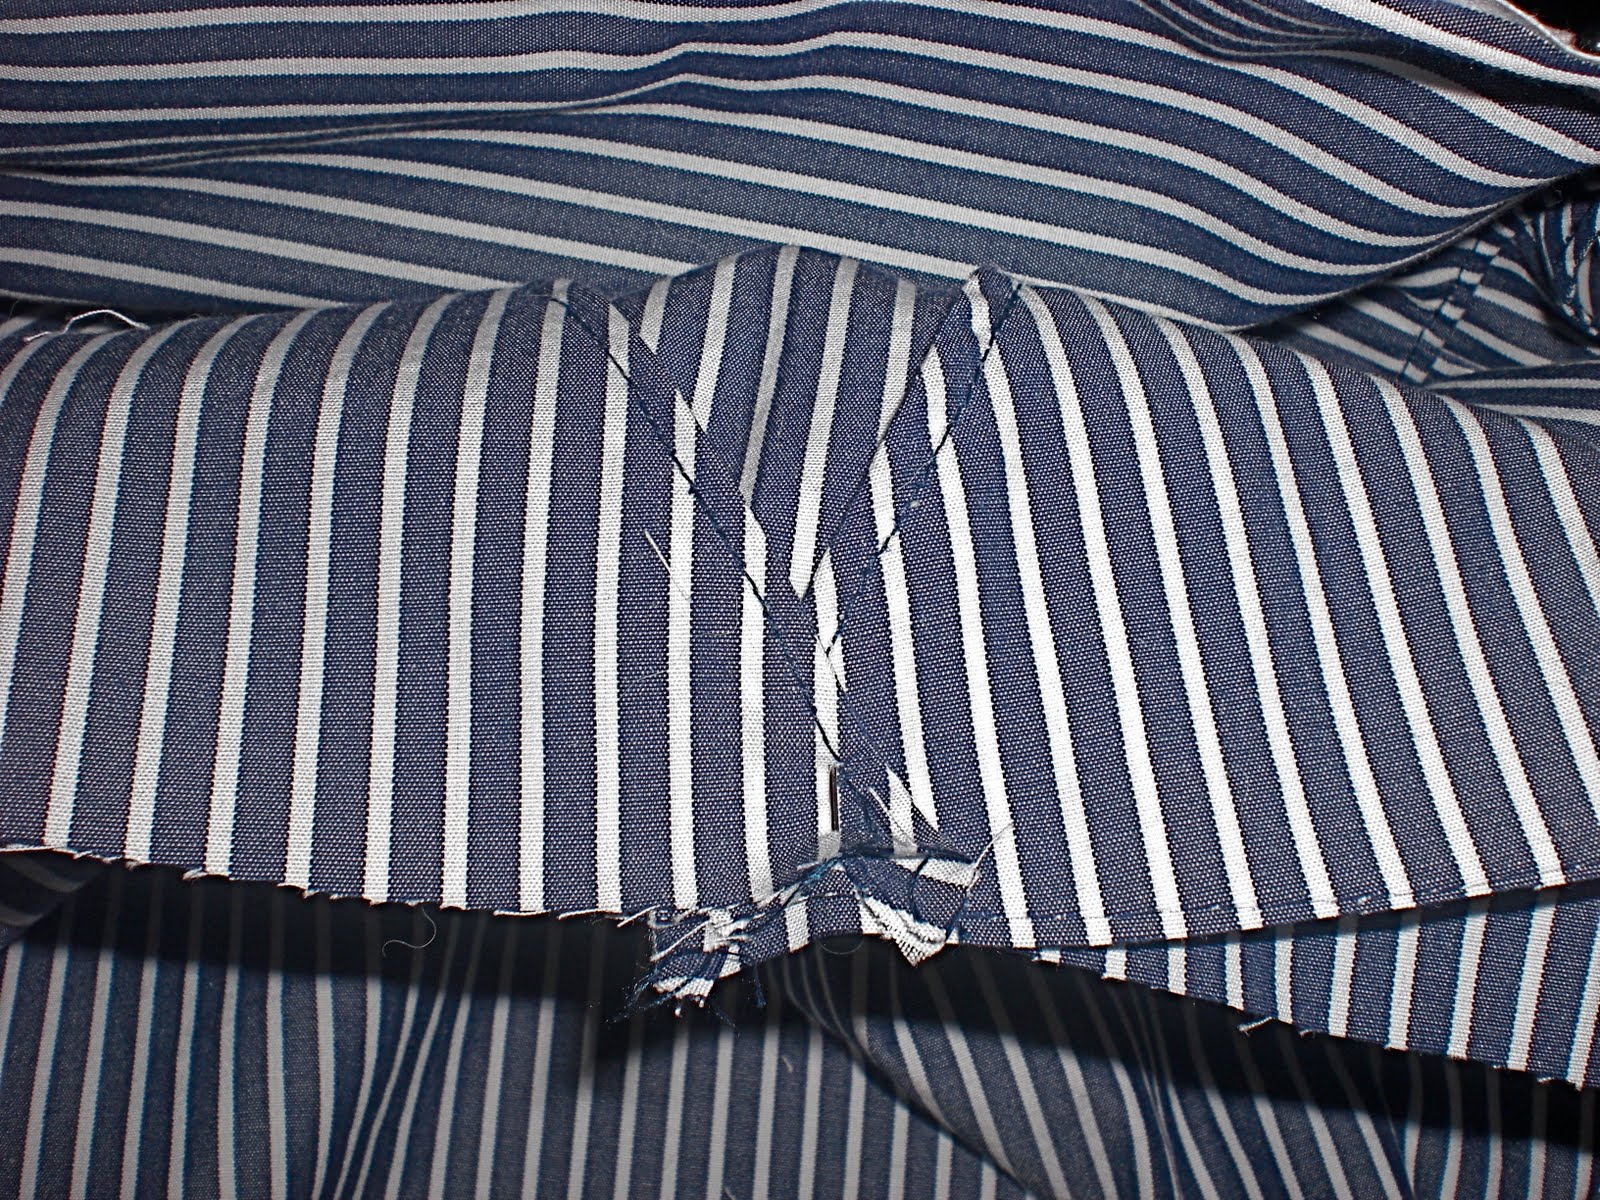
Step 23: meeting the middle of the back of the “skirt” part of the top cross the “v” so that they overlap by about an inch. as shown above.
Step 24: pleat the front starting at the middle until it is the same size as the top of the bodice. if you are doing the pockets simply pin along the pockets securing it to the “skirt” and then pleat the fabric that is left, as seen above.
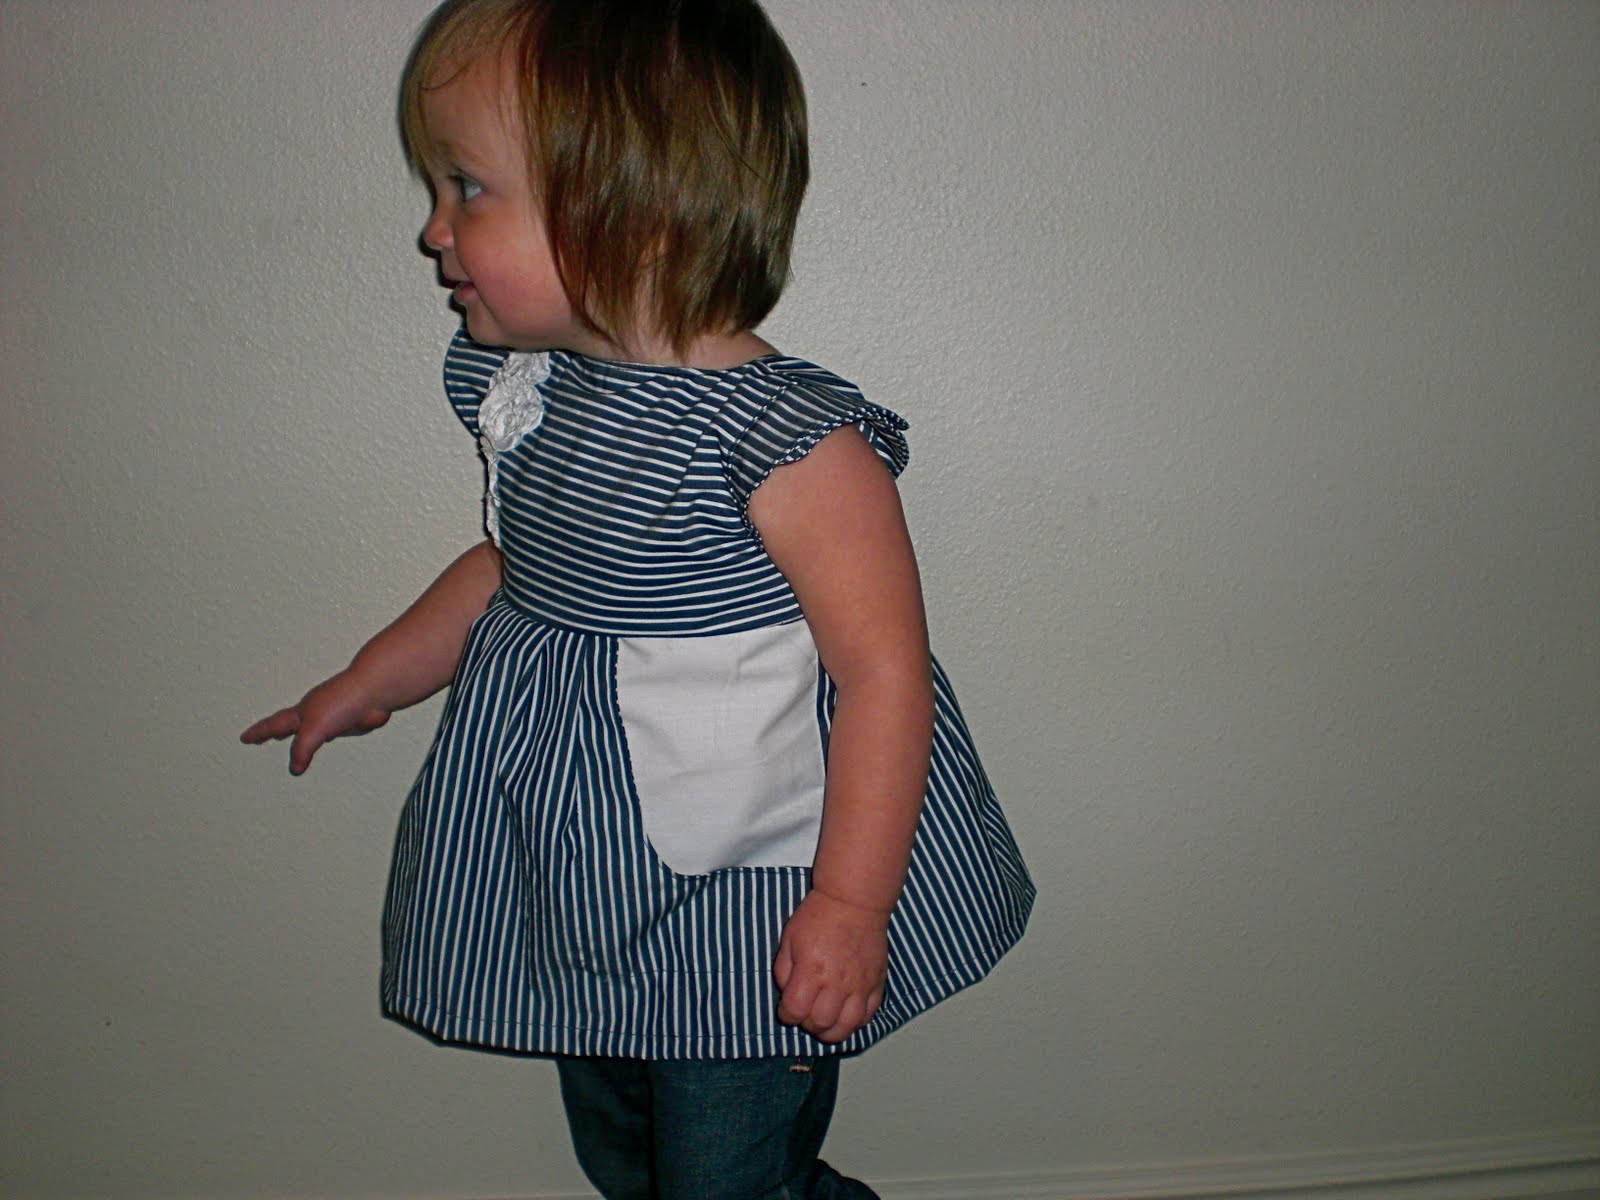
Sew together. And you are done, you are now the proud owner of a petal sleeve top complete with crumb catchers..err I mean pockets if you wish.
Nick Ashley Reagan Coen & Ike
I LOVE this top! I'm think I'm going to have to work up my courage and try it. Thanks!
The Nifty Nest
You have some amazing tutorials! I can't wait to give this one a try later tonight when the kids are in bed!<br /><br />Liz<br /><a href="http://www.theniftynest.com" rel="nofollow">The Nifty Nest</a>
Shwin W
I hope you both try it! It is really easy once you get going! Let me know if you have any questions
Casey Dozhier
Very cute – Thanks for sharing <br />-Casey
Amy Westphal
I just made this top and it is completely adorable and fairly easy. However, I wish your step 14 was more clear. I had to pull out a dress pattern and read how they put together a bodice. If your step 14 included the words "sew around the armholes" it would be completely more understandable. I actually ended up handwriting in my own instructions as such: "Step 14 with right sides
emilyflippinmaruna
So cute! I featured this tutorial in a kids summer clothing sewing tutorials post on my blog, The Handmade Experiment http://wp.me/pkcUM-Hr. <br /><br />Thanks!
Katie L.
I just wanted to thank you for this, and all of your other tutorials. They have really helped me out with my sewing! Today I used this tutorial for the second time to create a bodice for a dress for my daughter. This made it so much less intimidating, thank you! I have pictures of the finished product posted on my blog, (http://abitofcake.blogspot.com/2012/04/dress-refashion.html) This was