 |
| Has anyone else set a goal to sew more for the boys in their life? If so this would be the perfect week to start! Cheri shared an amazing tutorial for us yesterday, and I sure the contestants will dazzle us with some amazing ideas on Friday. Don’t have a boy in your life? Don’t worry some of the best boy clothes translate to some adorable girl clothes and I am sure our contestants may have a few girl ideas up their sleeves as well. I am excited for this week! Today I am sharing a really basic sweatshirt for boys that is also a great up-cycle. With some personal touches for the boy in your life. |
 |
| To start I thought I would walk you through how I make a pattern. I start with a roll of paper, butcher paper, parchment paper, freezer paper, or art paper like you can buy at Ikea. Really any kind of paper on a roll is best so they are nice and big sheets. |
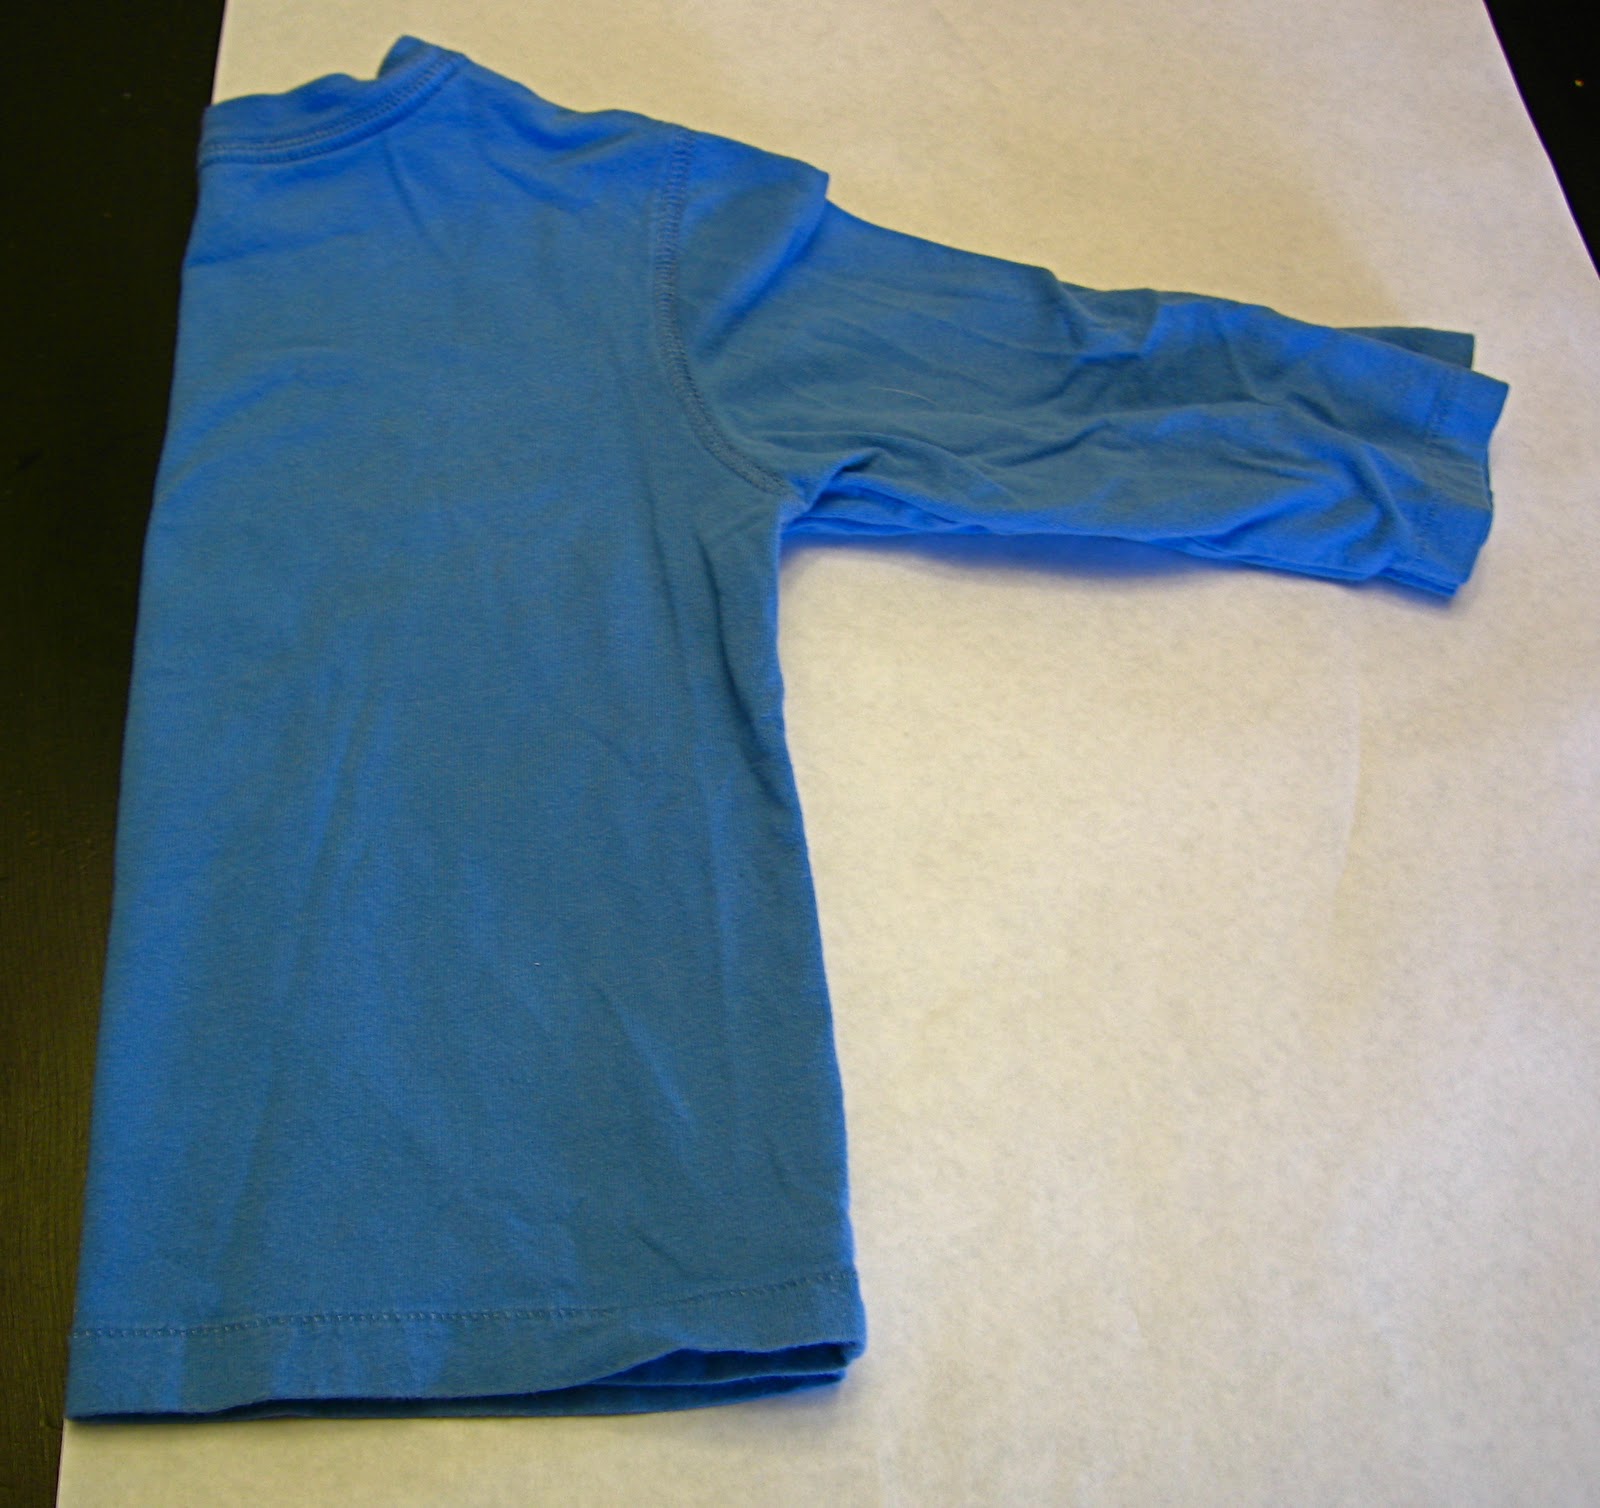 |
| Then for most things you make the bodice shape will be the same. You can alter from a basic shape. I usually grab a plain loose but well fitting tee. Fold it in half and lay it out so the fold is along the side of the paper. |
 |
| To create the bodice piece trace the bottom of the shirt and the side. Then when you get to the arm pit turn the sleeve in and follow the seam line to trace the arm hole. |
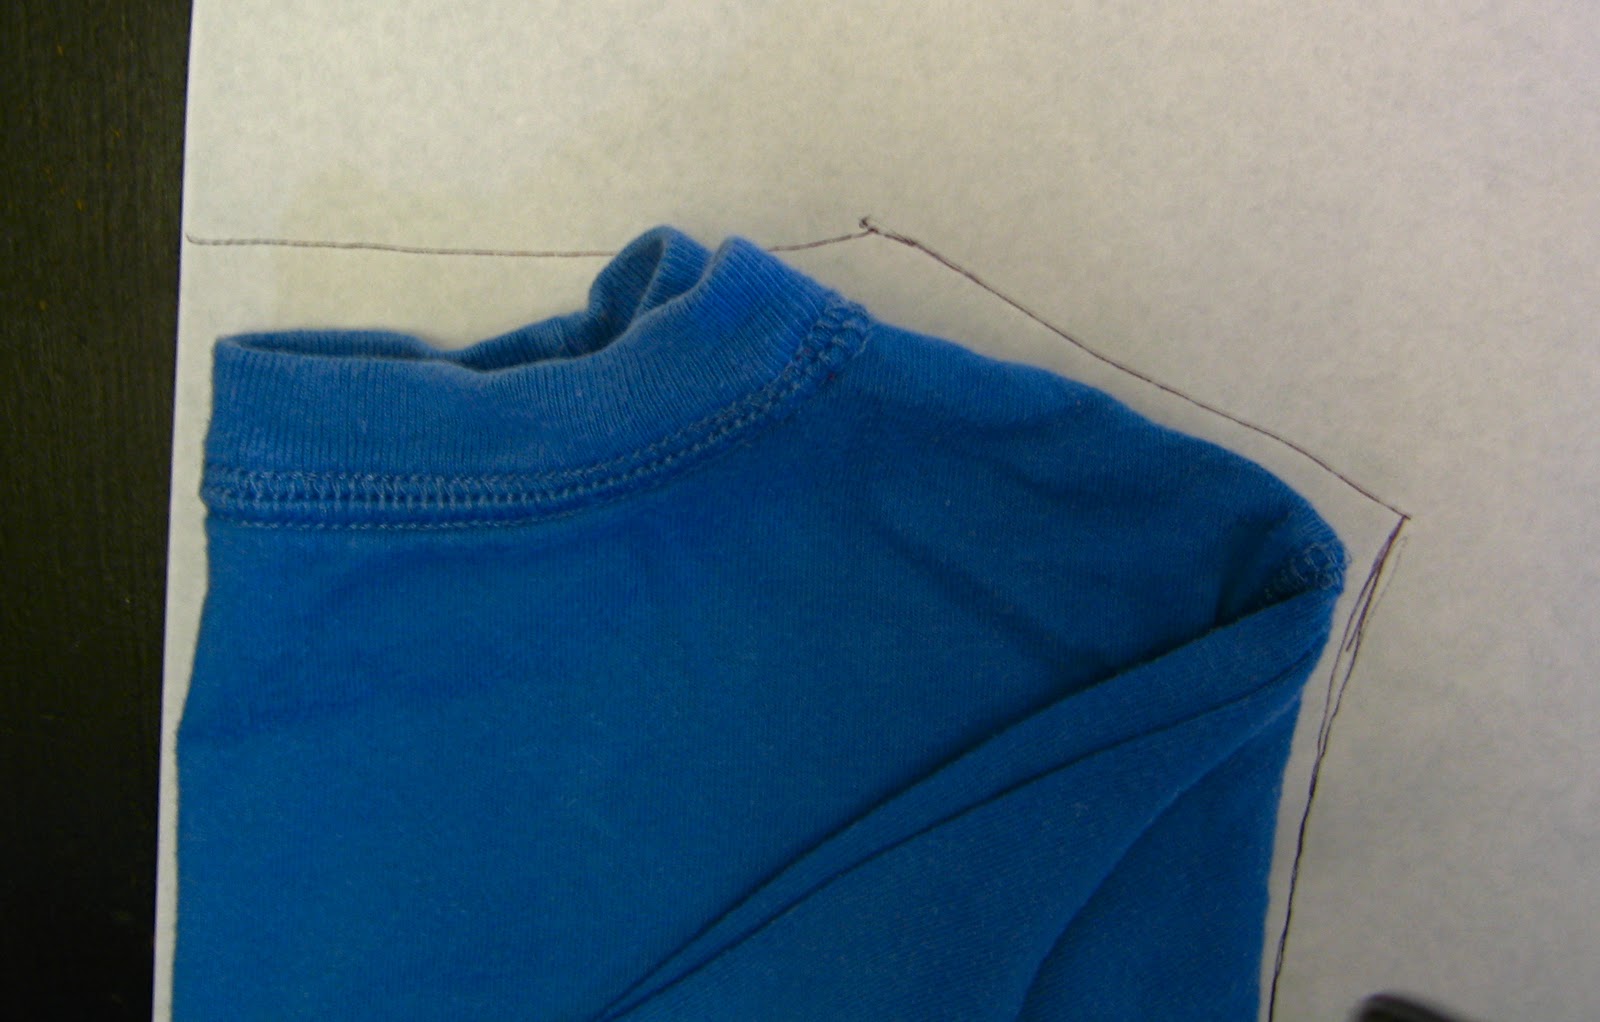 |
| Then continue to trace the shoulder and neckline. Bodice piece done. (as a note for the sweatshirt I did not curve down for the neckline but made it straight) |
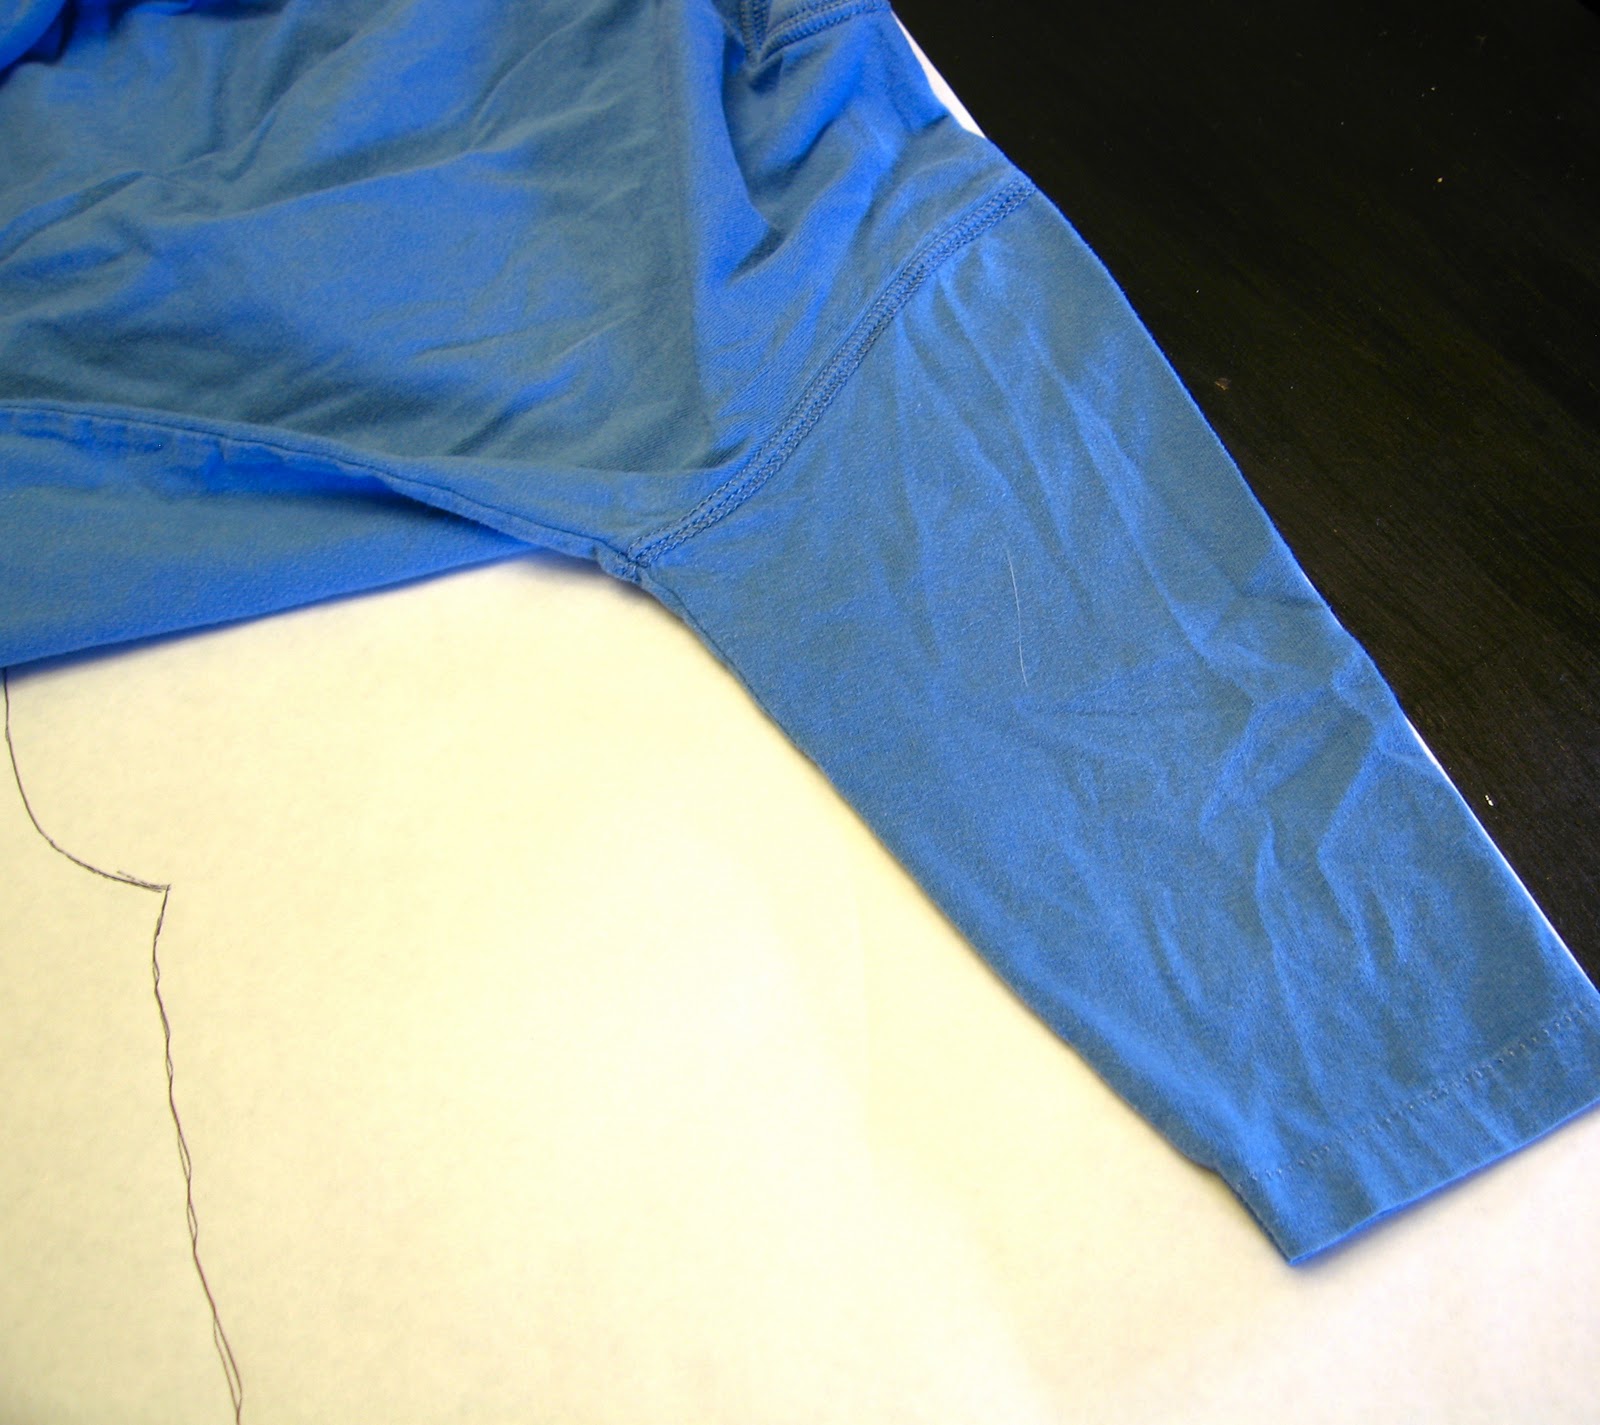 |
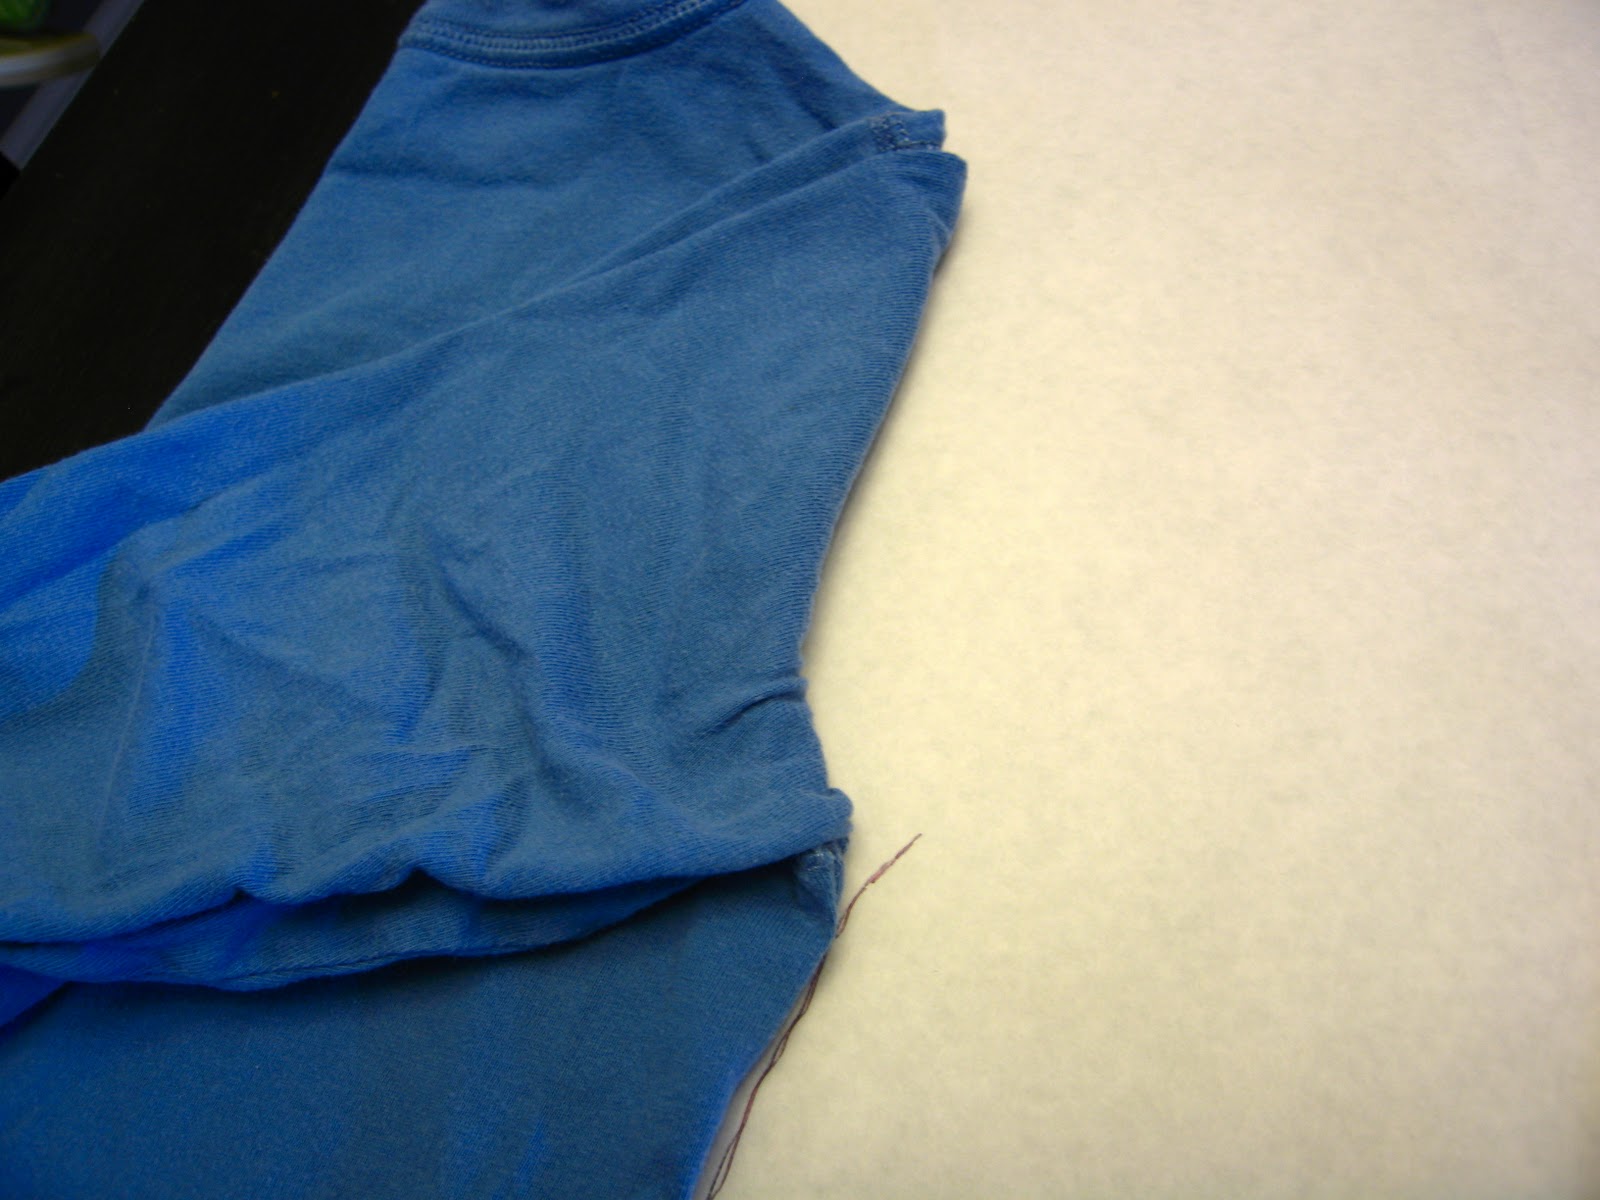
| Next for the sleeves. Lay them with the fold of the sleeve along the edge of the paper. |
 |
| Then flip the shirt over so you can follow the seam and trace along the arm opening line. |
 |
| So that’s really it a bodice and a sleeve. |
 |
| Now let’s add a few details for the sweatshirt. I started with a collar. Drawing it on to the bodice neckline. |
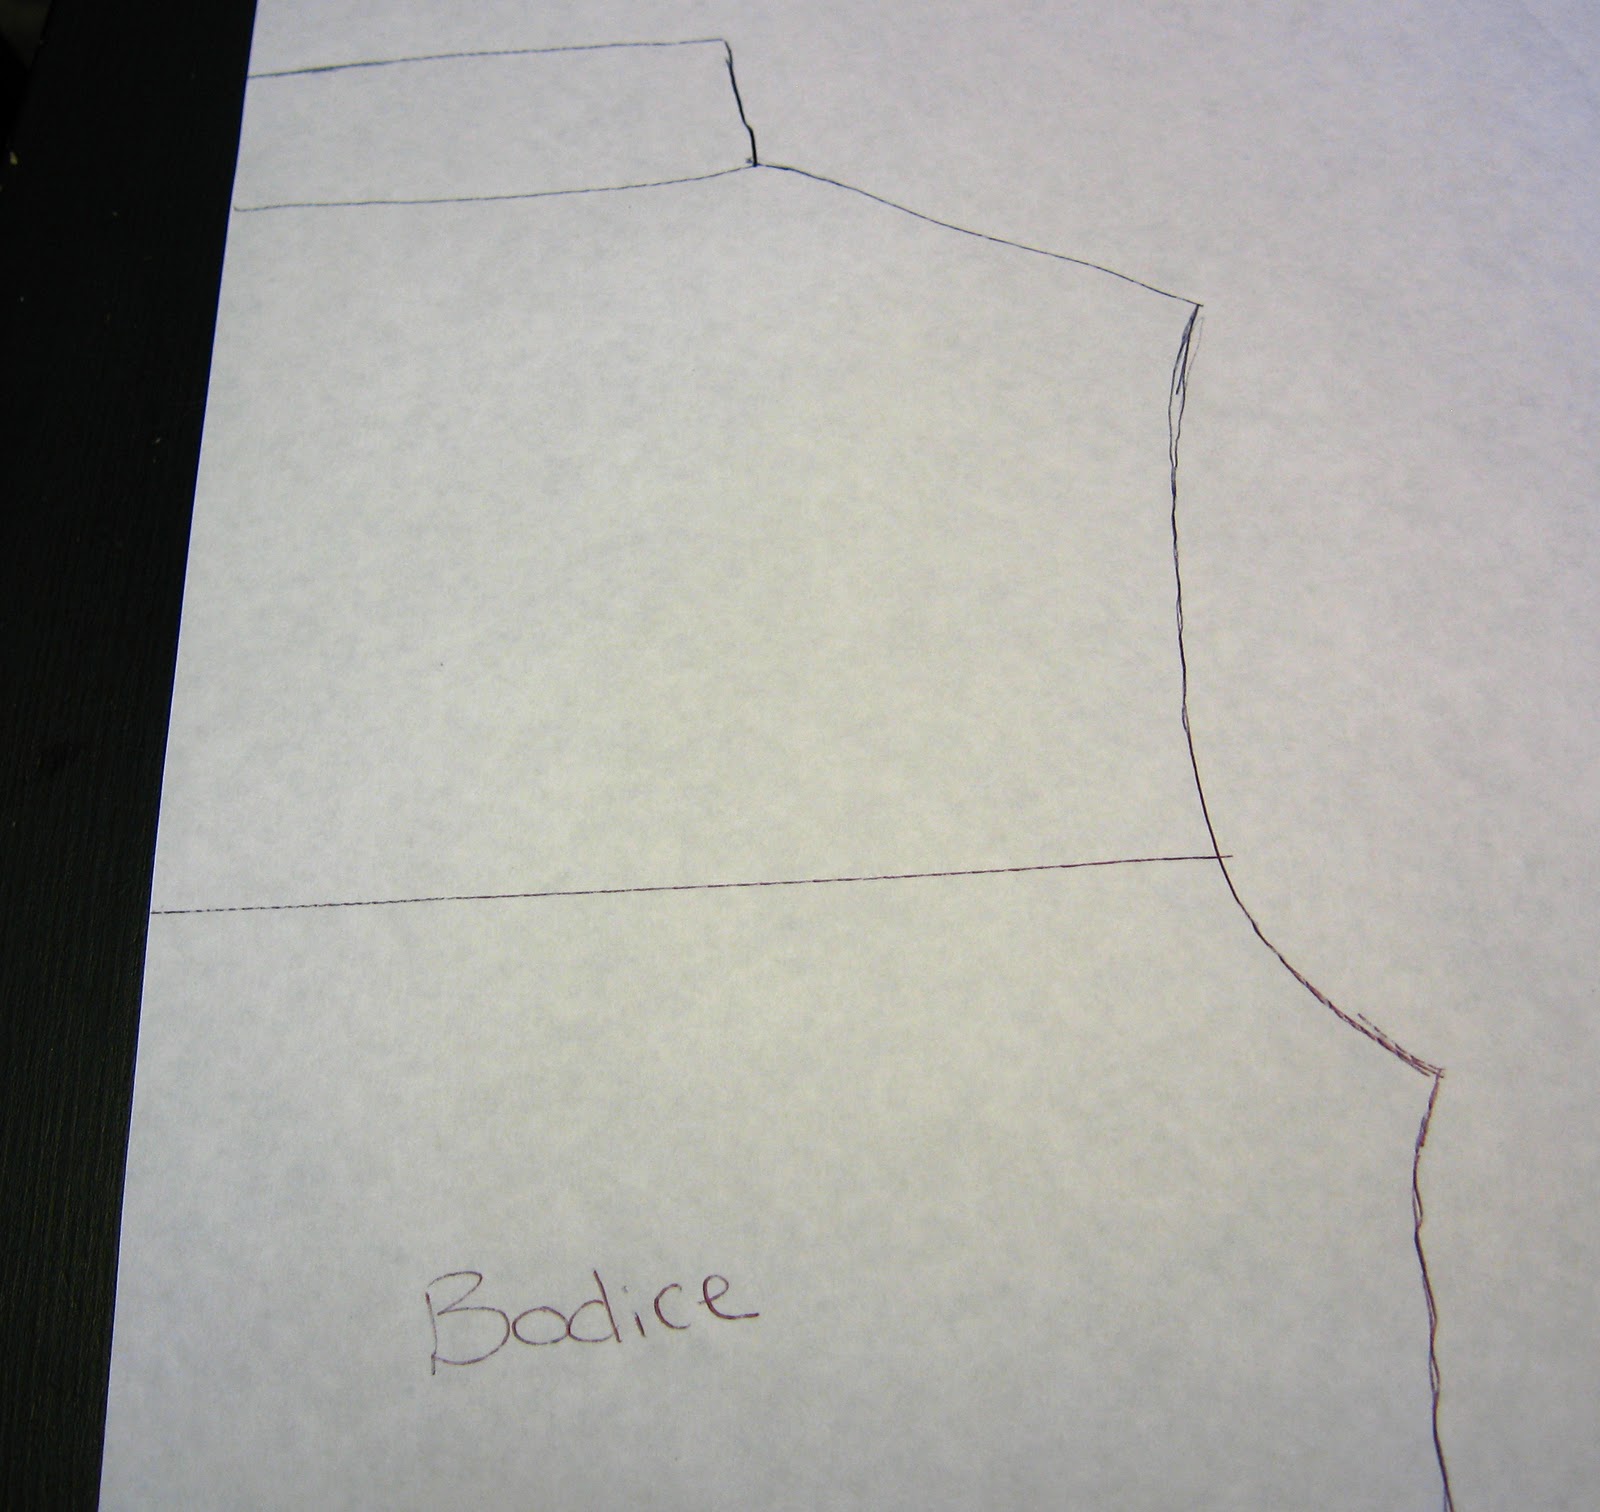 |
| Then to add the two tone bodice look I drew a line through my bodice where I will cut the pattern piece. |
 |
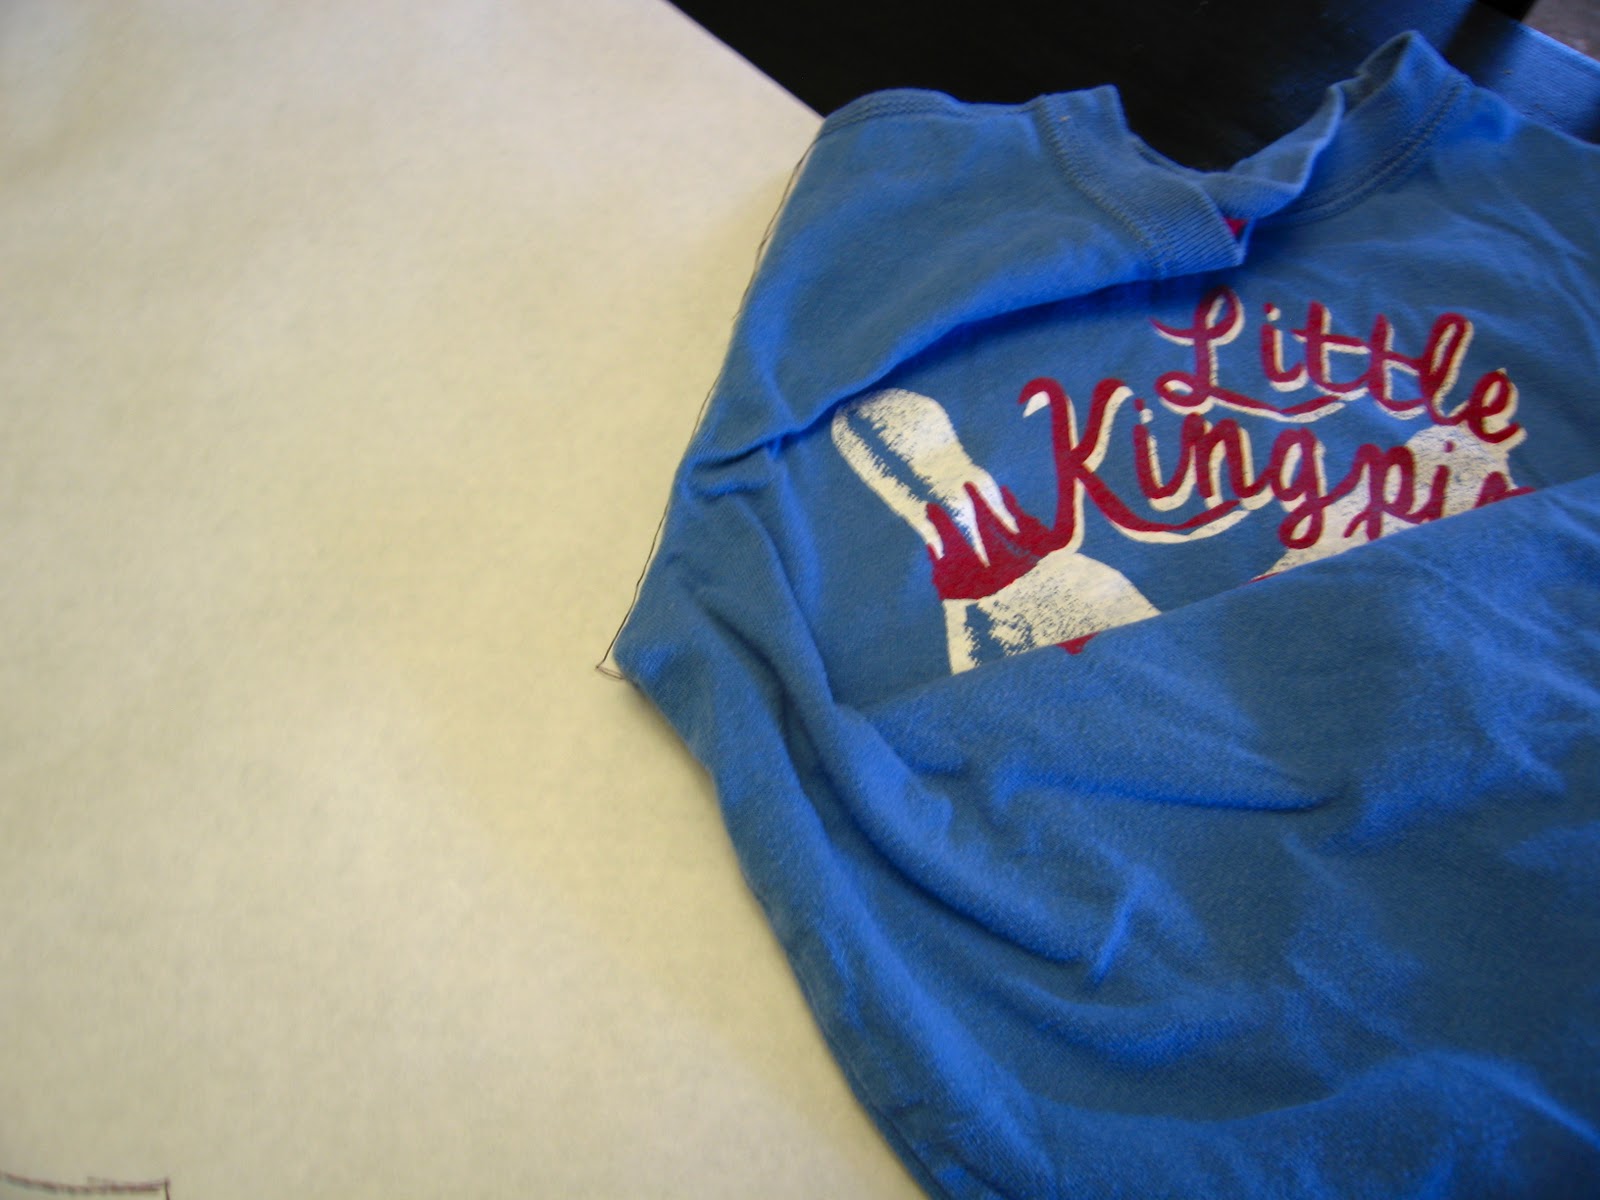
| Then to start I dug through the “re-do” pile and found two thermal tops one black and one red. Perfect for this top. |
 |
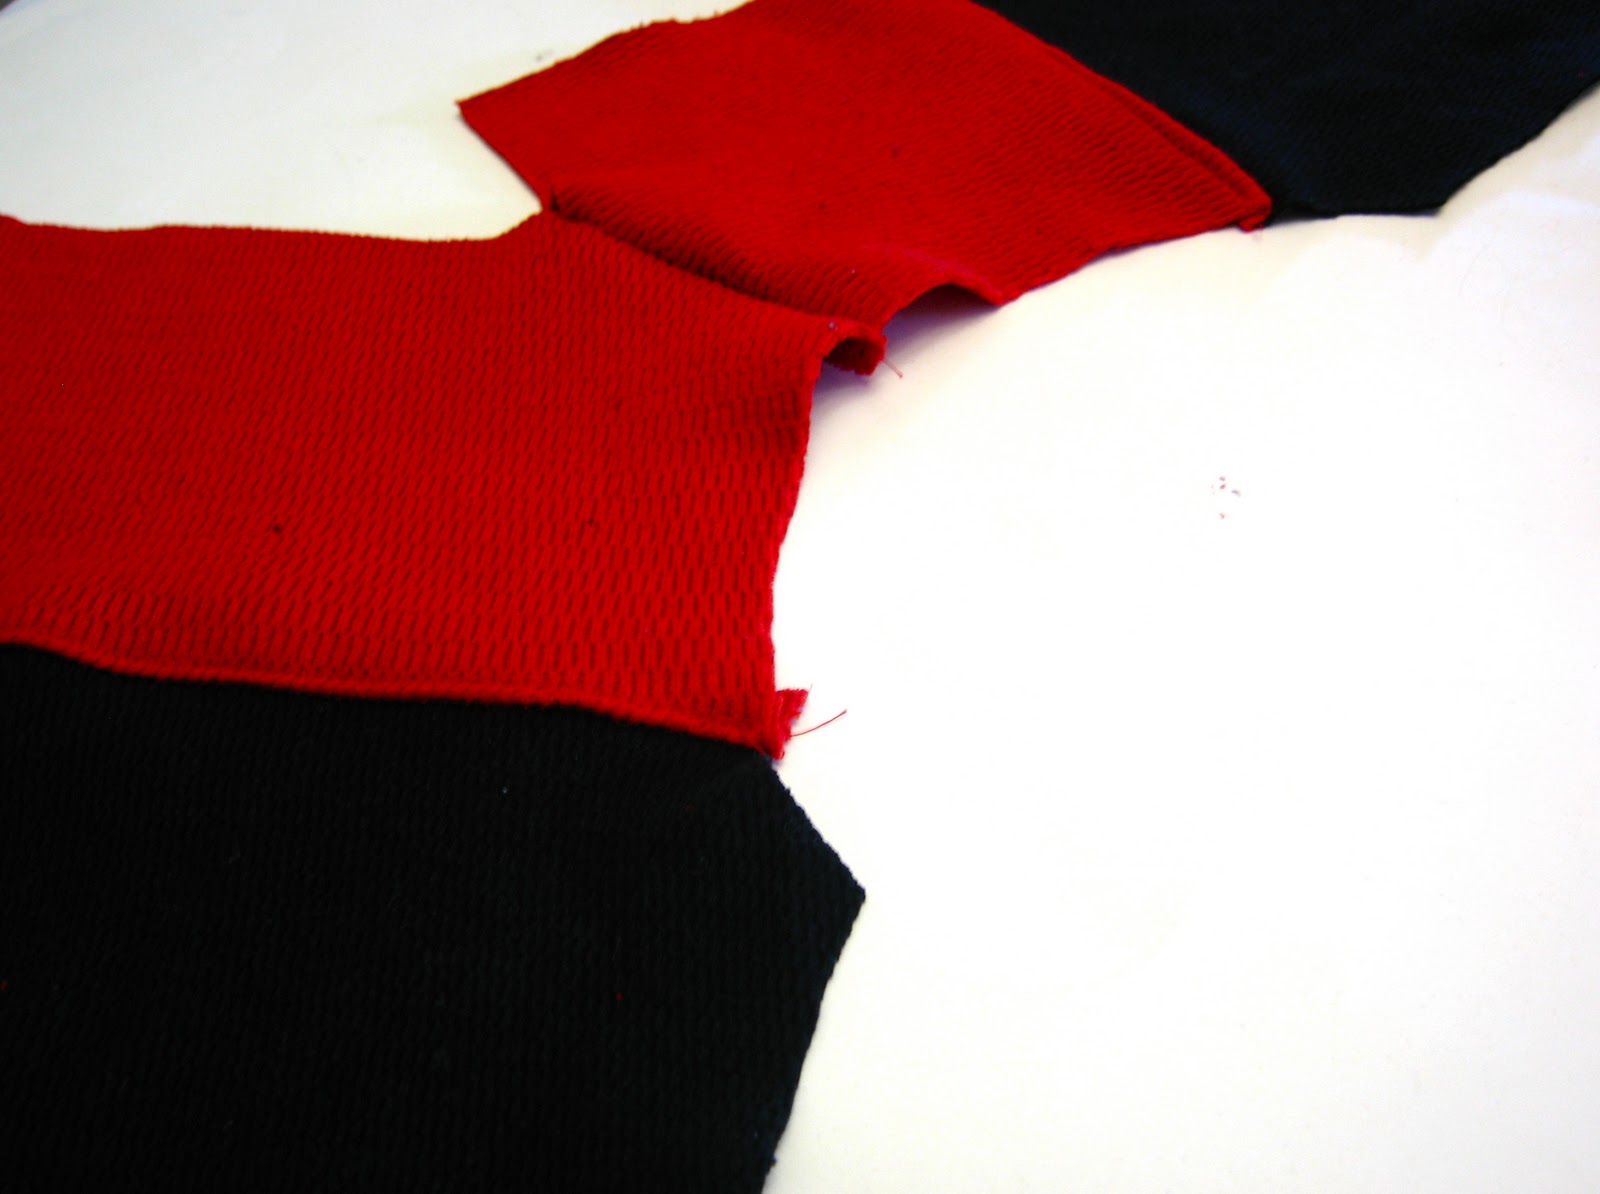
| Cut out the pattern I used black for the bottom of the bodice and red for the top and then black for the sleeves. Cut one bodice piece on the fold and one not on the fold and cut both sleeves on the fold. |
 |
| Then for the sewing. Start by sewing the bodice pieces together, so the top of the bodice is sewn to the bottom. |
 |
| Then sew the shoulder seams together. |
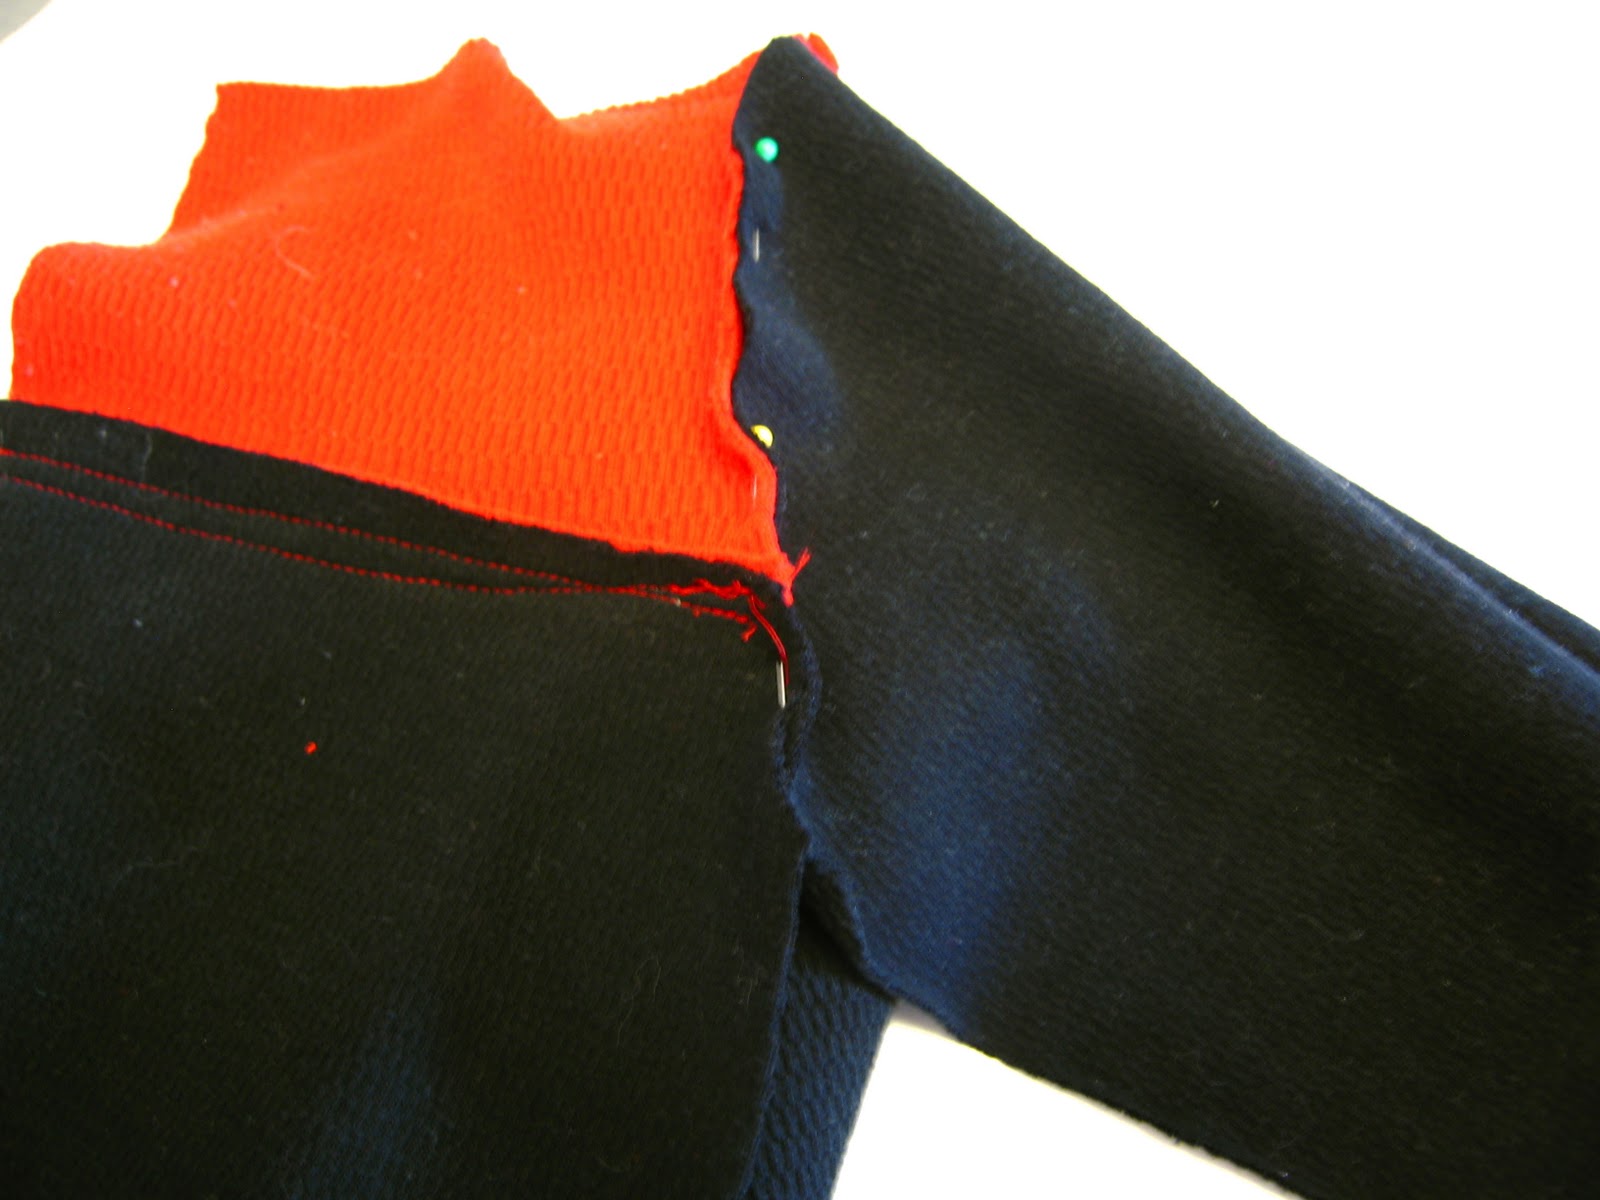 |
| Pin the sleeve in the arm opening and sew in place. |
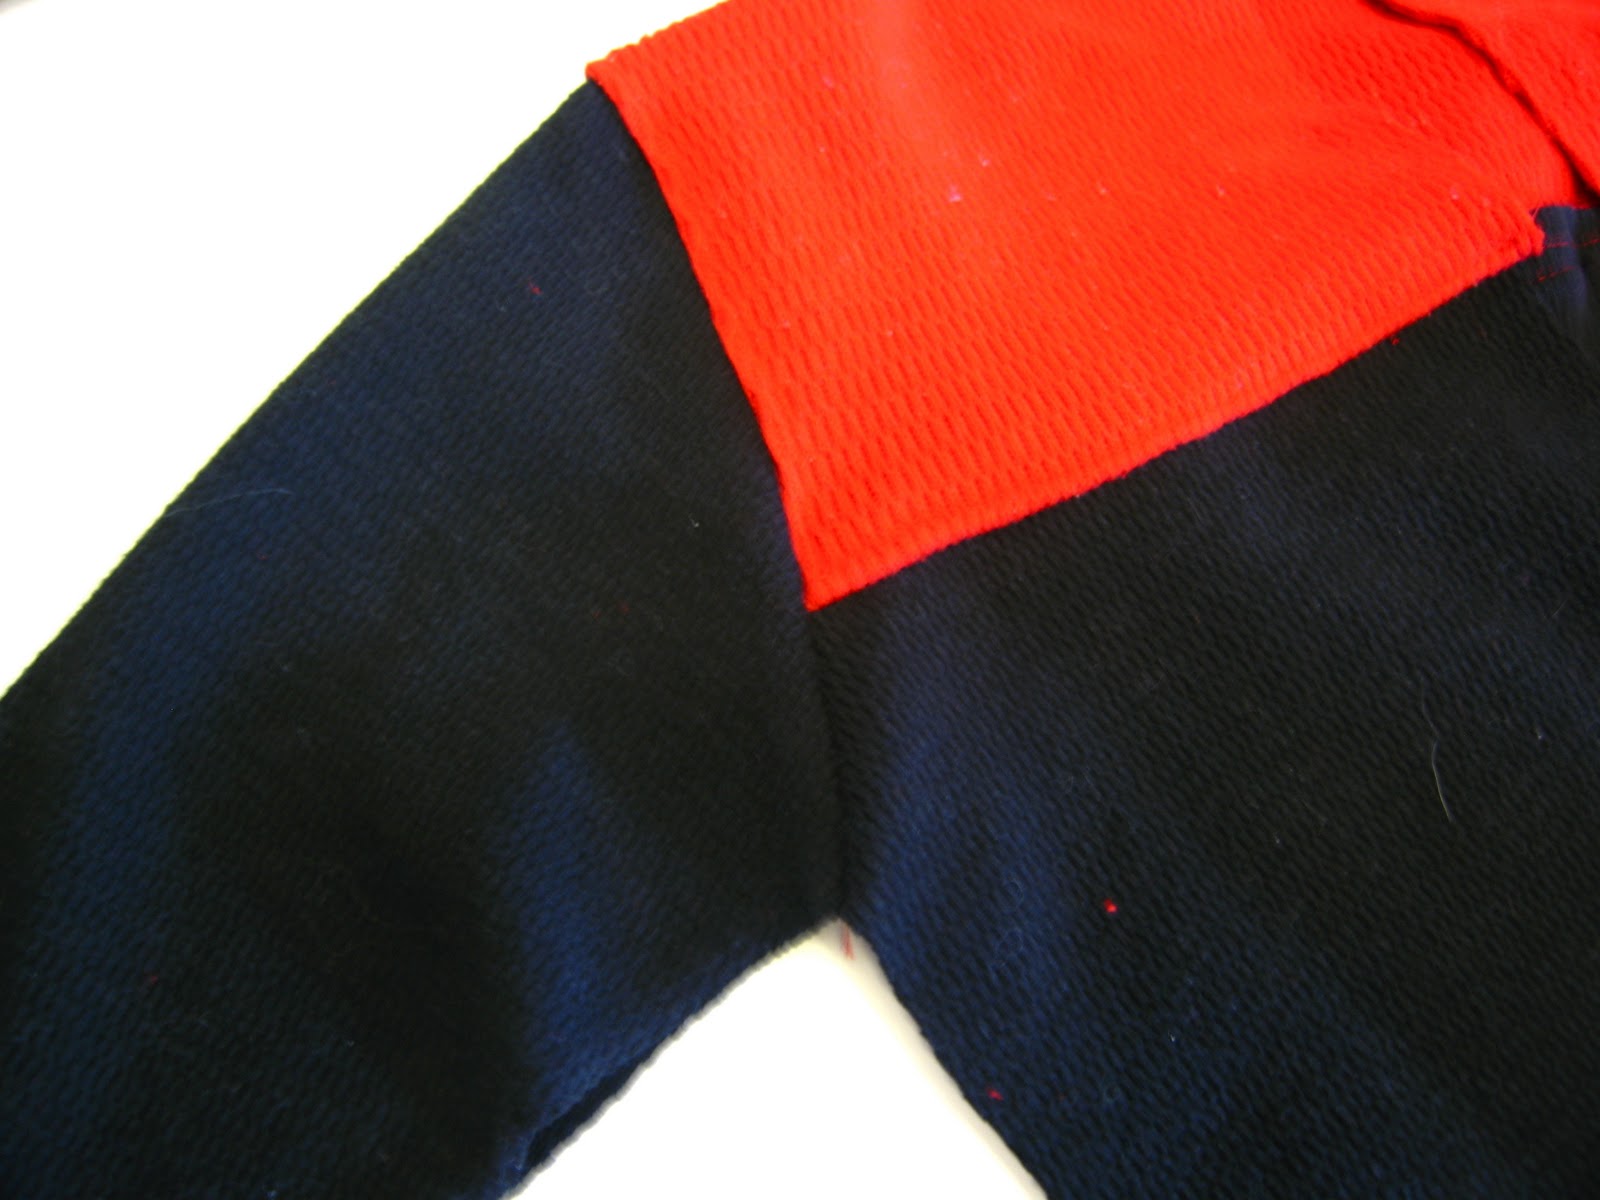 |
| Then with right sides together sew from the end of the sleeve to the armpit and down the side of the shirt. |
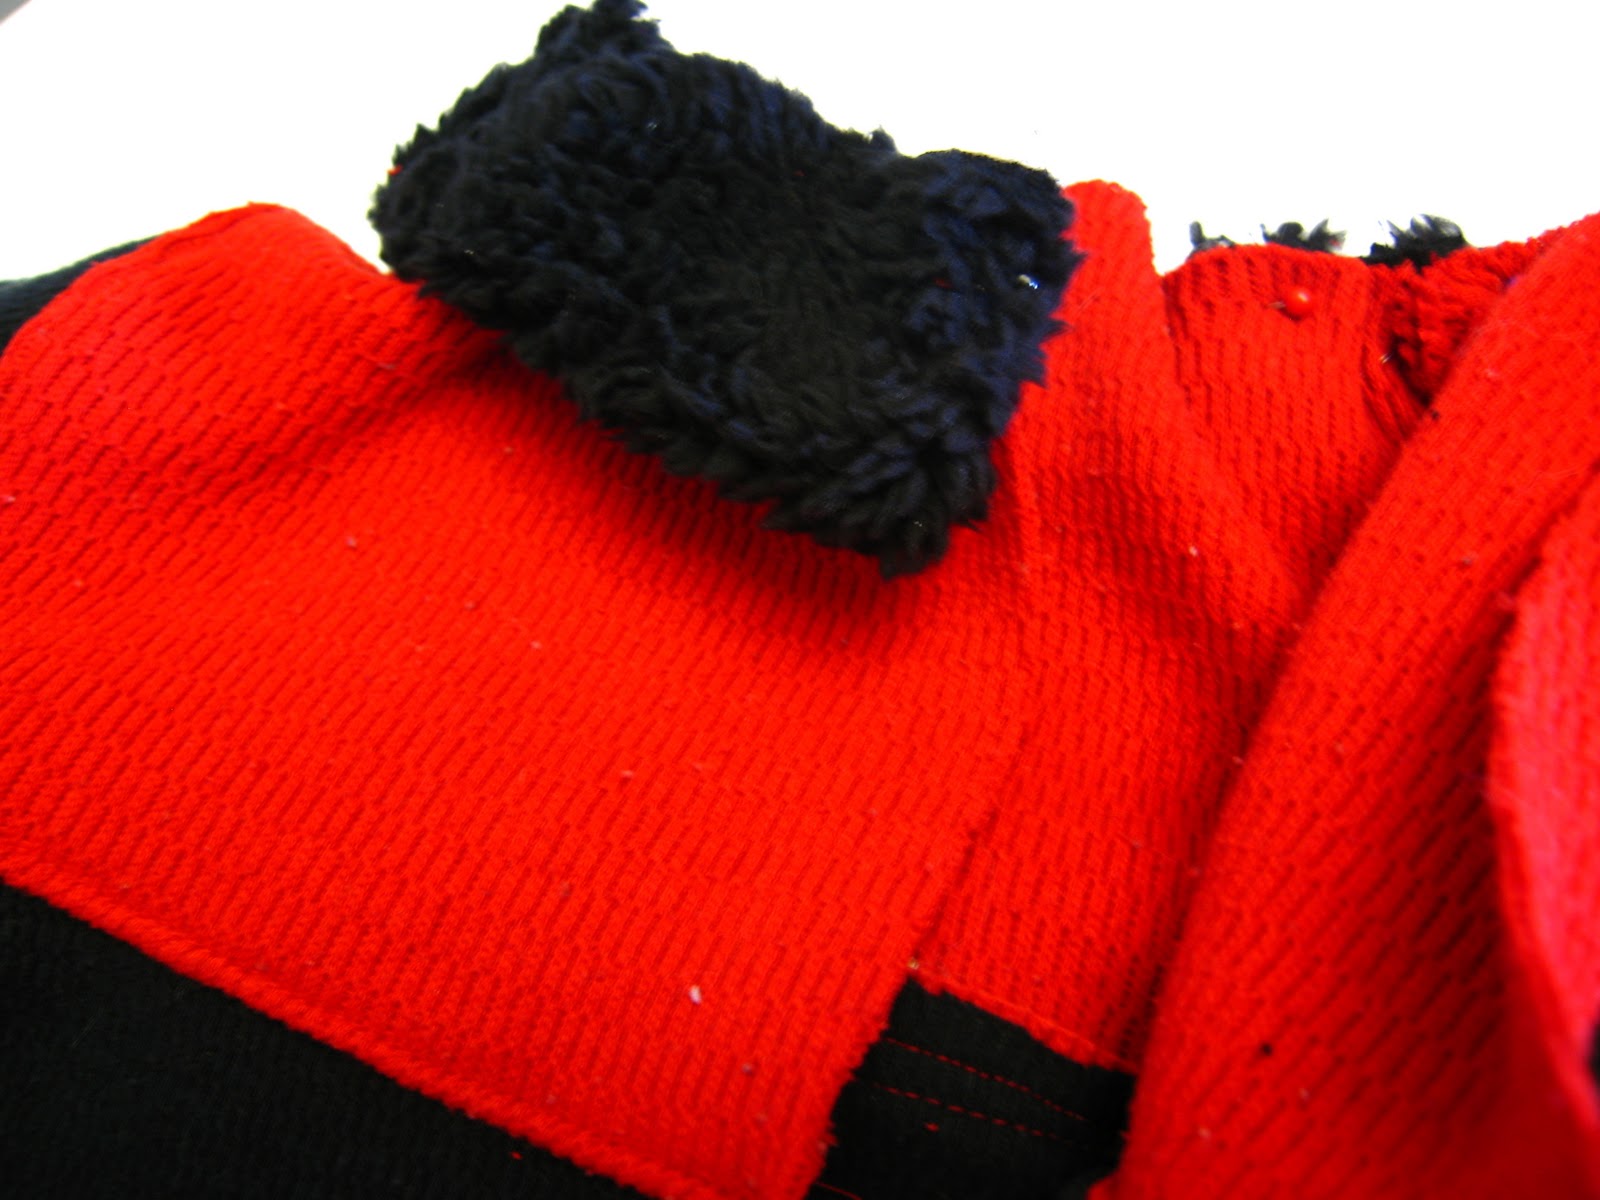 |
| Next with the collar piece. I used a sherpa material to line the collar so it would be extra cozy around his neck, but you could use the fabric as well. Sew the collar pieces right sides together and turn them right side out so you have only one raw edge. (the bottom edge) Then sew the raw edge along the neckline of the shirt. |
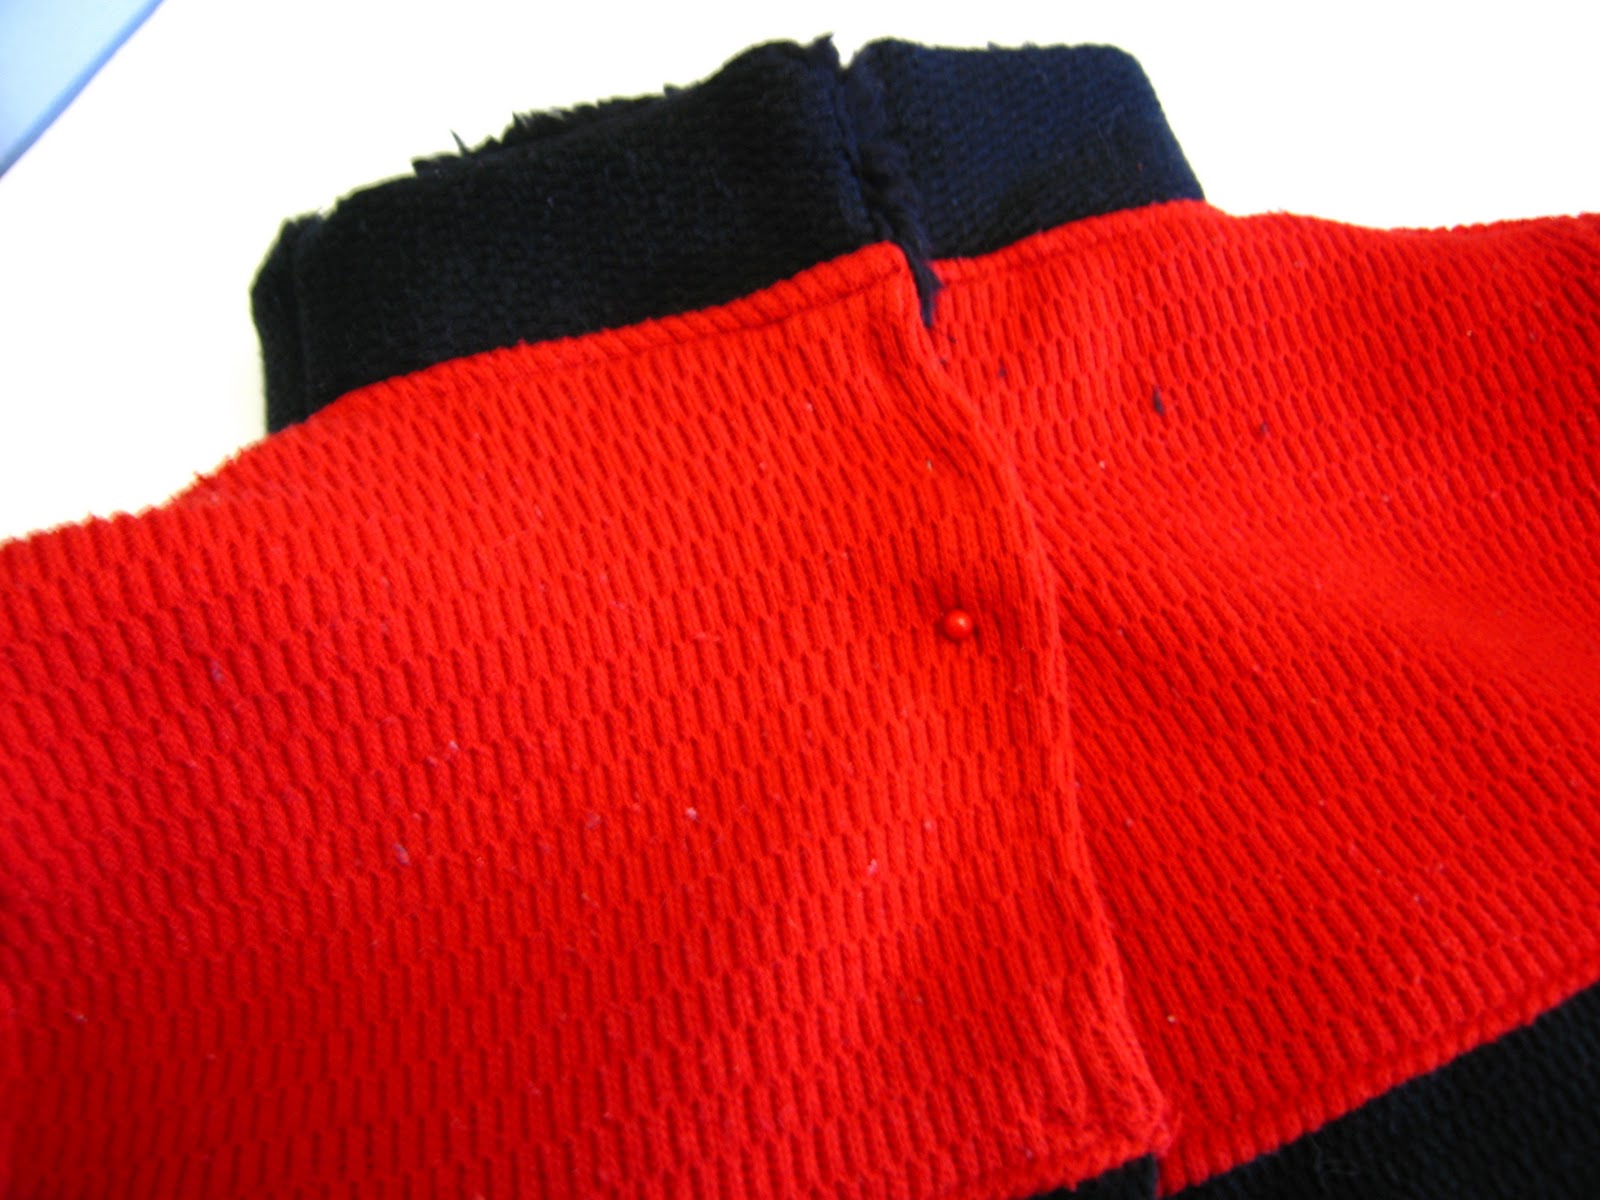 |
| Then you can top stitch along your collar if you want. Next you have a few options. You can put a zipper down the front, snaps, buttons, or as I decided at this point was to turn over the edge of the red part (top part) of the bodice and then I sewed the bottom of the bodice together down the middle. |
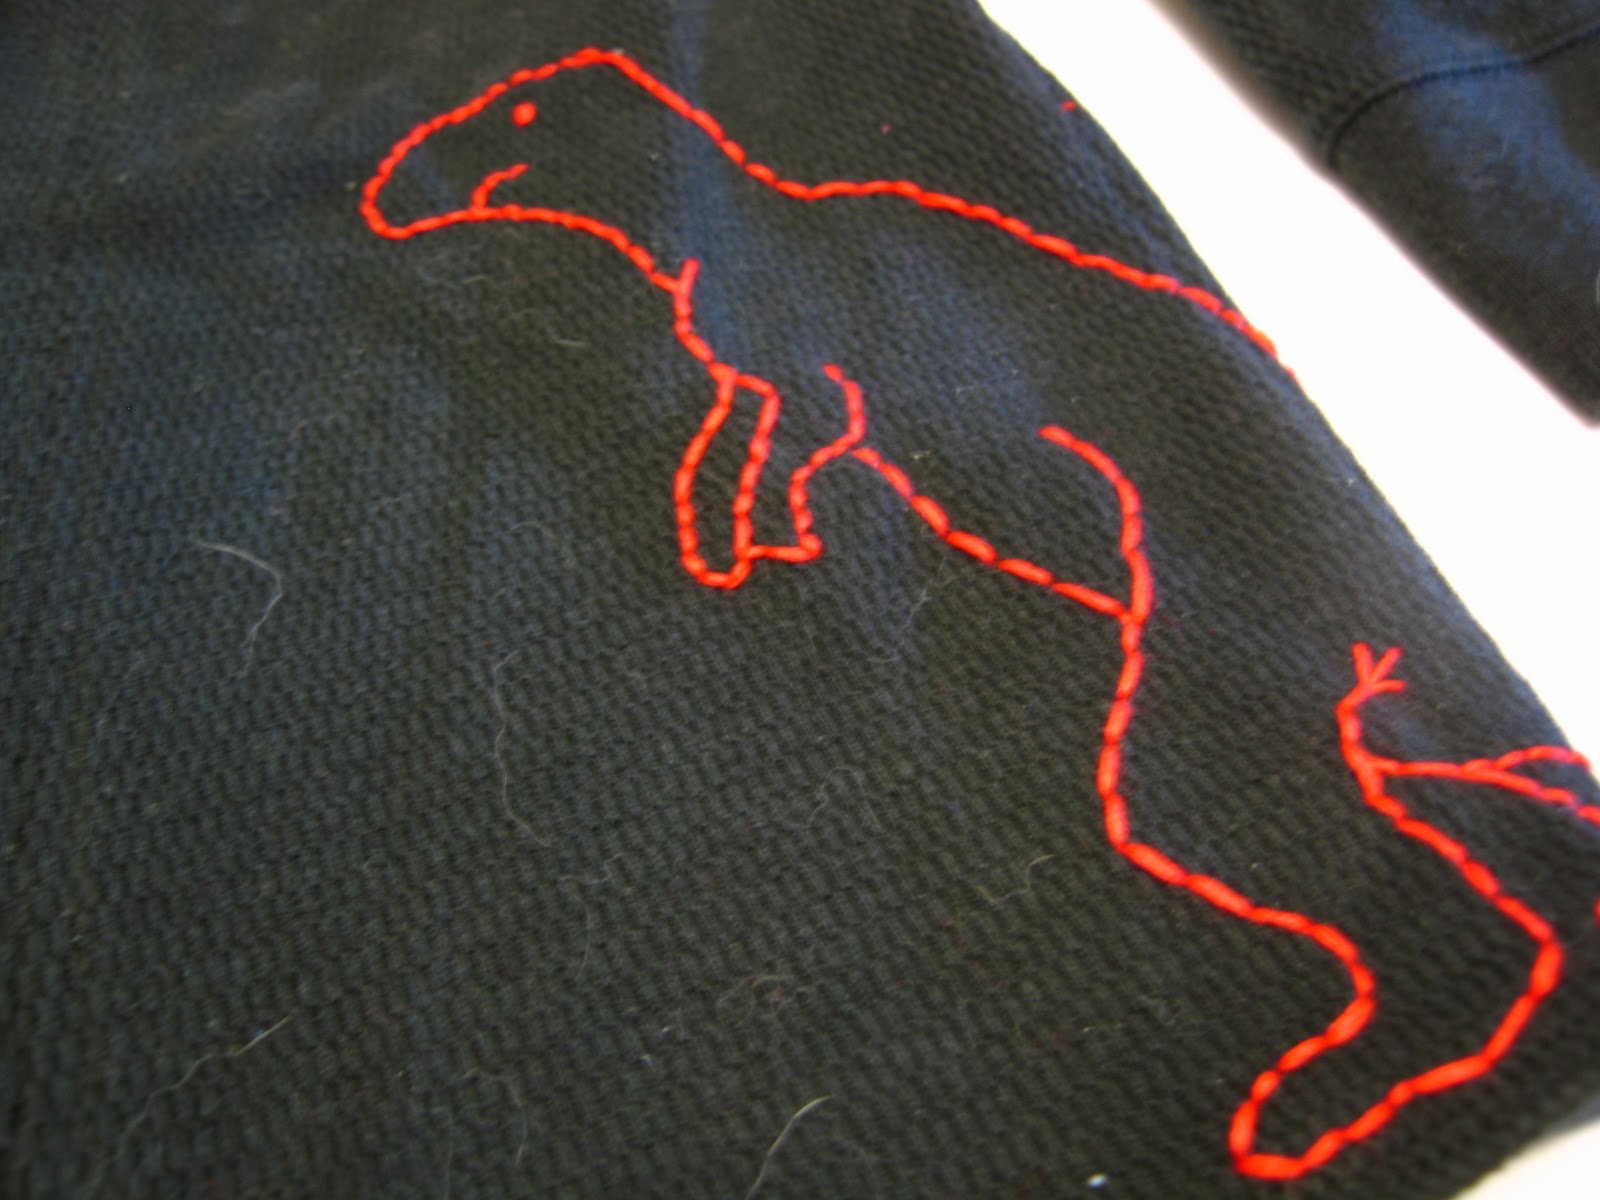 |
| Then for some personal touches I added a dinosaur. Since my son is very into dinosaurs right now. To do the dinosaur I drew the dino of his choice (t-rex) using a crayon and then using a basic up and down hand stitch with embroidery floss. |
 |
| Lastly I added Buttons and loops to the top of the bodice to secure it in place. |
|
| My son was so excited about his dinosaur sweatshirt. (it goes so well with the brown sweatpants he won’t take off ha ha!)
Enjoy! |
Sharon
Very neat! My little boys would love it, dinos are the in thing for them. 😉
Robyn
Did you trace your pattern with or without a seam allowance? Thanks! 🙂
everyday muses
thank you for this tutorial. i always love it when bloggers highlight crafts and projects (esp sewing) for boys since they usually get shafted. hard to compete with the abundance of darling girl things out there!
Shwin W
I do add a seam allowance as I trace, There are two ways to do this you can turn the shirt inside out and follow the exact line since most of them are surged with the seam allowance still there. (as in the actually seam is just in from the edge) Or you can just draw the line adding seam allowance as you go or cut it out with the added seam allowance. All will work well.
~Beth D.
wow! great job! love it!