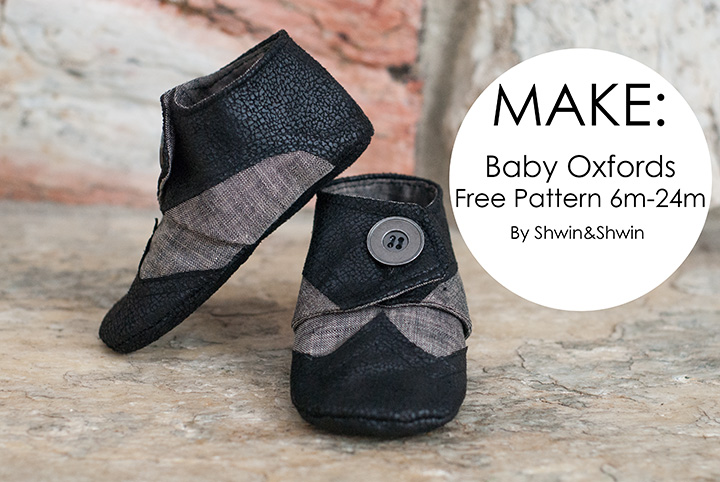
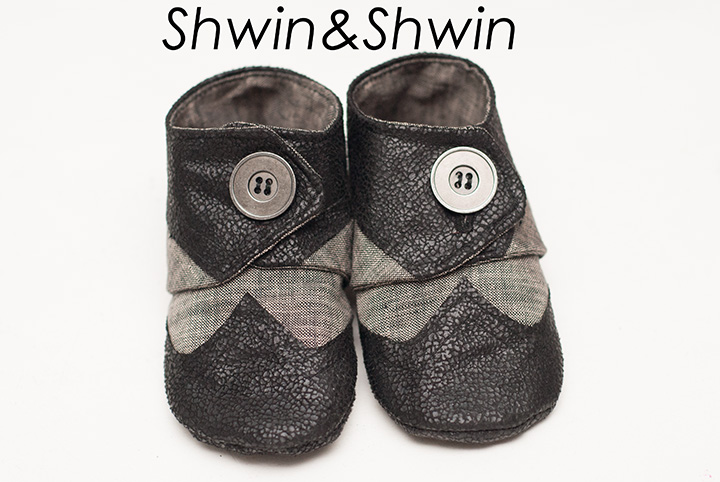
I Love Oxfords. Especially the wing tip ones, I love the stitch detail I love the layered look. I love how unique every pair can be. What I hate is the part that actually makes them an “Oxford” I hate ties on baby shoes. They are either always coming untied, or they are a big jumbled mess of a double-triple knot. So I wanted to design a baby shoe that had all the elements I loved and omit the one I didn’t love. (if you love ties you are free to make the top part tie)
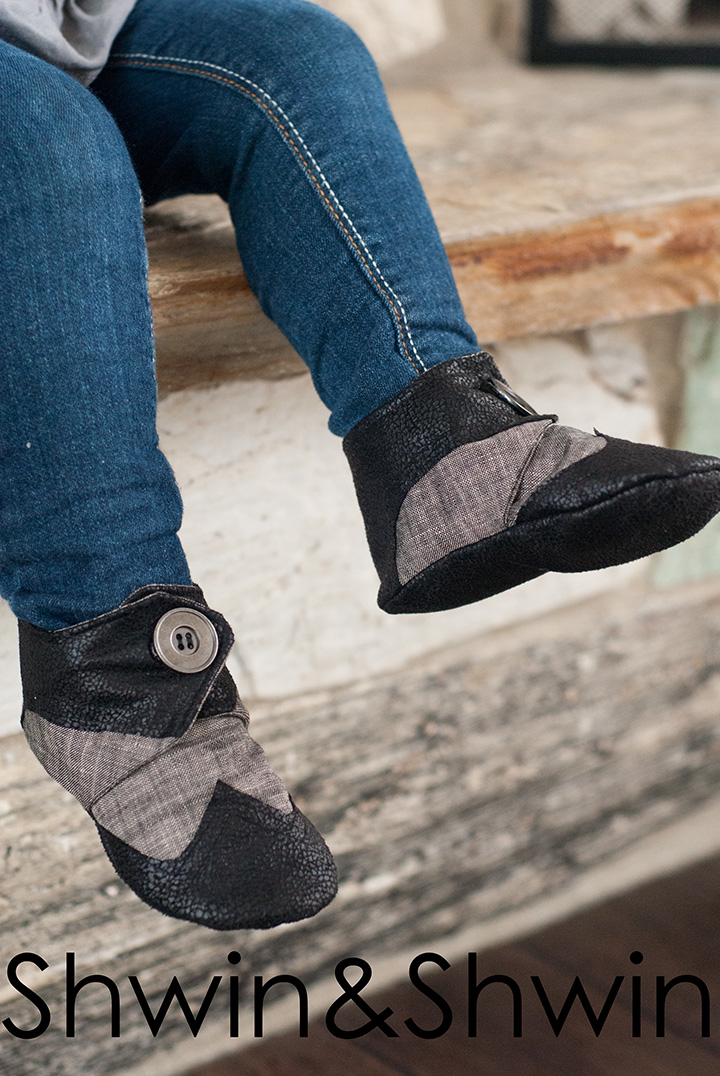
The shoes button at the top although a snap would be fine a button helps them to not come undone, and so far with a fair amount of wear they have not fallen off which is a huge bonus for shoes.
I made a pattern in 3 sizes.
- 6-12m- finished length 4.5″
- 12-18m – finished length 5″
- 18-24m – finished length 5.5″
You will need:
- The pattern pieces found here: Baby Oxfords || Free Pattern
- 1/4 yard Main fabric
- 1/4 yard Mid-Weight Interfacing
- 1/8 yard Accent fabric (non fraying fabric is best)
- 2 buttons (1″ was used here)
A couple notes about making soft soled baby shoes:
- It is wise to use a non-slip fabric for the outer sole for kids who are walking you don’t want them to slip and fall.
- I like to use fleece or felt for the inside of the sole since it is soft.
- You will want to use heavy dusty fabrics since they will take a beating.
- Any embellishment including the button should be well secured and used at your own risk since it is a chocking hazard if it were to come loose.
- Leather is a great fabric to use, it is recommended that you use a leather sewing foot and needle when working with leather.
- Seam allowance is 1/4″ everywhere except when attaching the sole then a 3/8″ seam allowance is used.
First attach the interfacing to the toe pieces. You don’t want to skip this step even if you are using a heavy fabric it adds stability to the shoe so it’s not a soft floppy mess.
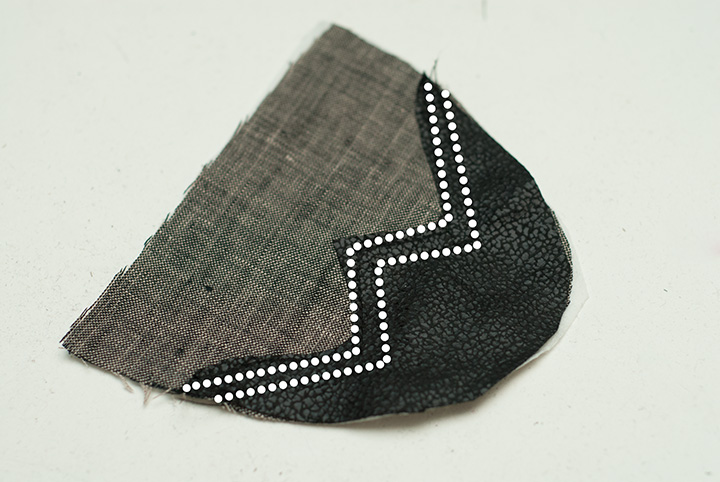
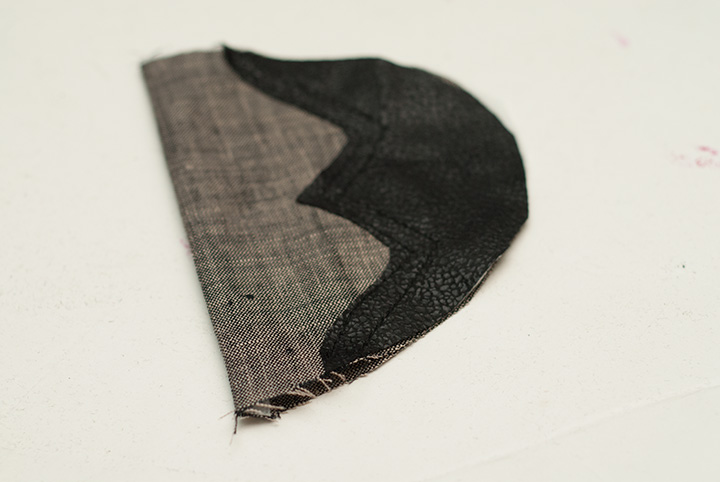
Next sew the toe accent on to the toe pieces. You will place the toe accent on the right side of the toe piece and the right side of the accent piece facing up. Then sew one or two lines along the zig zag edge.
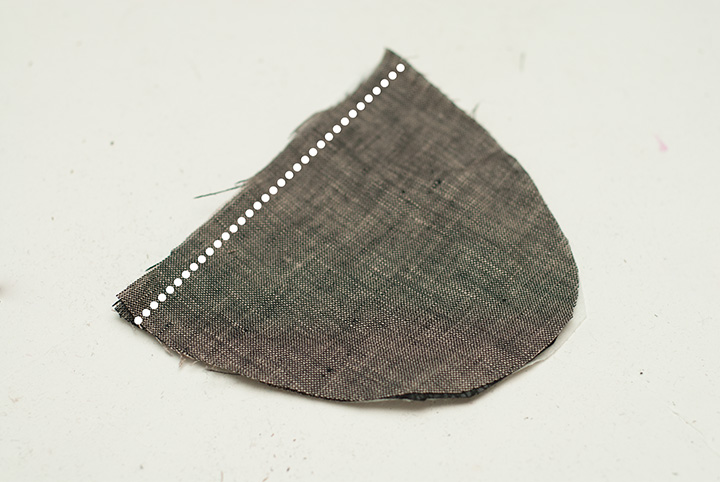
Next with right sides together sew one toe piece to the toe piece with the accent sewn on along the top straight edge.
Turn and press the toe piece to the back so the seam at the top is flat.
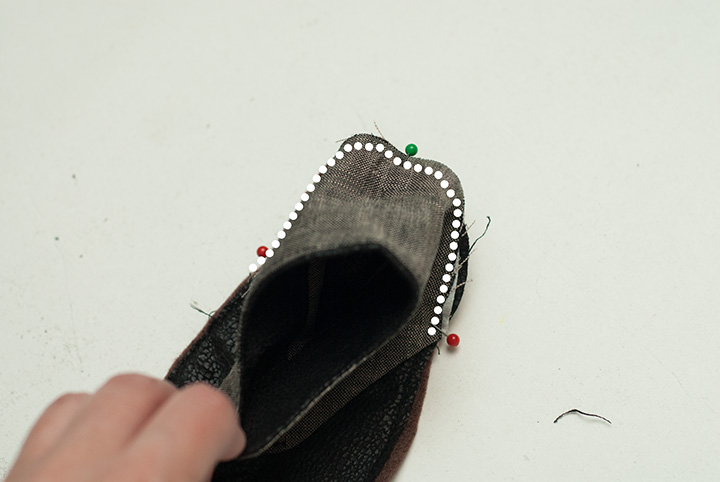
Now for the heel place the heel accent down on top of the right side of the heel piece so the accent piece is facing up. Then sew along the curved edges along the bottom.
Now with right sides together sew the heel piece to the heel piece with the accent. Sew along the sides and top edge as shown above. Clip all the corners and curves.
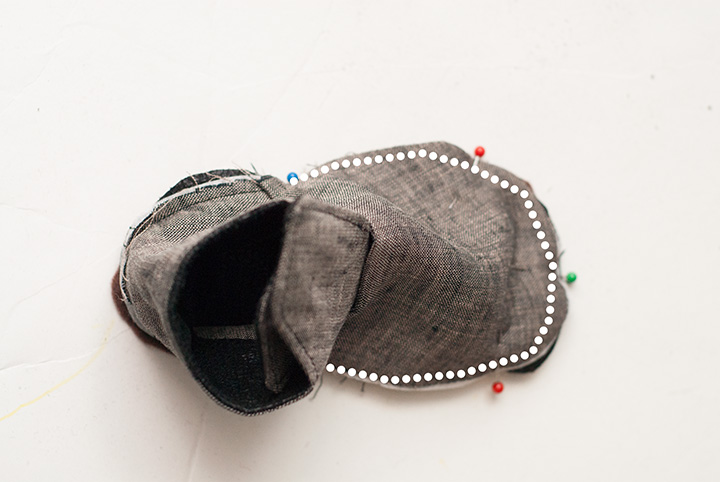
Then turn the piece right side out and press. Top stitch along the top of the accent piece.
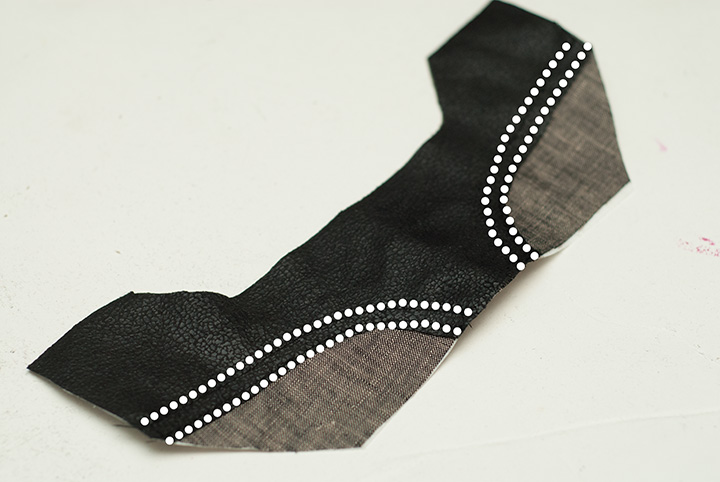
Now to attach the heel and toe to the sole. For this part we will sew with a 3/8″ seam allowance because it’s easier to make sure you catch all the layers if you use a slightly larger seam allowance. Start by taking 2 sole pieces and with wrong sides together simply stitch right along the outside edge just to stick them together so they don’t shift as you sew later.
Then with right sides together match up the center of the bottom heel piece to the center of the bottom sole. Then continue to match up the rest of the heel piece to go around the curve of the foot. Sew them together.
**Tip, sewing around the heel can get tricky as the fabric wants to bunch up. Stop often with the needle down and raise the presser foot, smooth the fabric and sew a few more stitches, continue this until you make it around the heel and you will have a wrinkle free heel.
Next with right sides together sew the toe piece to the front of the sole. You will want to match up the center toe with the center sole. Then match up the toe piece with the rest of the curve. Again sewn with a 3/8″ seam allowance.
** NOTE the toe piece WILL overlap the heel piece. It needs to overlap by at least 1/4″ more is fine. If it doesn’t overlap you will have gaps in the shoe.
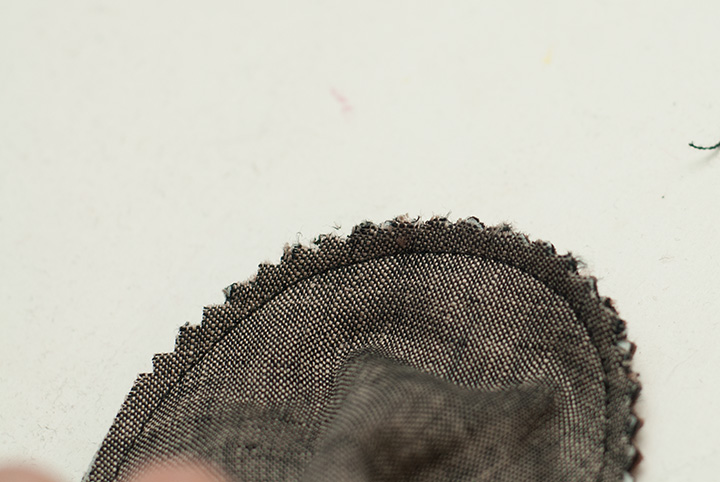
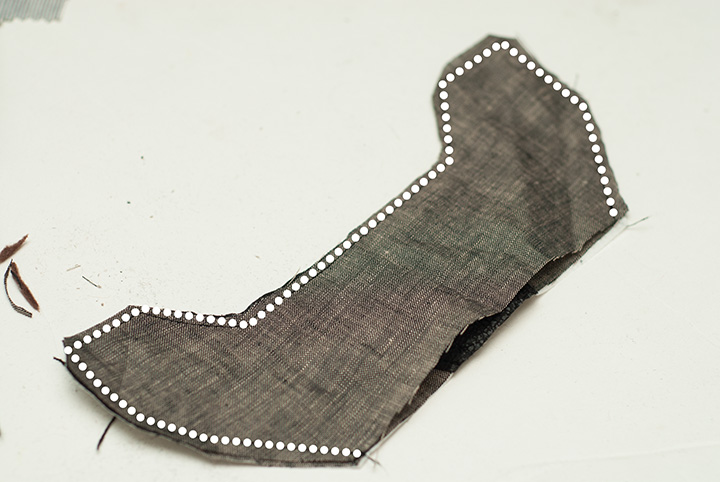
Next, you will want to trim the edges up so there is less bulk. I do this with pinking shears so the fabric won’t fray down the road.
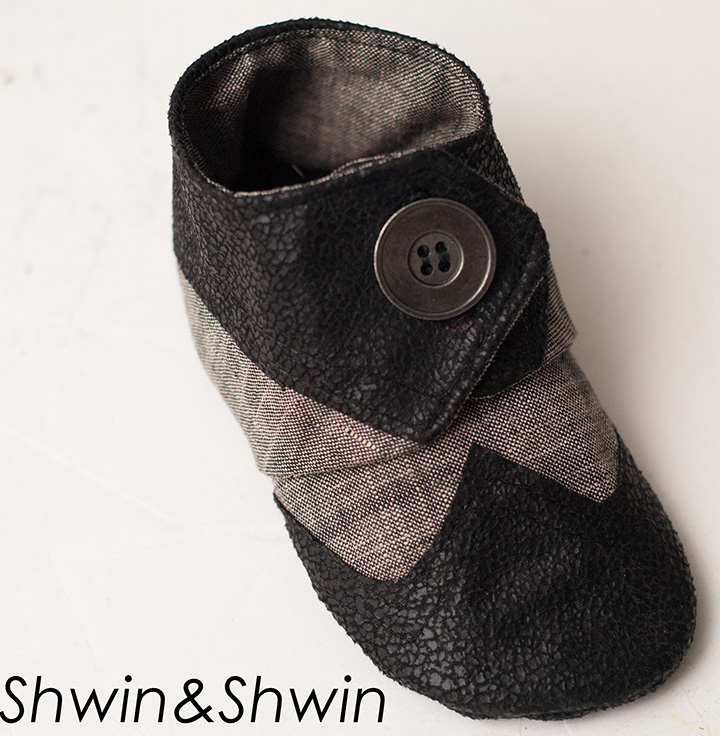
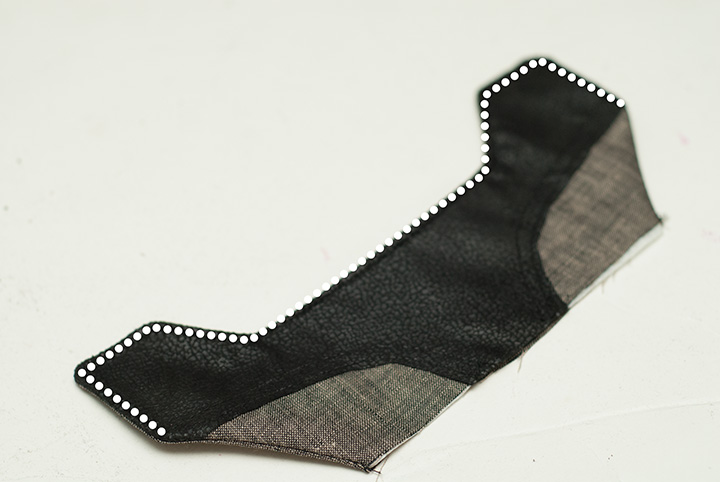
Now turn your shoe right side out. the top pieces will overlap at the top of the shoe (with some room for adjustment so you can make the ankle larger or smaller) Add a button to one side and a button hole to the other, and you are good to go.
Repeat all the steps for a second shoe and you have a pair. Big huge important note here… the tops of the shoes are the same but the soles do have a left and right. You SHOULD make the buckles cross over in opposite directions… learn from my mistake and make sure you flip the direction. Shown above both buckle right over left, where one should be left over right. Something I am too lazy to fix on these but for future note 🙂
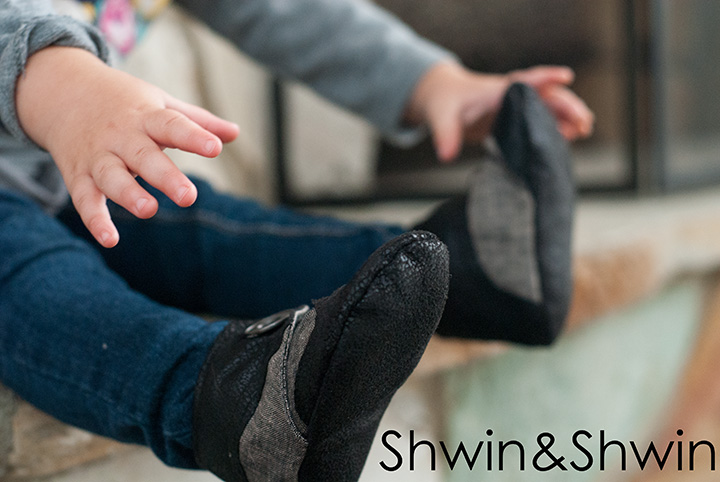
That’s all there is too it. Cute little oxfords that don’t tie 🙂 I have another “mock tie” solution coming later I will show you, incase buttons aren’t your thing 🙂
I hope you will share pictures if you make them. And as always feel free to sell any items you make using my free patterns BUT please please please DO NOT use my photos in order to sell your items. I reserve the rights to all of my photos, pattern pieces and instructions but what you do with the things you make is totally up to you. Thanks!
Elisabetta
These are so adorable and perfect!
Thank you so much for this lovely piece of art ^_^
marissa | Rae Gun Ramblings
oh my gosh I’m dying from the cuteness!!!! Teddy needs some asap
Anne
Adorable!!! I’ve posted a link to your pattern on Craft Gossip:
http://sewing.craftgossip.com/free-pattern-baby-oxfords/2014/09/05/
–Anne
Tara
Om gosh, how can I buy these 🙂
Bricolente
Magnifique ! Thank you for the patern.
Raven
im confused on the heel piece and the heel accent, the pattern that i printed was not the same as you pictured? I may be doing something wrong?
Pink Pink
Oh, that’s so cute!
Thanks you very much for you sharing!
sona
I love it,
thank you for sharing with us.
Lauren
These are fantastic, thank you so much. I’ve also found that putting two tiny strips of batting along the seam where the ankle is (back piece of the shoe, at the top of the ankle piece) provides some extra cushioning for little feet 🙂
Kamesha r.
Soooooo incredibly CUTE! My hope is to make these for my little Godson for Easter!! #FairyGodMotherALLLWAYSDoesTHEMost! Thank you for your gracious share! You’re helping us make dapper little dudes the world over! 🙂
annie
I just recently get into sewing with leather, and this tutorial is just so perfect! I have a little boy who will soon start to walk. These will be his first pair of shoes and we will always remember them. Thank you for sharing such beautifully designed pattern!!
http://i.imgur.com/FA2nb7X.jpg
Judyf
Thank you for sharing these gorgeous shoe patterns. I will be making the little Baby Oxfords tomorrow for a neighbour’s grandson.
Leesa
Thanks for the pattern. These were easier than I imagined. Great instructions.
Lauren
I’ve now made two pairs of these shoes for two different mom’s. They love them because of how easy they are to put on and take off. Instead of buttons I used round velcro pieces!
pgold
This is amazing, I love them and I could learn more. I try this for two princess
Melody
How can I pint out the instructions for your baby shoes. I cannot be online for long periods of time . And my memory is not so good. I tried printing but, get only the photos. Please help. I’m dying to make these for my first great-grand child.
Christina Flowers
I just have to saw, these are probably one of the cutest pairs of baby shoes I’ve seen and with 3 kids I’ve seen alot lol! Thank you for the pattern and the share!
Robin G.
Is there a pattern adjustment to make the heel narrower? If not, would inserting a piece of elastic in the heel help?
Thanks!