Welcome to Part II of learning to how to make a PDF pattern in photoshop. Incase you missed yesterday you will want to check out
to catch up. (or today may just seem confusing) So let’s jump right into todays lesson. We are going to take those solid lines, and make them dashes and dots. (you know like most paper patterns) Personally my patterns which you will find in my shop, use color coded lines. They still print well with black and white printing, and if you print in color its even easier to cut out the size you want. But dots and dashes aren’t bad either, and I would say they are perhaps more “industry standard” so let’s learn how to make them because you totally can.
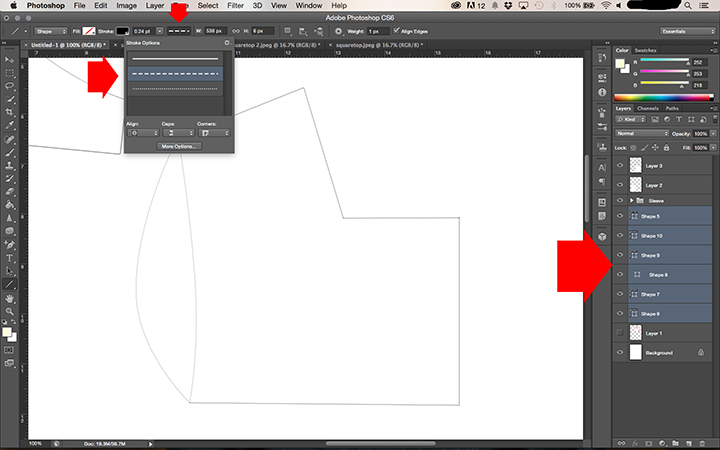
So yesterday we learned about the “tracing” of your sketched pattern using the line tool. Here I have the bodice done. You will notice I curved the line that needed to be curved, but I DID NOT rasterize the line yet. Once you do that you can no longer change or alter the line. (like bending it or changing it’s color you can make it longer or shorter) So go over to the right hand side and select (hold the ⌘ and click on the shapes) all of the shapes that are part of the bodice. You can see they are all highlighted. This lets you group edit them. Then up at the top, you will see a drop down section that will have a solid line, if you click you will see options for a dashed or dotted line. Select the dashed line and you will see your solid lines become dashed.
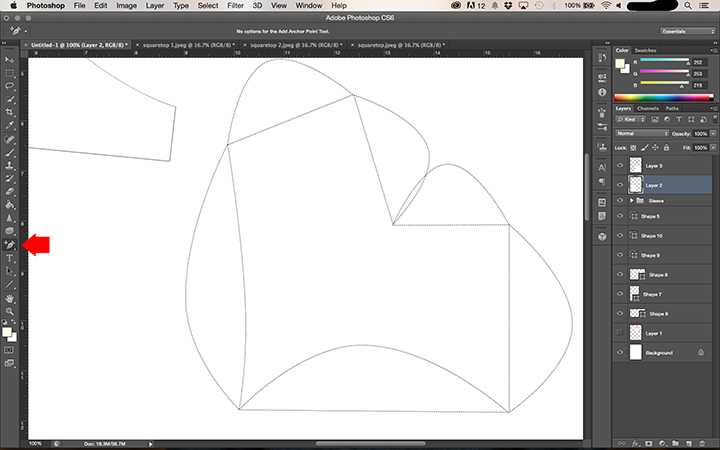
Now, an important note, ALL lines are made up of 2 strokes. Which is why when we curve a line it separates them. When I am dealing with just solid colored lines I don’t worry about separating the straight lines, mainly because your can’t tell. HOWEVER if you are doing dots or dashes you have to separate the lines and essentially erase half of it, so they show up properly. It sounds like a hassle, it’s not so bad. (although this is the area where illustrator has the advantage) So take the add anchor tool and add a point to each straight line and then drag it out so you have these loops coming off of your straight lines left behind. It looks like a mess but we will clean it up.
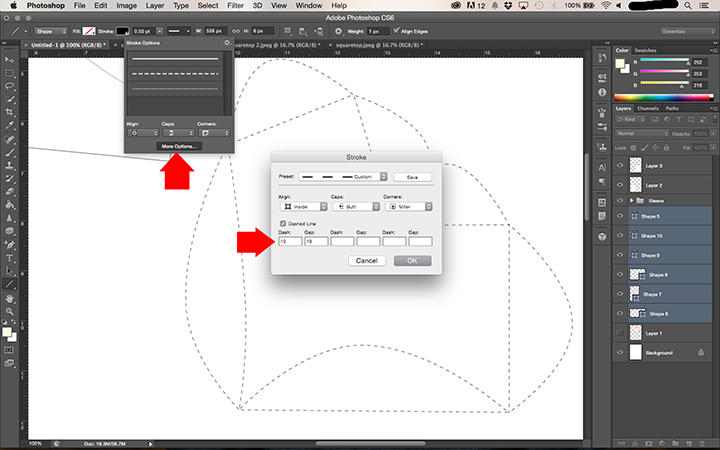
Now before we clean it up, let me show you how you can change the dots and dashes. If you once again select all the shapes. Then go to the dashed line drop down menu, you will see “more options” at the bottom. Click there. Here you can customize any style of dashed or dotted line you want. Simply change the numbers in the dash and gap area. You can also click “save” when you create your style and it will save it as an option in the drop down menu while you are working on your project. That way you can make as many styles as you have sizes. Easy enough right?
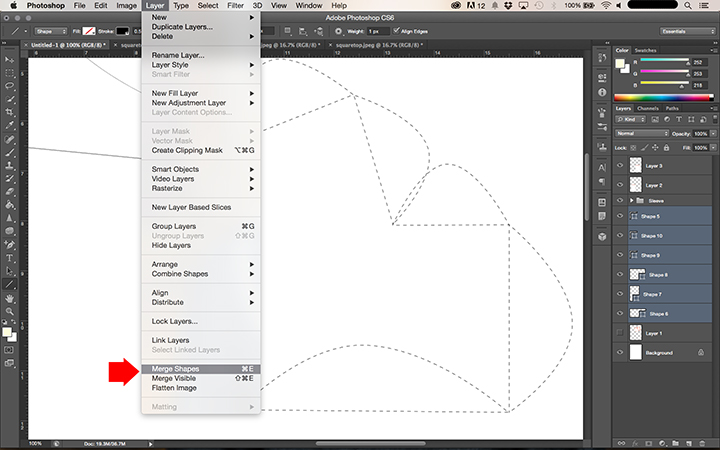
Ok now let clean it up. With the shapes selected, go to
layer —> Merge Shapes (⌘E)
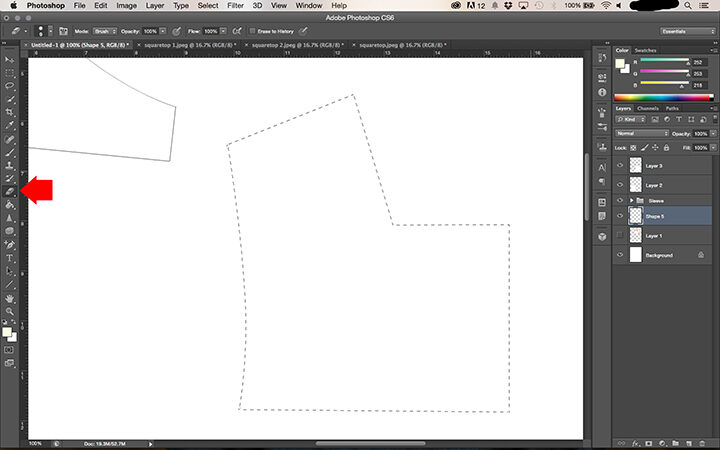
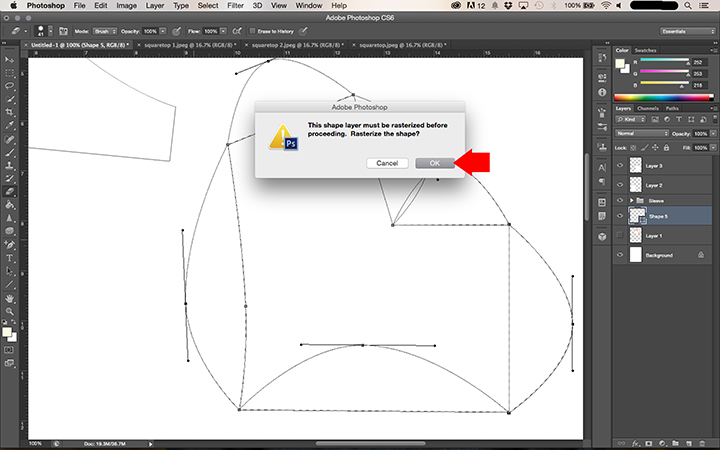
Your shape will look like so, then grab the eraser tool. Click on the shape, the warning will pop up, and go ahead and say OK.
Then erase all the curved lines that you separated but DO NOT erase the bodice lines you want left behind. What you are left with is a clean and pretty dashed line bodice piece. Go ahead and label it as such on the right hand side. (especially handy if you have multiple sizes so you can keep them all straight)
