Welcome to the final day! We are going to prepare the pattern for printing.
If you need to catch up, check out
Part 1: Scanning and tracing a drawn pattern
Part 2: How to create dotted and dashed lines
Part 3: How to create Pattern graphics with invisible backgrounds
Part 4: Preparing the Pattern for printing.
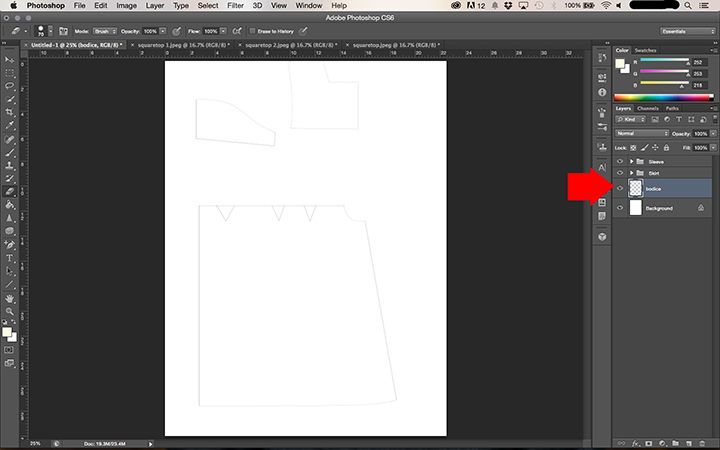
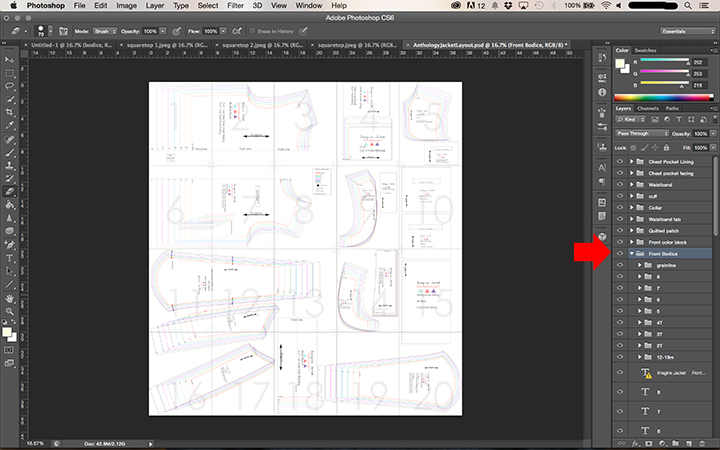
So we have the pattern pieces all made. I always have them grouped and labeled so I can move them as needed.
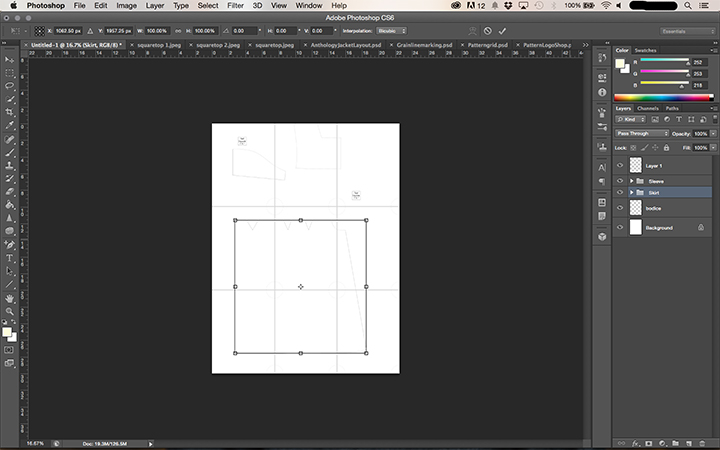
Now open the pattern grid that we made. Copy and paste it on the pattern. You can see the gird, and the pattern pieces. Then I free transform (⌘T) each layer or group. Move the pattern sections so they are best divided by the grid. So I like to do this so the pattern is printed on the least amount of pages, but also I try and make sure an important area like a edge, or curve, or pleat is not on a grid line.

Then I add text to the pieces, label what the piece is, where any fold lines are, and so forth.
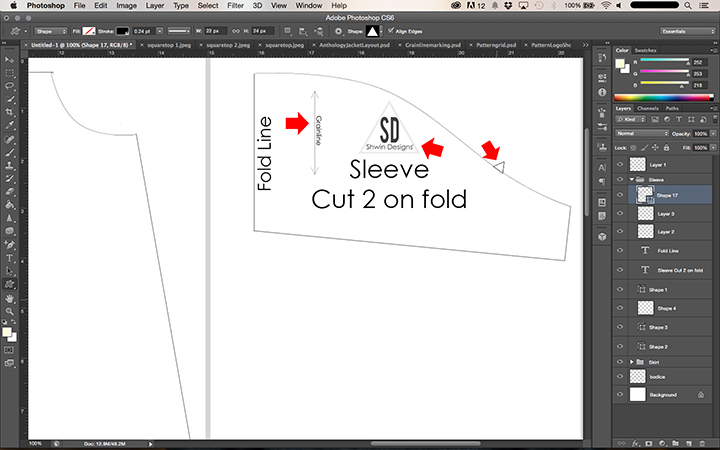
Then I add things like the grainline marking, and logo. You can also add any matching up points, or any other things you want added at this point.
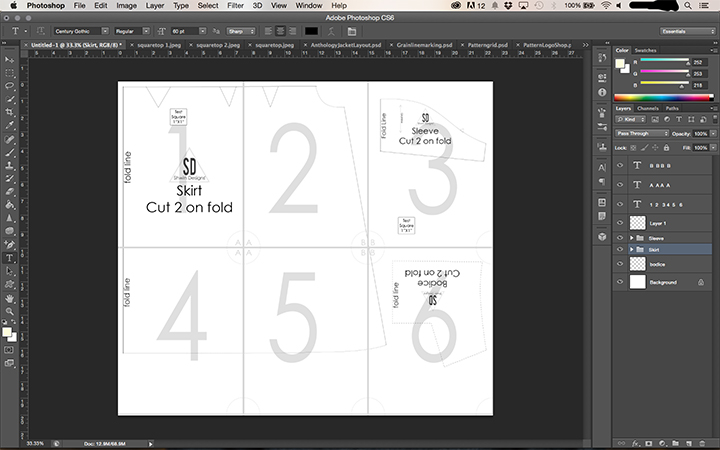
Once everything is labeled I add numbers to the page (large text) and letters to the circles so they are easier to match up.
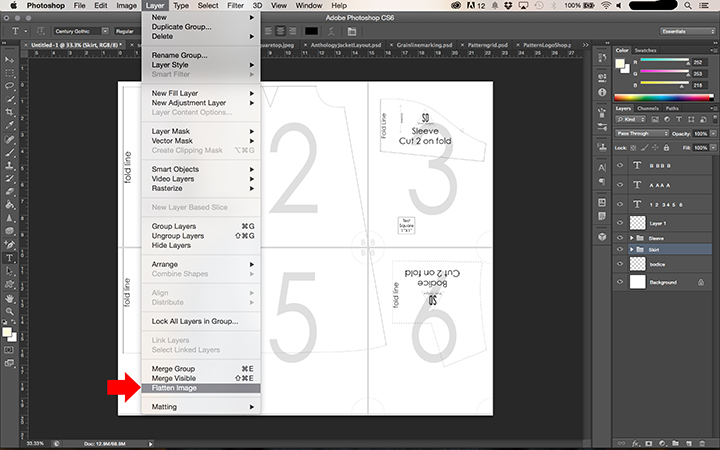
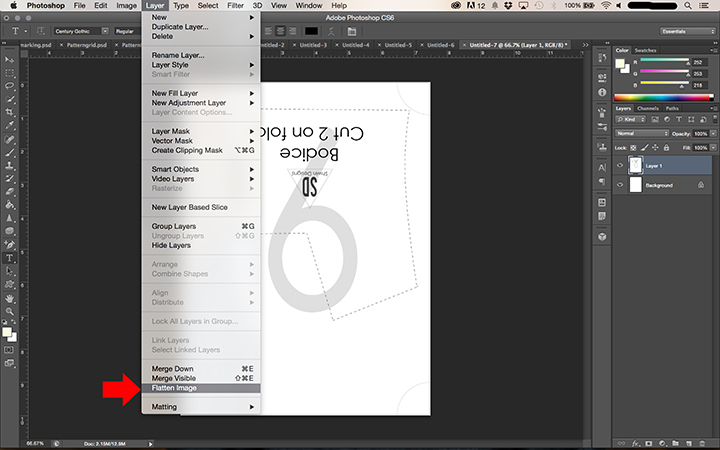
Once you have everything placed the way you want it SAVE IT before you flatten it as a PSD or PDF, do this so if you need to alter it later you can. Then go to Layer—> Flatten
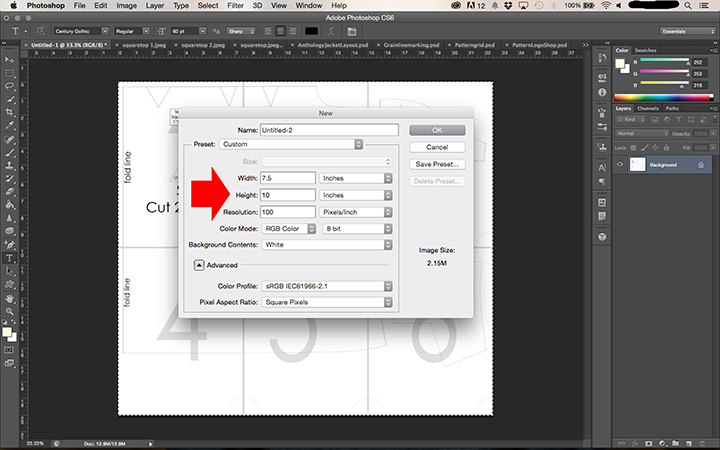
Now create a new document that is 7.5″X10″ and the same 100 resolution. Create as many of these as you have pattern pages, so 6 for this one.
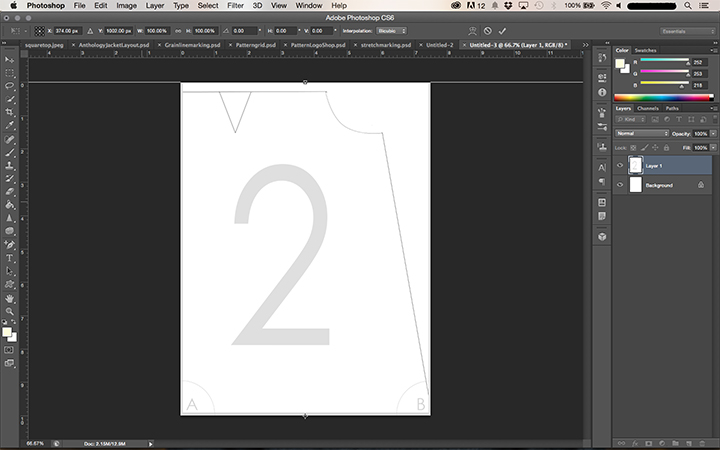
Then select and copy the flattened pattern (⌘A, ⌘C) go to one of the new files and paste it. (⌘V) Then free transform the layer (⌘T) then move the layer so the rectangles from the grid fit into each page. (shown above for example is page 2) you want each file to have a different page showing.
Then go to Layer—> Flatten, on each page. Then save each page as a PDF
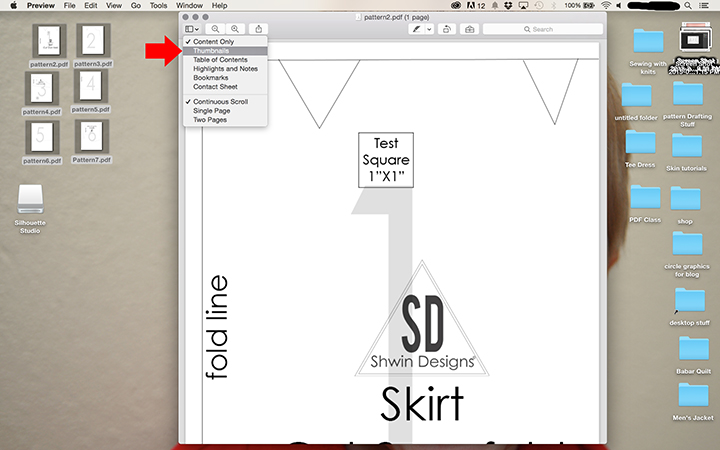
Now I use Preview to combine pages real quick. I open the first one. Then from the dropdown menu I click thumbnails.
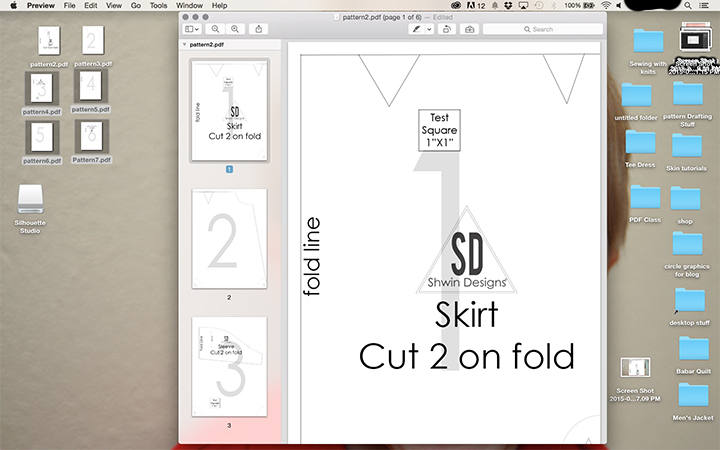
This creates a side bar where you can see all the “thumbnails” of the PDF which will only show page one. Then I simply drag and drop the other pages there (shown above)
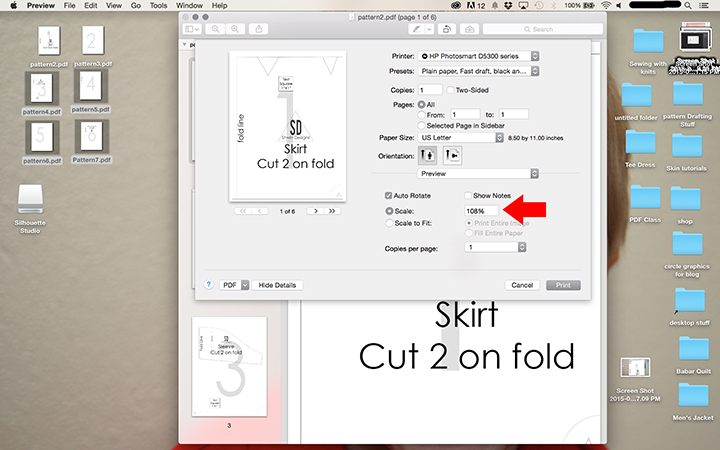
Then save the changes. Now when printing the pattern this way, preview usually scales it wrong, like shown here scaling it at 108%, however to print correctly it has to print at 100% so I always change that. This is the reason that for patterns I sell I switched to InDesign to combine pages because then this problem doesn’t occur, but for free patterns or patterns I am just wanting to store for myself, this is super quick and I know to change the scale.
So there you have a pattern. And even though I did the walk though with a single sized free pattern, you can see here what a full graded pattern looks like, I have all the pattern pieces labeled and I break down each piece into groups for each size. This makes it easy if in testing I have to go back and change a part of the pattern I can easily find and change the piece without messing with the whole pattern.
So hopefully this was all helpful, I know it kind of seems like a lot, and I won’t say it’s “super easy and quick” because pattern making does take time, and sometimes a lot of it, but the more you do it the faster and easier it does get, much like anything else I guess.
Lesley
What a fantastic post!!!! This is something I have always wanted to know how to do. As soon as I have some time I am going to sit down and follow all your instructions. It looks like you have explained it all beautifully. Thank you so much for taking the time to share.
Paper Doll Art
I was wondering how to make a pdf pattern. Thank you for sharing your knowledge, you are very generous!
Leigh Ann
Thank you, I will be trying this!
How do you make different sizes? I know how to grade on paper, but can you do it in photoshop? Or do you just follow all of the same steps and then layer them near the end?
Shauna
I do grade in photoshop now, although for the longest time I was a paper and pencil drafter and grader only. To do this I created my grade rules, (measurements used to increase the sizes and where they need to be increased) I use those to adjust the lines and anchor points as needed.