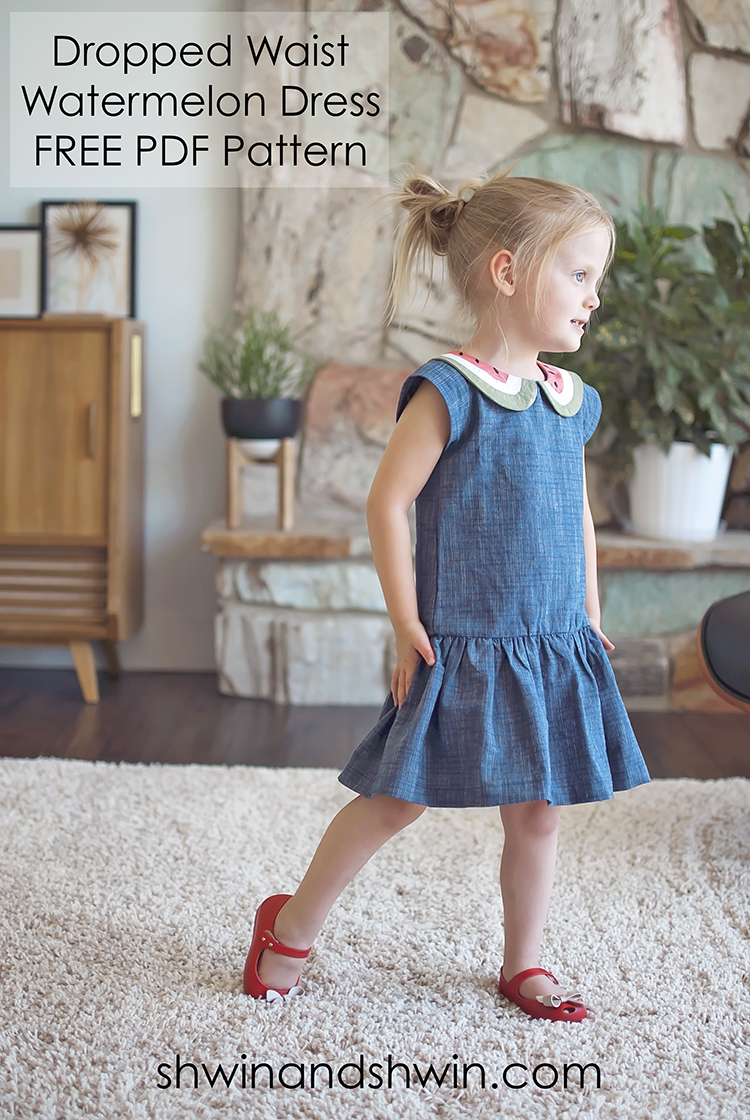
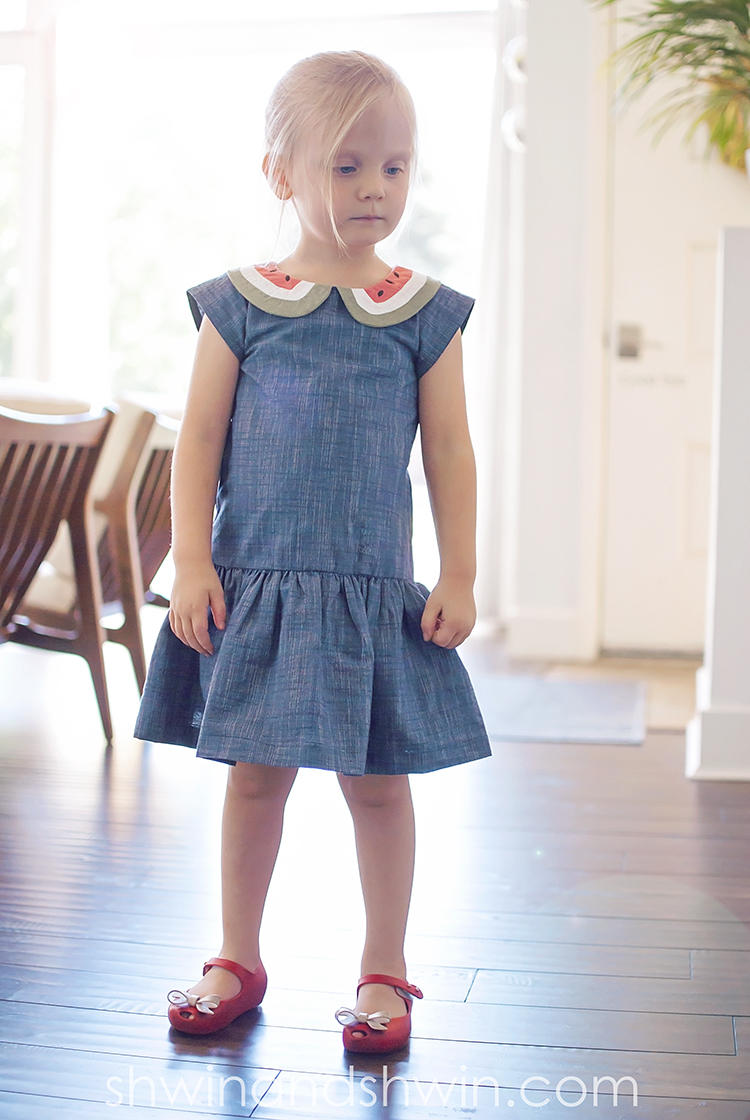
A year or so ago my sister in law gave me the cutest vintage dress for my girls to wear before it would fit her daughter. (we just pass everything on down the line) It had the cutest watermelon collar. I just knew I wanted to recreate it. (you can see a peak of the original one here) So I decided to make my own version of a watermelon collar and added it to a cute little dropped waist dress.
I am sharing a free pattern for the dress and collar in a size 2T (no I don’t have more sizes available sorry) However, I will walk through how to do the collar so you could alter any pattern that has a collar to be a watermelon collar.
You will need:
- Size 2T Watermelon Dress Pattern
- 1 yard cotton, chambray, linen or other mid or light weight woven fabric.
- 1 12 inch invisible zipper
- scraps of red (or pink) white, and green fabric for collar
- 1/4 yard light weight fusible interfacing (for collar)
- black thread to embroider seeds on collar
- I recommend using freezer paper to trace your collar pattern pieces so you can iron it on and cut out, it makes it easier.
Let’s get started:
The collar pattern is marked with cut lines for each of the colors, but you will also cut 2 full size collar pieces for the under collar. If you are altering your own collar, you will trace off the sections, to do this measure and mark the sections, so they are evenly spaced. How wide you make each section is up to you, the smaller they are the tricker it may be to sew. Also if you are altering a collar from a different patter you may want to make the collar wider, since it’s easiest if you are working with at least a collar that is 2.5″ wide or wider.
For the colored sections, I traced and cut the pattern on the freezer paper so I could iron it on to my fabric. this is helpful so the pattern doesn’t slip all around since it’s small little curves. Then you will need to add seam allowance to the cut edges of the pattern. (you don’t need to add it to the neckline or outside edge since those already have seam allowances added on. I added 1/4″ seam allowance you want a very narrow seam allowance, like you would use when you are paper piecing because you don’t wan the added bulk, but also we won’t be clipping the curves.
To sew the pieces together, place the white and green layers together so the right sides are together along the inside of the green curve and the outside of the white curve. Fitting these curves together is a little tricky, they almost won’t want to go together and the green layer will want to pucker, just sew slowly and carefully around the curve, lift the sewing foot along the way and smooth the fabric out so you don’t sew any puckers into place. 
Then press the layers open.
Press the seam allowance towards the green layer, which is the direction it will naturally want to go due to the curve. Everything should press nice and smooth for you but if it’s not laying right you can clip the curve a little, just be careful not to clip through your stitches.
Then we will do the same thing with the red and the white layer. Sew them right sides together, the curves get even sharper here so it will seem like the collar is a spiral, but again, sew slowly, and smooth everything out as you go and they do fit together.
Then once again press the layers open. This time the seam allowance will go towards the white layer.
Repeat so you have two collars, a right and left. Then press the fusible interfacing to the back of the collar pieces to stabilize.
Next you will add the seeds, for this I used the stitch number 42 on my Bernina I just watched as it went so it would only sew one seed shape for each seed.
They worked out to the perfect size and shape so it made it really easy for me, you could also sew them by hand with embroidery floss, or paint them on with fabric paint even.
Then with right sides together, sew the under collar to the collar pieces.
To clip the curve, for collars I just use my pinking shears and trim all along the edge.
Then turn them right side out and press well.
Now we will move on to the dress.
Sew the front and back bodice right sides together at the shoulders.
Then sew the invisible zipper right sides together along the center back edges. If you are afraid or sewing invisible zippers, get an invisible zipper sewing foot and never fear them again. You don’t have to prep or iron your zipper, you simply place it right sided together with the fabric. (so the zipper tape is along the edge.) Then make sure the zipper teeth fall in the groove at the bottom of the sewing foot. Then sew straight down the zipper. It’s so easy, and always perfect.
Repeat with both sides so the zipper is sewn in place.
Then sew the front and back facings together at the shoulders. Press the seam open. Finish the outside edge as desired. (I serged mine)
Then with the bodice right side facing up, place the collar along the neckline so the back meets right at the zipper teeth, and the front collar meets together right at the center front. Then right side facing down, place the facing along the neckline, turn the zipper teeth in so the facing can be sew all the way to the back center edge. Sew from the center back, and then around the collar to the other center back. Clip notches in the curve.
Turn the facing towards the inside and press well. If desired you may sew the seam allowance to the facing.
With right sides together, sew the sleeve to the arm curve. Finish seam as desired. Repeat for the other sleeve.
Press the sleeve edge under by 1/4″ and then again by 1/4″ and press well to mark the hem. Then unfold the second fold. Repeat for the other sleeve.
With right sides together match the front and back bodice. Sew from the sleeve edge, sew to the armpit and then turn and sew down the side. Finish seam allowance as desired. Repeat for the other side.
Re-fold the sleeve edge to the marked fold line. Then sew along the folded edge to secure the sleeve hem. Repeat for the other sleeve.
For the skirt (cut following the measurements listed on the pattern) Fold in half width wise so the right sides are together. Sew along the edge to create a loop. Finish seam allowance as desired. Sew two rows of basting stitches along the top.
Match the seam of the skirt up with the center back, with right sides together. Then gather the skirt evenly to fit the waist of the bodice. Sew the skirt to the bodice.
Hem the skirt by folding the bottom edge up 1/4″ and then again by 1/2″ and sew along the folded edge to secure the hem.
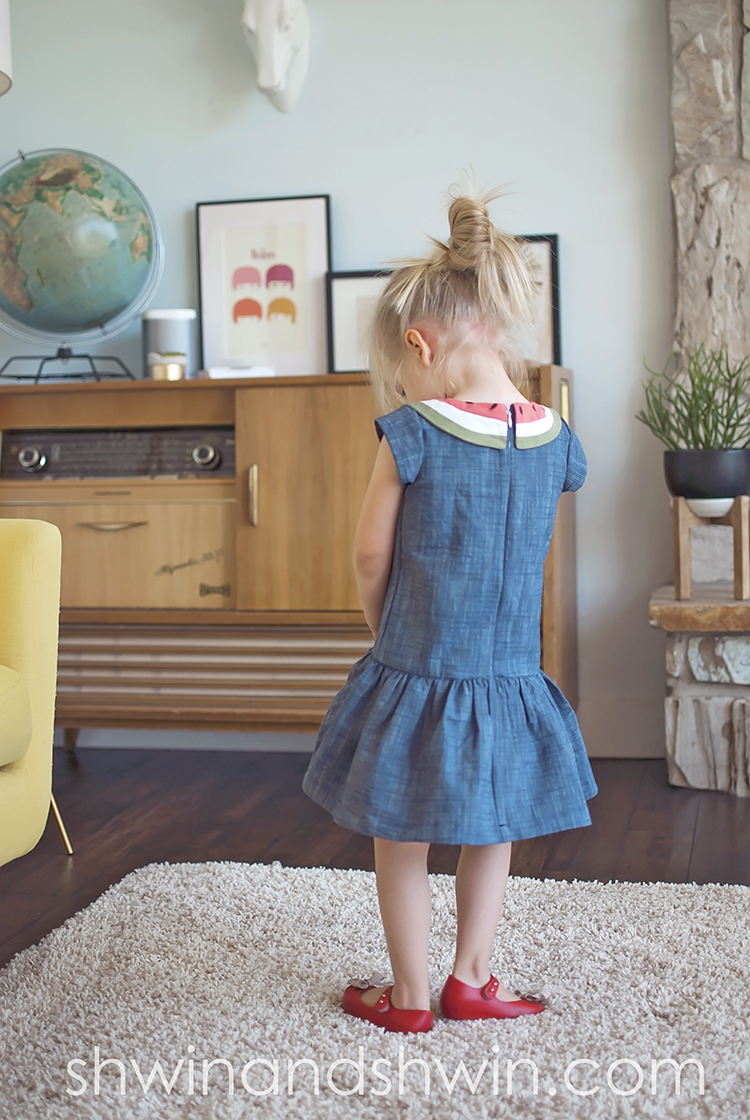
Then you are done! One cute watermelon collared dress.
With an invisible zipper down the back.
Now go make one! Mix up the color combos for a cute striped collar, or ombre collar.
