Hair and Skin week wrap up
Today is the last post for our Hair and Skin week
Re-cap? Glad you ask! This week we had tutorials for…
And now I bring to you the final installment
Women’s hair tips.

Picture from L’Oriel
I thought I would share a few color tips. I mean let’s face it the home hair coloring market wouldn’t be a 1.54 billion dollar industry if no one was coloring their hair at home. So for all of you who do color your hair at home, here are a few tips for better results.
I of course still suggest seeing a professional.
(after all once upon a time that is how I made a living)
So tips for today:
- Highlighting (or using foil)
- Retouching color
- Bangs (cut and trim)
Highlights First
To do a highlight here are some things I suggest, although do foil my own hair I don’t reccomend it. Find a buddy to practice with. For the tutorial I used my amazing sister in law for my model, we didn’t actually do a color for the tutorial I just used conditioner which is great for practice if you are trying to master the technique. (and very hydrating for the hair) Please if you can at least go to Sally’s beauty supply or some other beauty supply store to buy your color. Here’s why:
- You don’t need a license
- You can have help picking the right supplies and color
- It is tailored for your hair
- It hardly costs more
- It is easier on your hair
- You will have better results
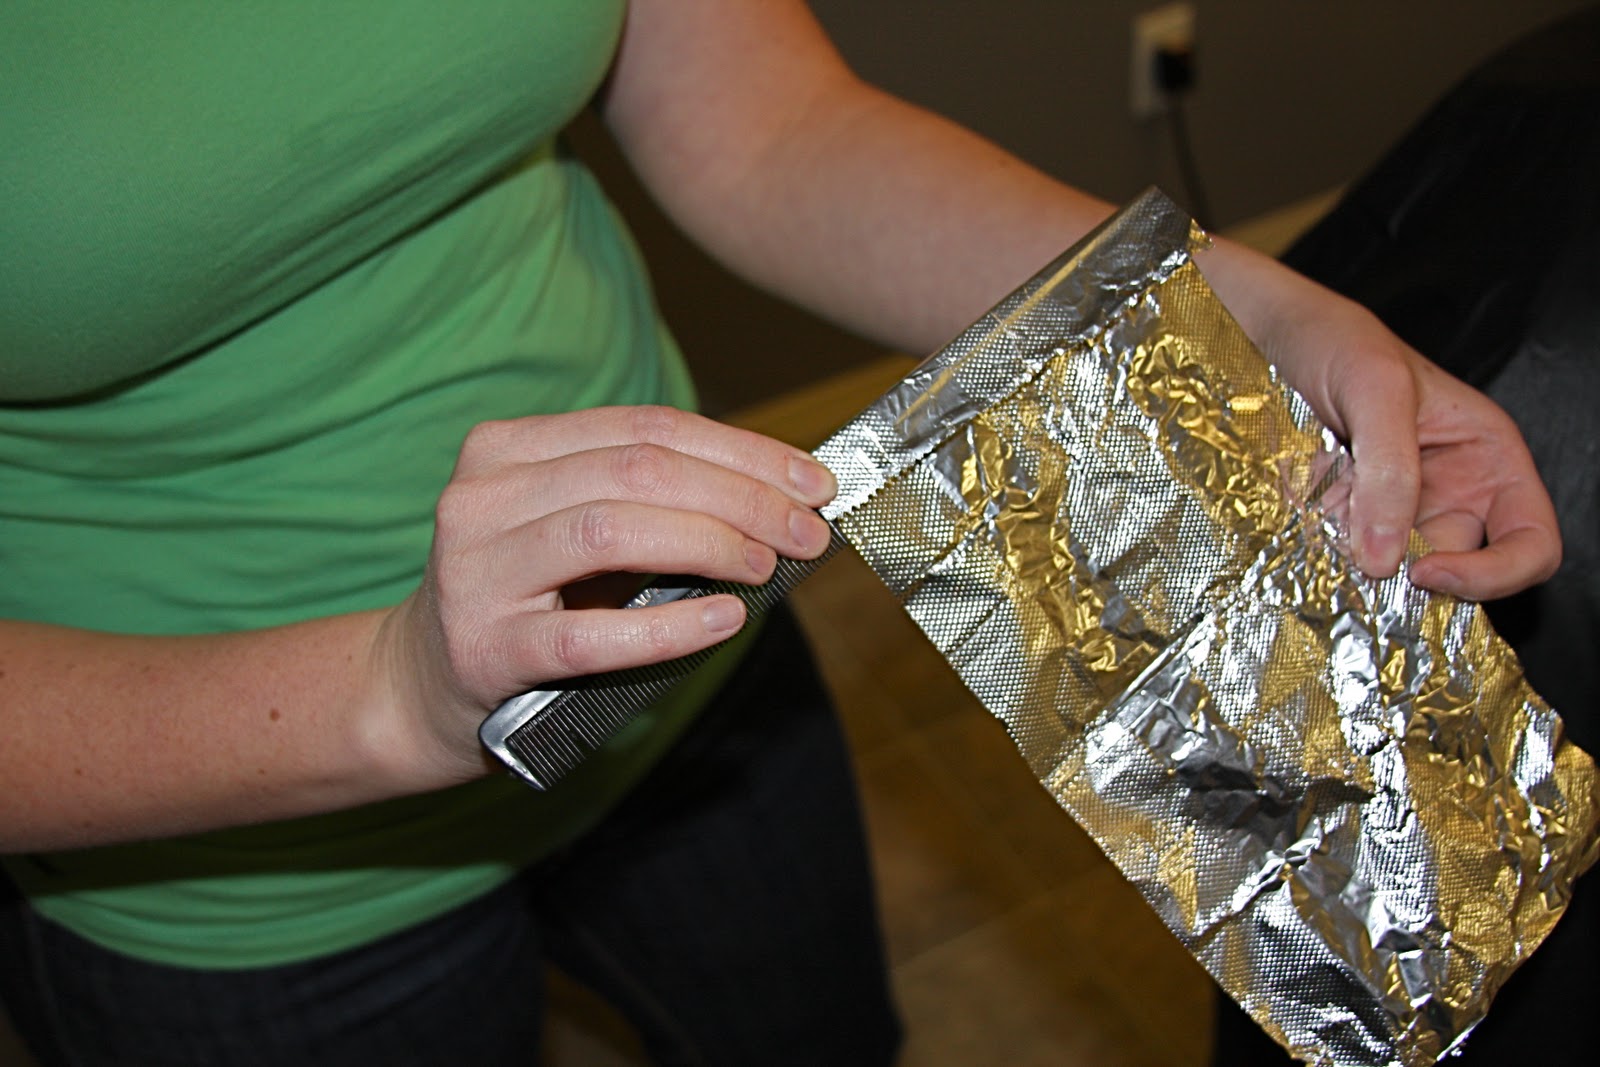
Ok so now what you will need:
- Foil
- Rat tail comb (has comb on one end and tapered edge that comes to a point on the other)
- Color bowl (or any non-metal bowl really)
- Color Brush (looks like a paint brush
- Foil (if you will foil your hair often buy the pre-sliced sheets at the beauty store, otherwise kitchen foil is fine)
- Clips to hold your hair
Ready to go?
 |
| Section off the hair. Then take your clip and pin the top of the section up. (as shown) Grab the bottom selection and hold it taut between your fingers. |
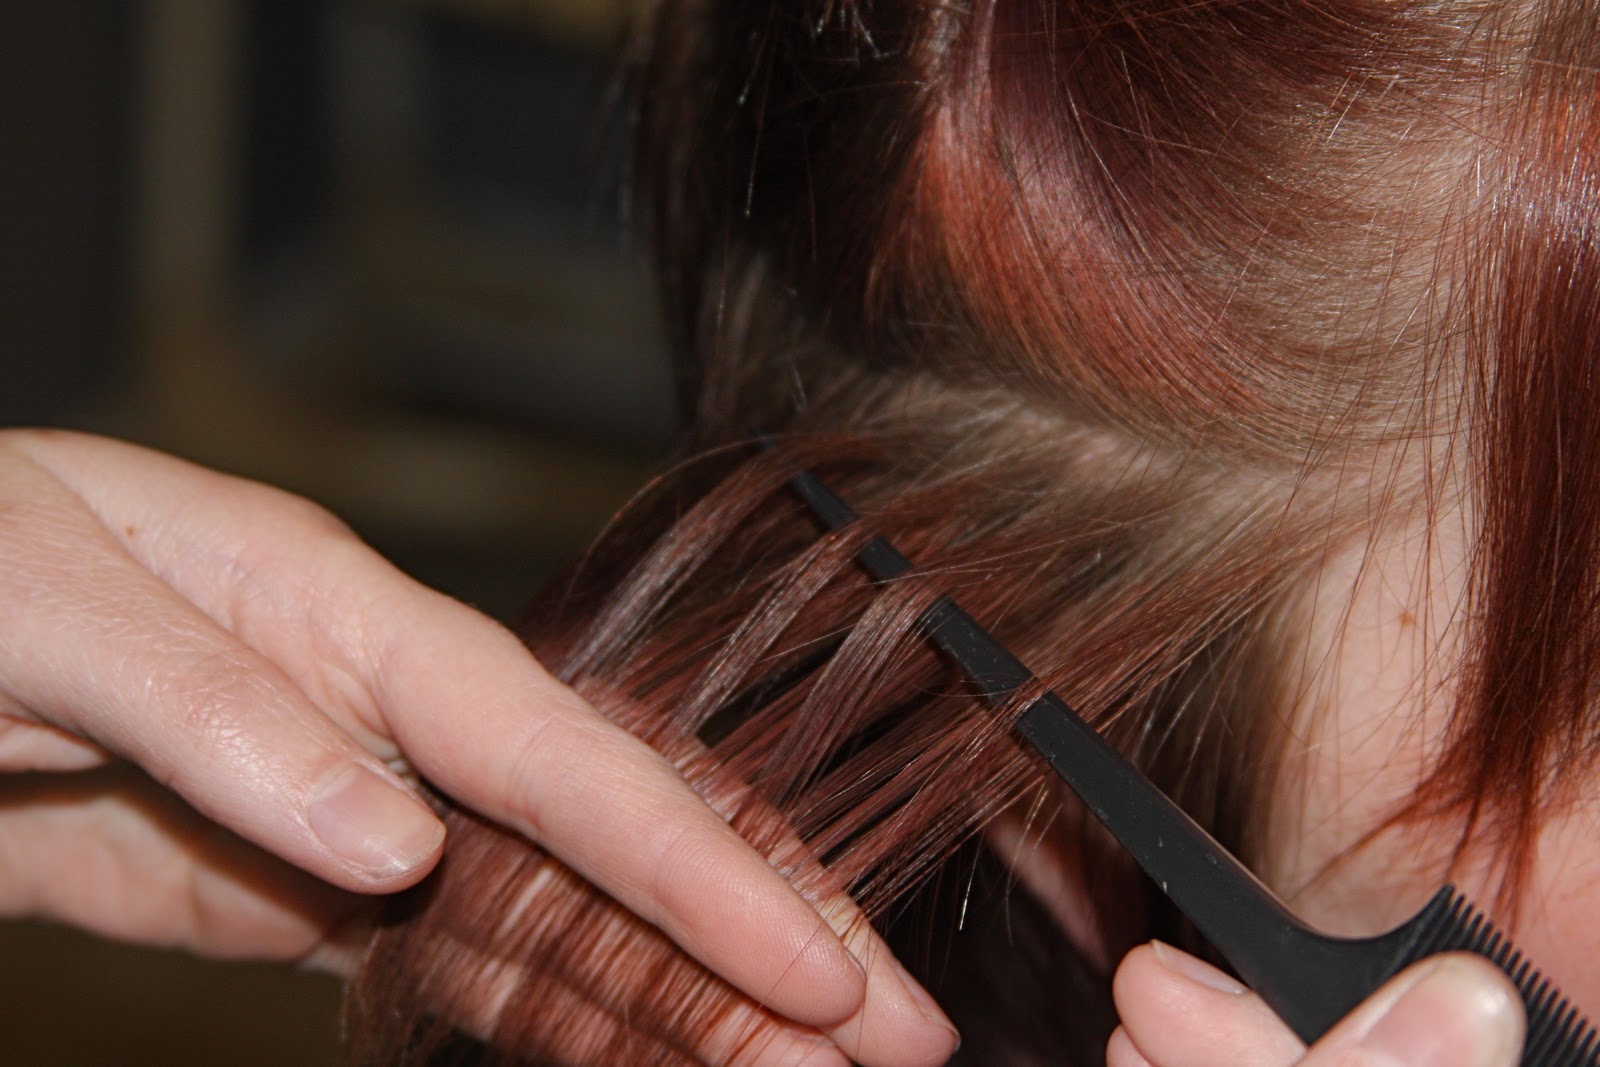 |
| Weave the comb through the section of hair. How wide you weave is how chunky or thin your highlights will be. |
 |
| Then pinch the hair left on top of the comb. Keep holding it |
 |
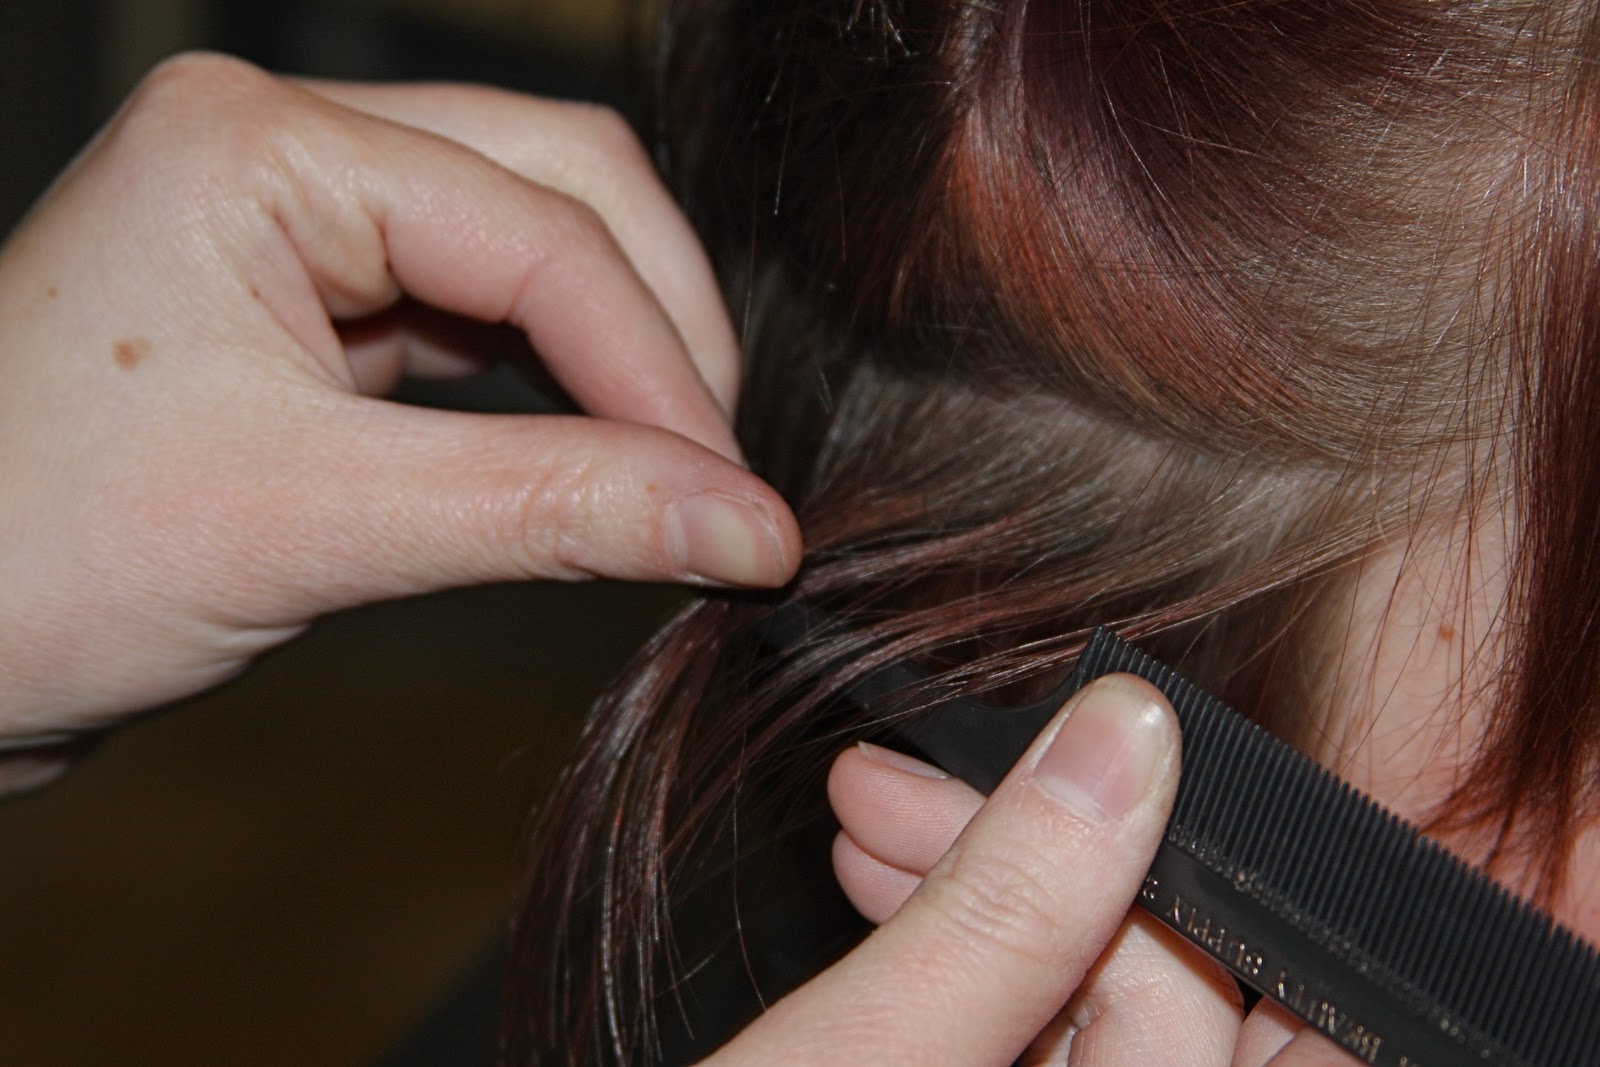
| Then you will fold the foil over the tail of the comb as shown |
 |
| Place the fold side against the head (that flap will come in handy later) Hold the hair tight and pull the comb out. |
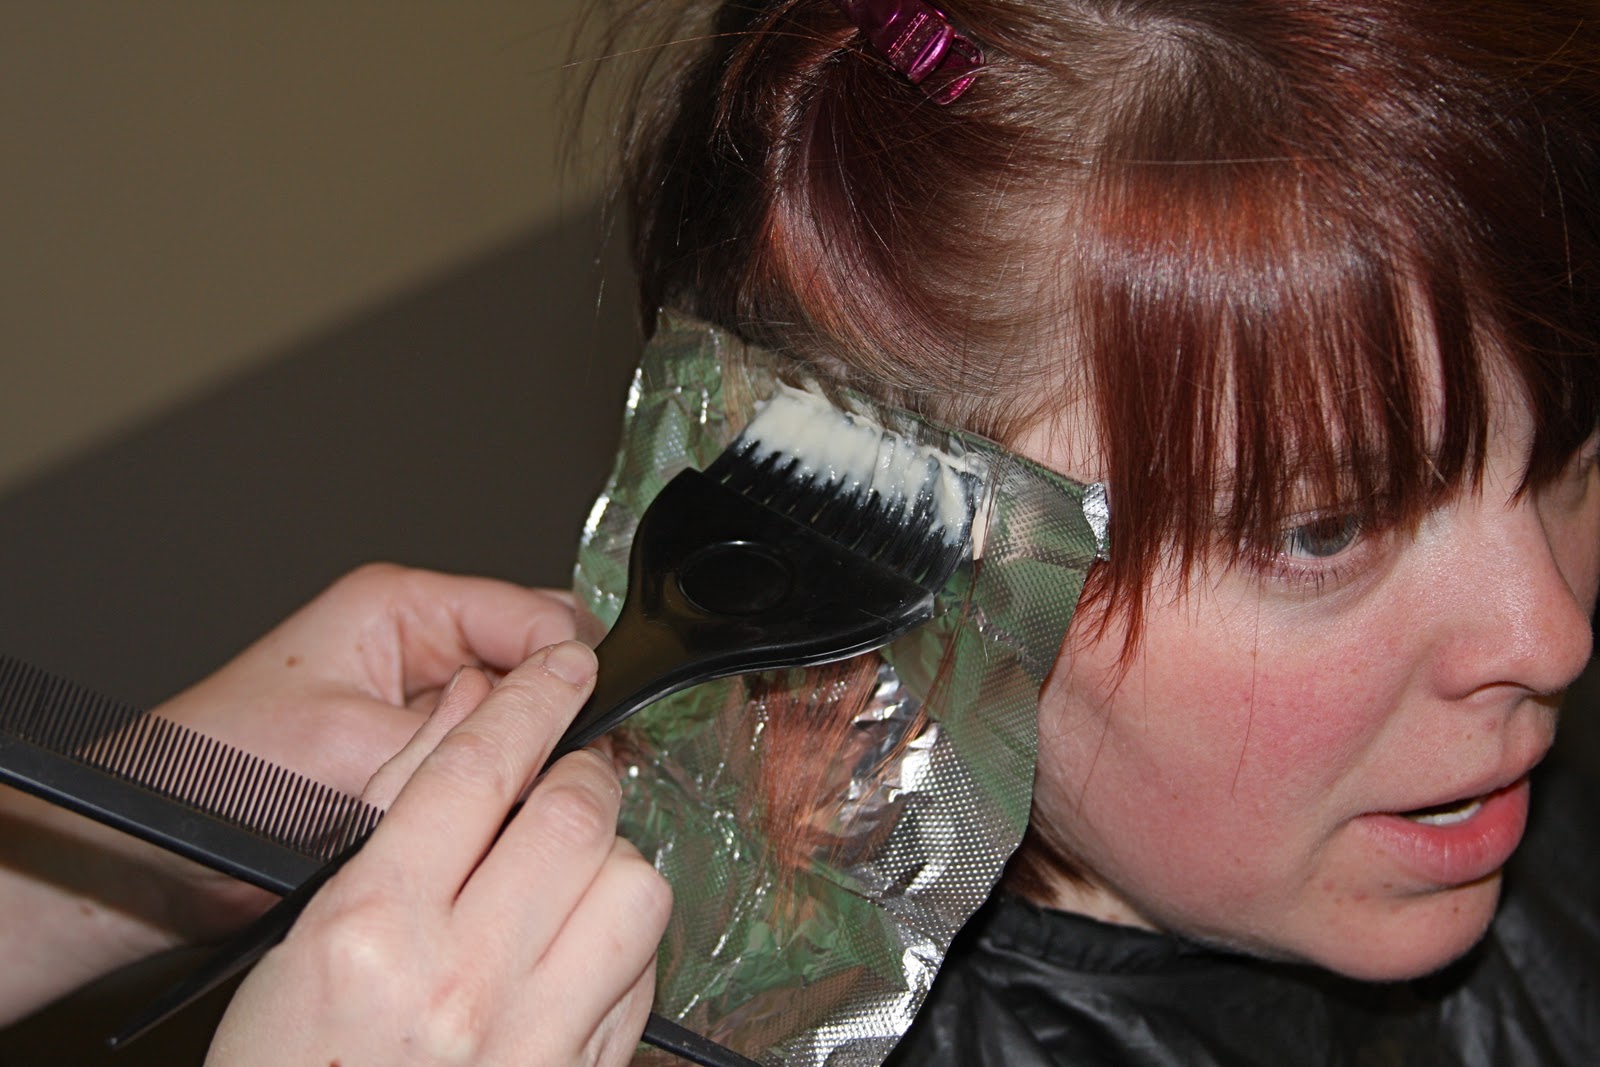 |
| With the bleach or color on the brush start a little down from the roots and paint the hair. You want to get the bleach or color close to the scalp but you don’t want to get it on other hair or create those tiger strips so don’t get too close. You can flip the brush on it’s side and carefully paint just the strands of hair up to the scalp, but use caution. |
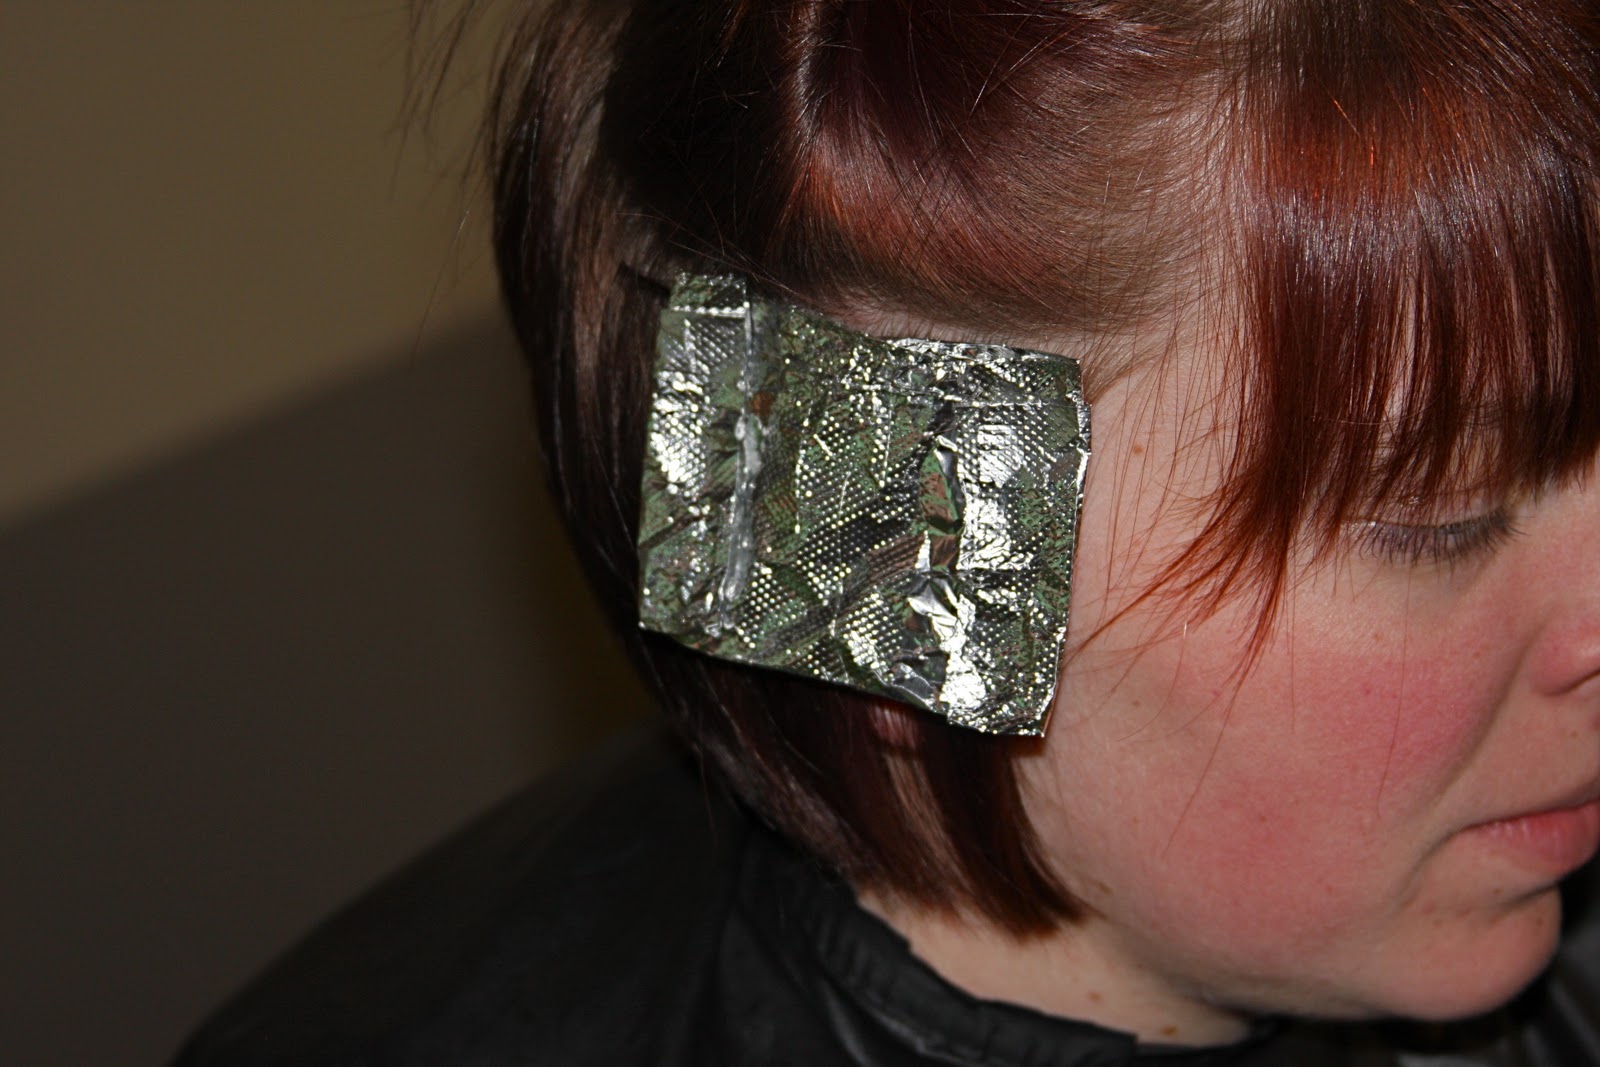 |
| Then you will fold up the foil fold the bottom up to the top, and then up again. Then fold in the sides and it will stay in place. You want the foil to stay up against the head so this is where that flap in back can help out, if your foil slipped away from the scalp then lengthen the foil by unfolding the flap. Keep moving up the side of the head and add as many as you want all around and on top of the head. Now the retouch This is really pretty easy and basic but a picture can make everything better. |
 |
| You will simply paint the color on the the roots, up to the point where the previous color starts. Then done, when you are done painting all the roots, you can rub the rest of the color into the ends to freshen the color. (which I do recommend) Now on to the bangs. The best friend and worst enemy of all women. I mean they are great and I love them I can’t remember the last time I didn’t have some kind of bang, but seriously bangs are what make bad hair days. Ironically they also fix bad hair days. So ladies let’s get the bangs right. |
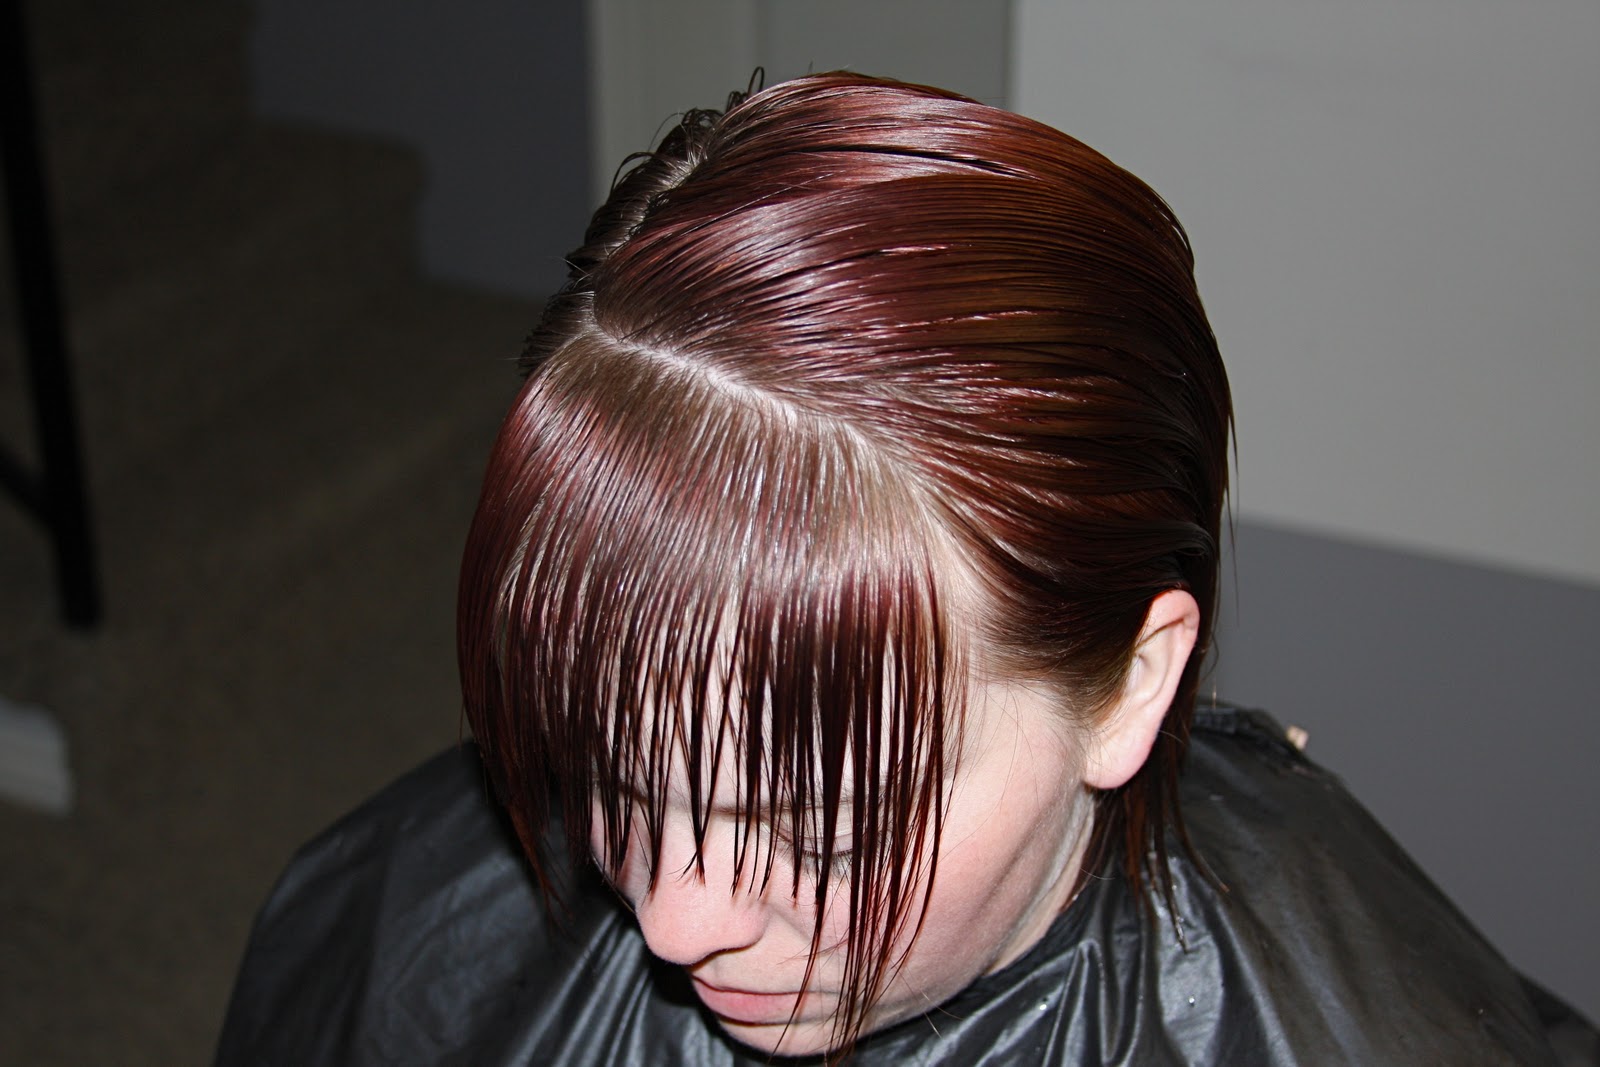 |
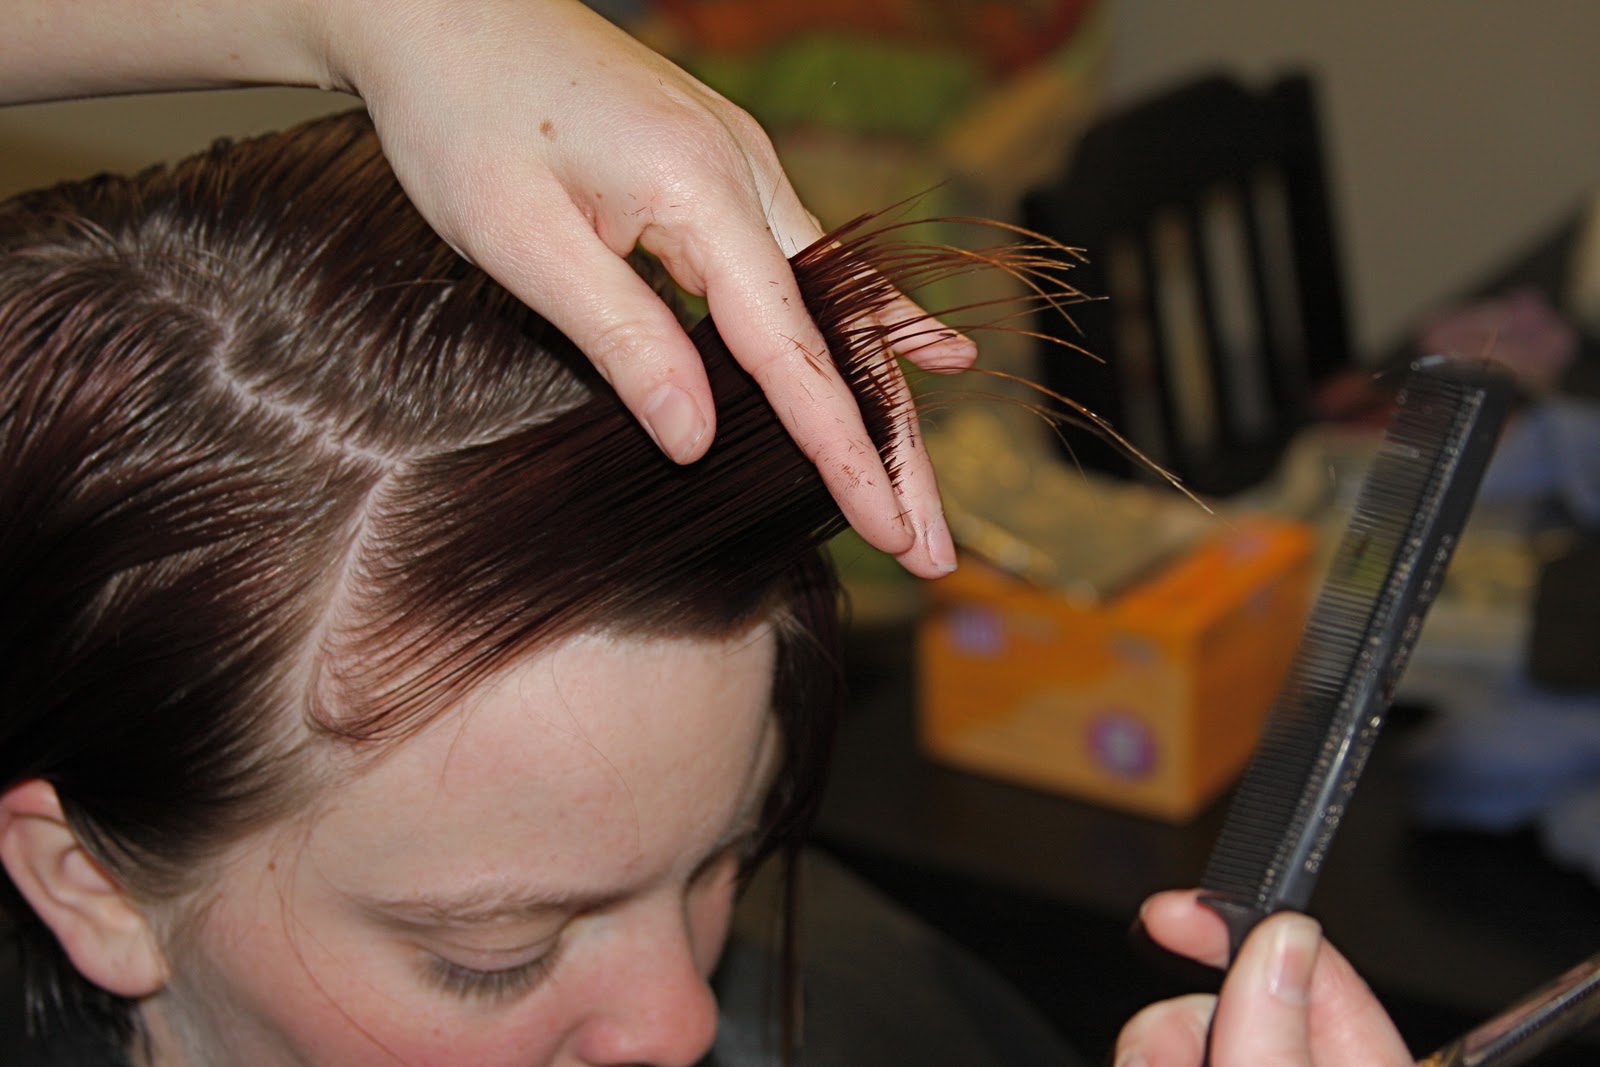
| My sister in law is currently sporting the full straight across bang, so that is what the tutorial is for but the tips work for any style bang. So first with wet hair section off your bangs. Slick back or clip back the hair you don’t want cut other wise you will end up with too many bangs. |
 |
| Then take the middle section of the bangs and comb it up from your head at a slight angle as shown above. |
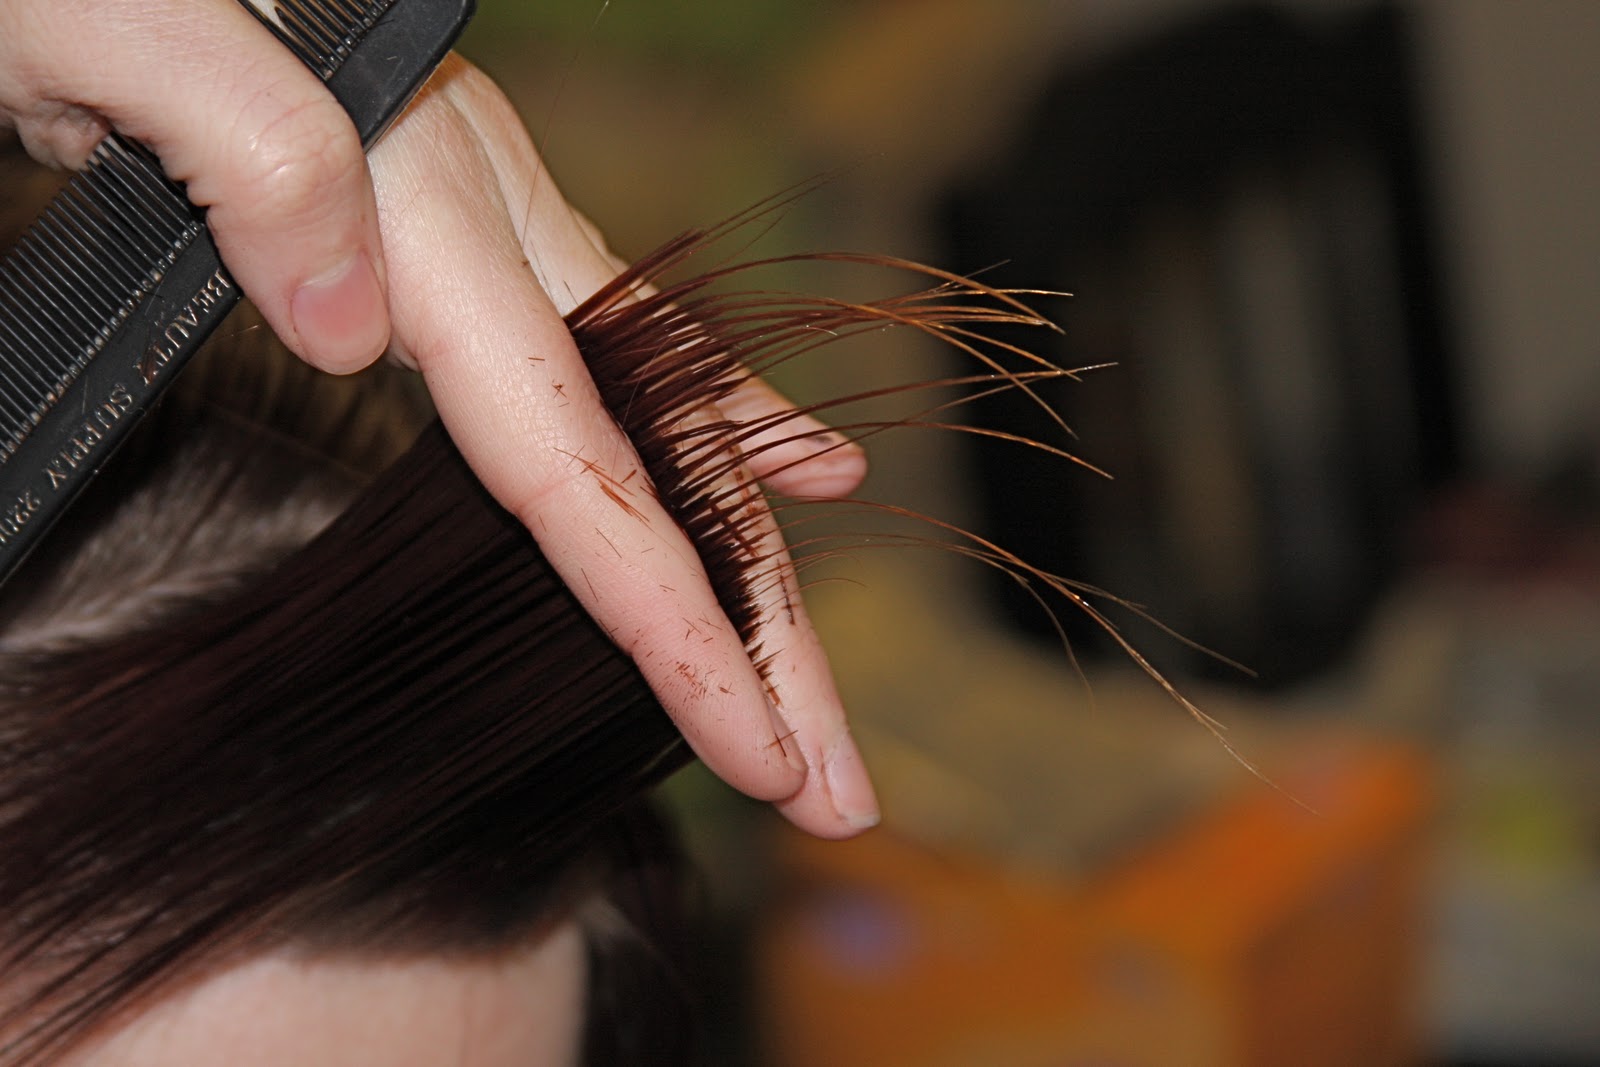
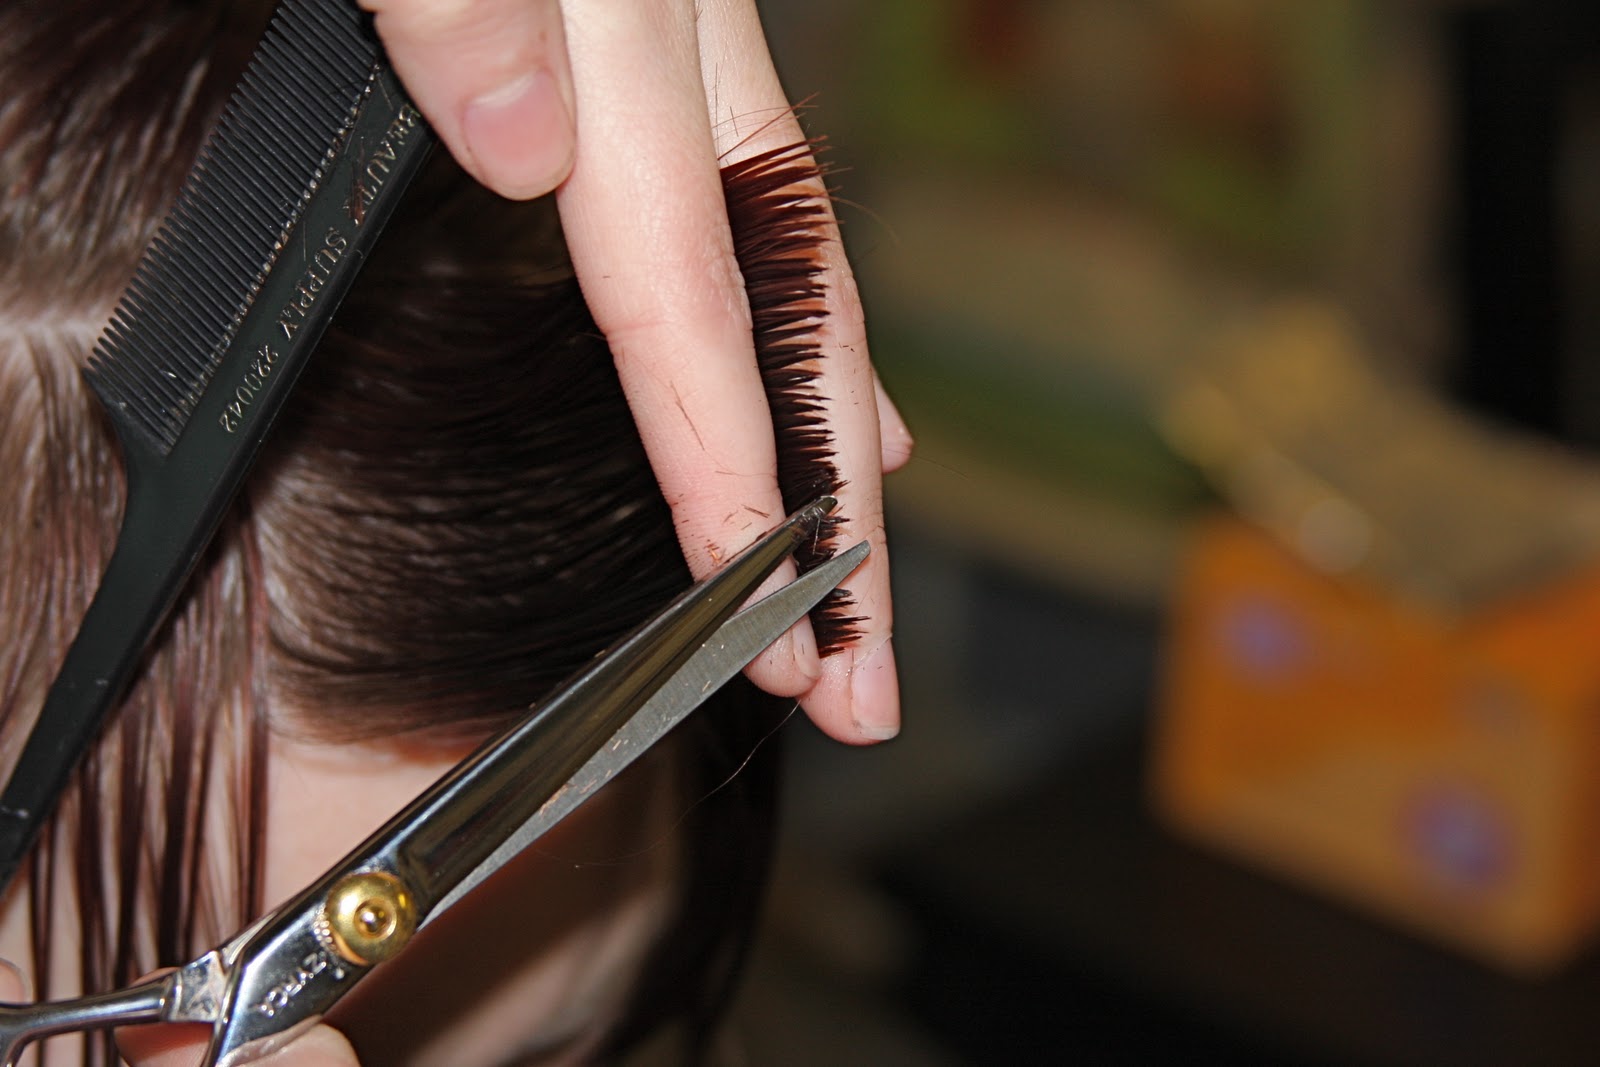 |
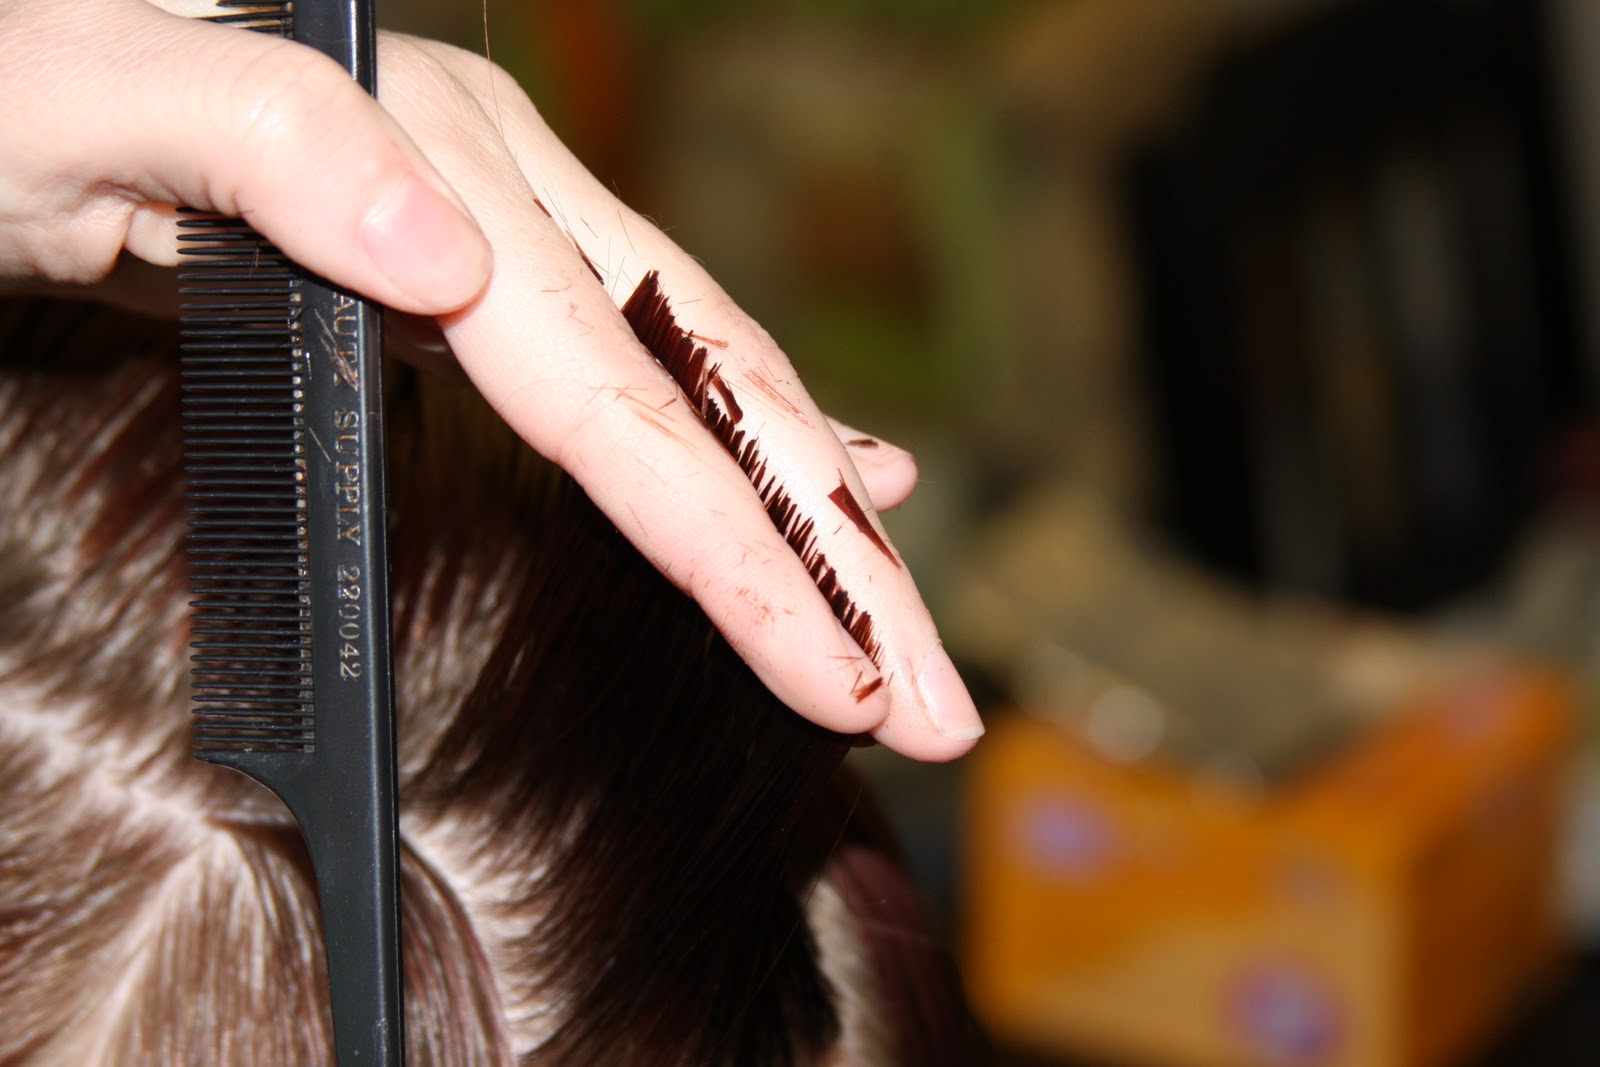
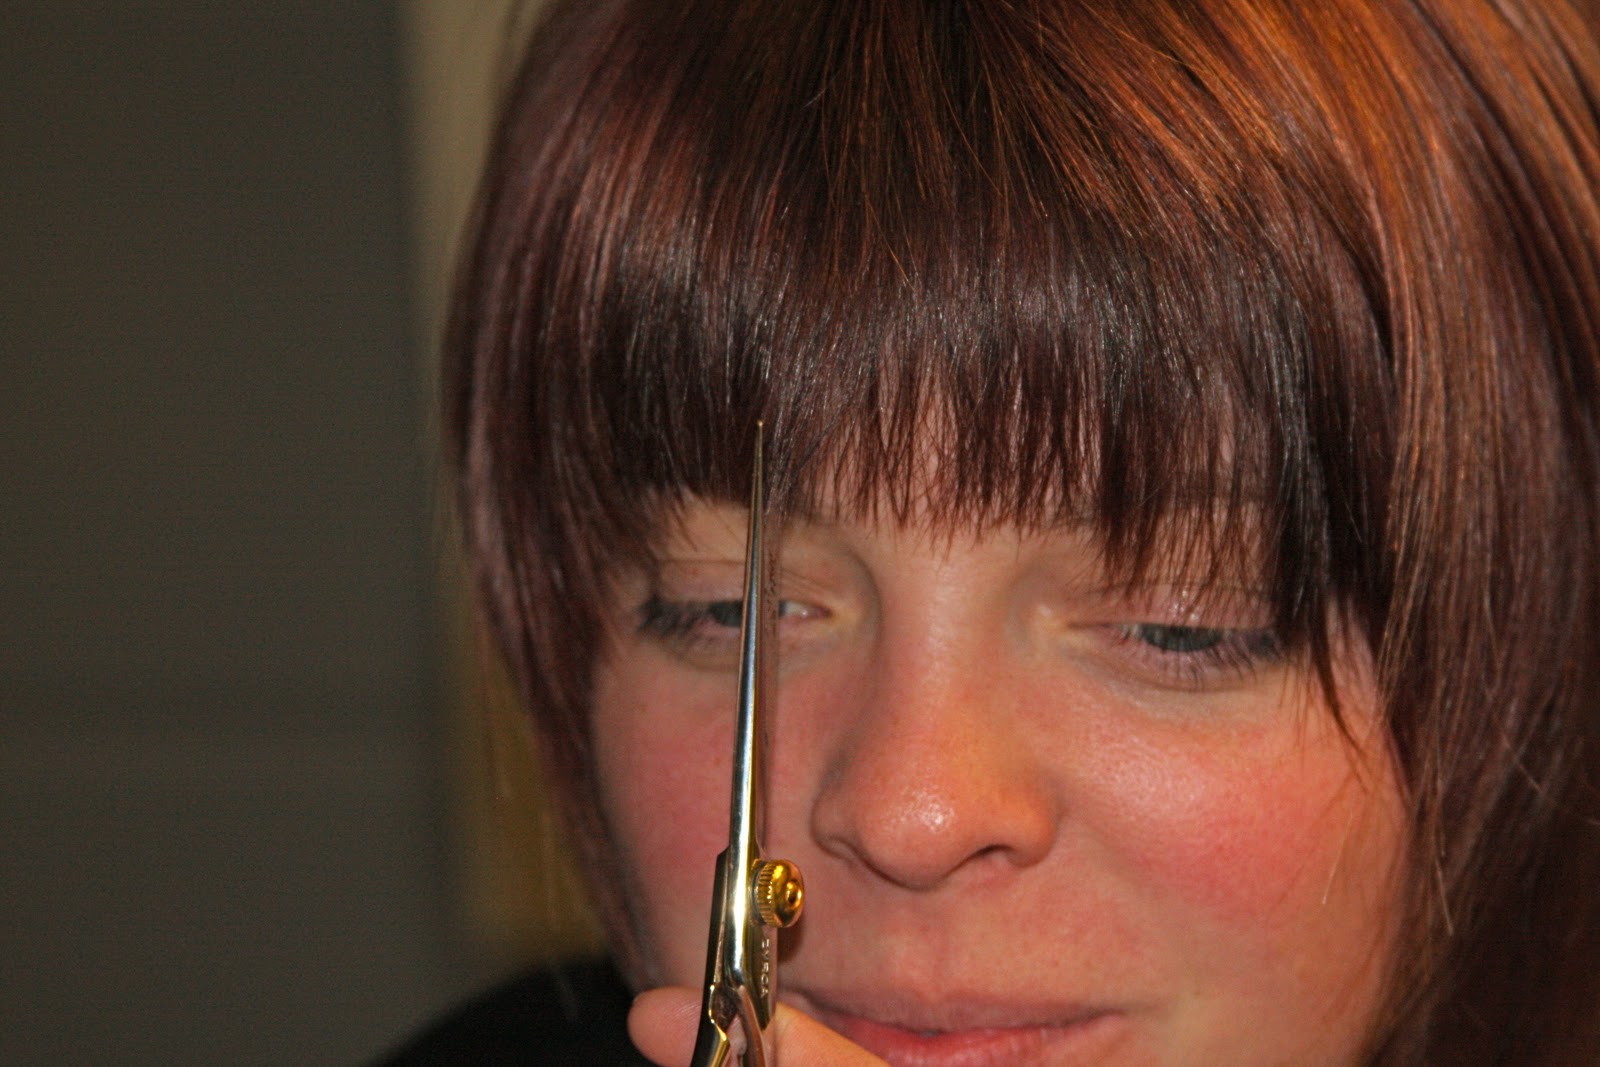
| Then with your scissors on the side notch away at the bangs. Start slowly you can always take more off, I have been doing hair for 7 years and I still start slow, you can’t glue hair back on. |
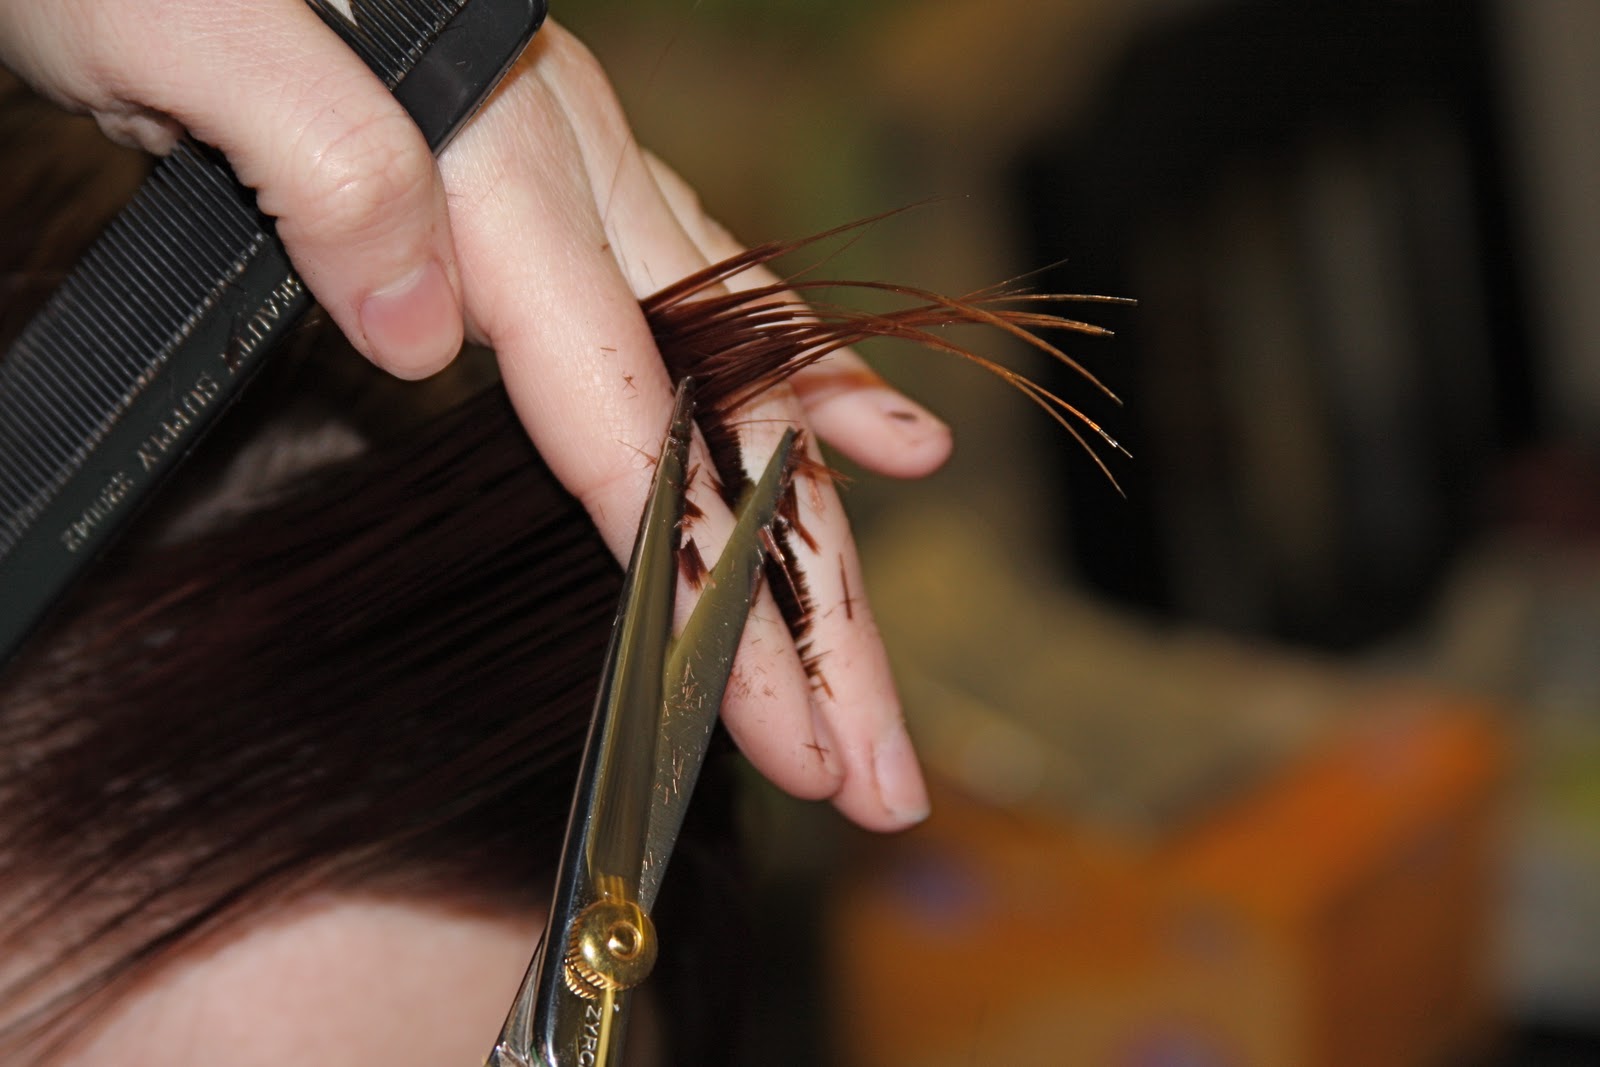
 |
| Then you are going to lift the hair more straight up and cut off that point at the end there. (see it?) |
 |
| Now it is gone |
 |
| Next comb the hair from the side to meet the hair in the middle. |
 |
| See how you can see the hair you already cut? |
 |
| Cut that hair to the same length. Pulling it to the center is how you get it so it is slightly longer on the sides kind of framing your face slightly. Do this to both sides. |
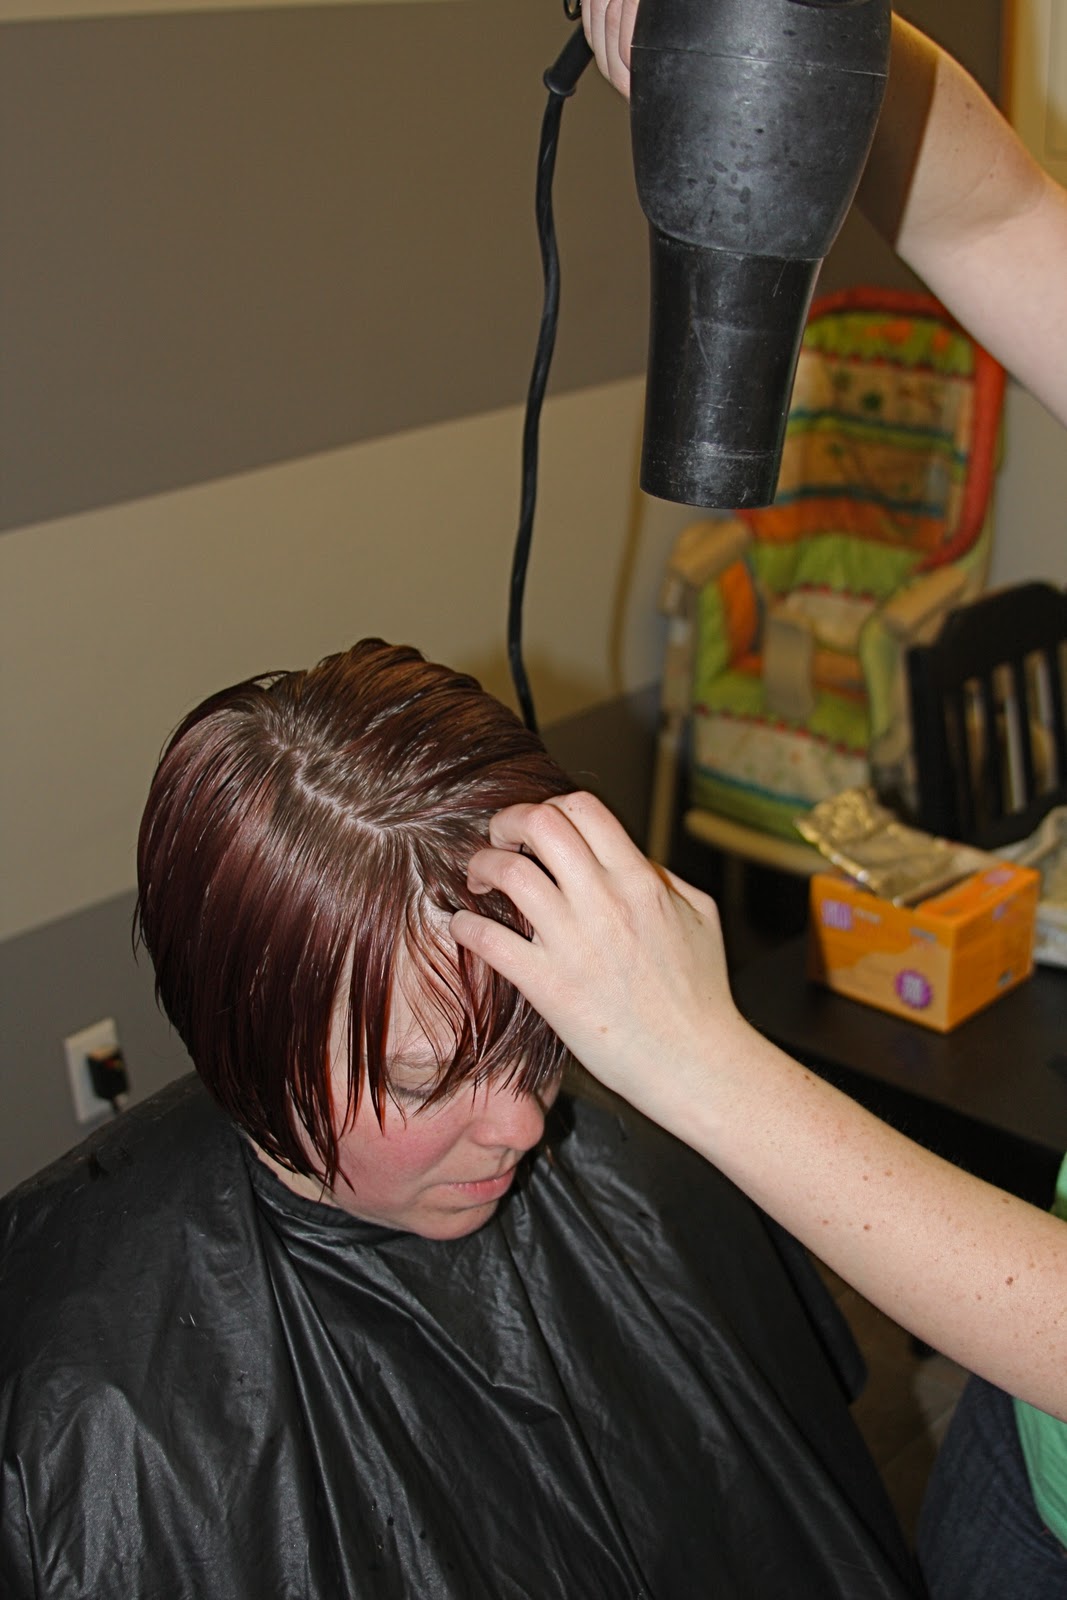 |
| Then for drying, I like to have the hair dryer blow straight down and making my hand kind of a claw I comb through the bangs. |
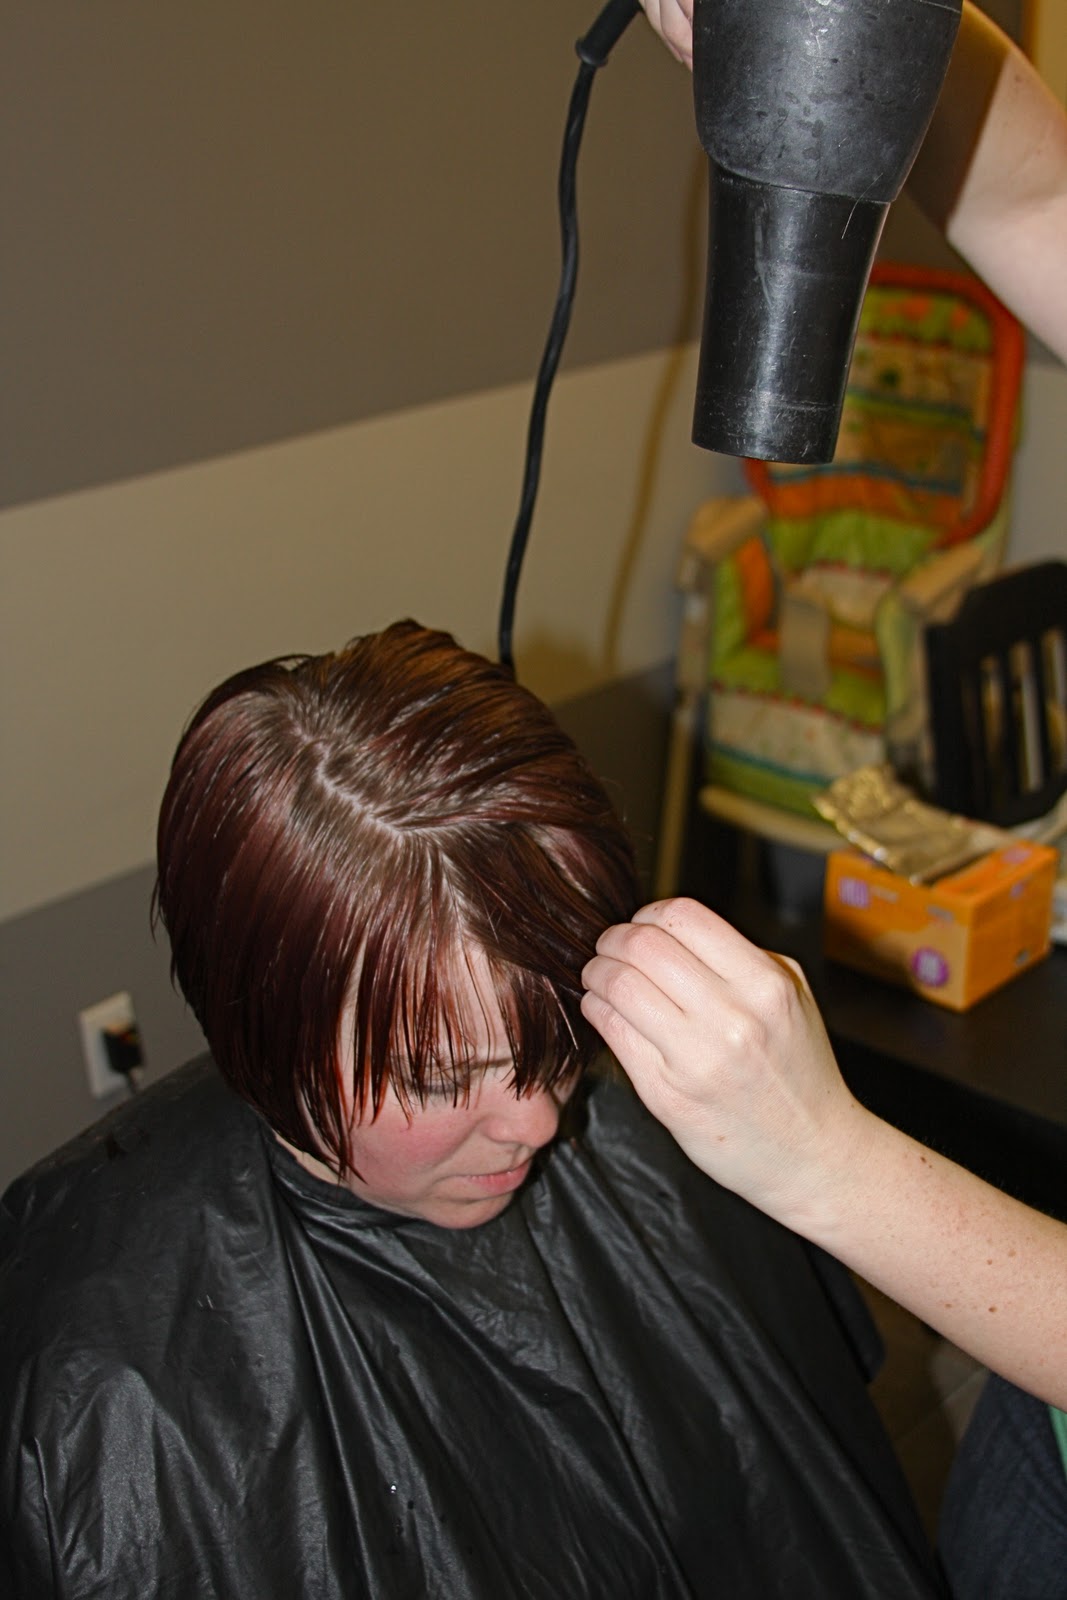 |
| You can pull the hair straight as you are drying so it will lay right and if you have a curl or kink in your bangs feel free to break out the flat iron (my best friend) |
 |
| If you are trimming your bangs between cuts dry and style them as you normally wear them and with your scissors straight up and down trim away slowly until they are the length you want. (again do this slowly) If you dig the side sweep bang you can do this one of two ways
Enjoy!
Well there you have it the end of Hair and Skin week I hope it inspired all of you to try something new.
Now we are back to our crafting! (it has been building up)
|
Stephanie
How awesome, thank you. I just got bangs on Friday, so I may use your technique. :)<br />I tried the boys cut on my son … heh heh! Sort of butchered the back, but I think it's doable for the first try.
Shwin W
I hope you use the technique! You will find bangs are easy to tame. <br />I am also so happy you used the boys tips! It will get better over time, I butchered my first boys cut as well, my poor little brother had a terribly embarrassing cut for a few weeks, it get's better.
Anonymous
Hello. Just stumbled onto your site. <br />I have dark brown hair with lots of gray mixed in! I've been coloring my hair light brown for years trying to hide the gray. I'm thinking I'd like to save $$$ and cut back on the chemicals. Wondering if there is a natural product that I could use to highlight/lowlight my hair at home to let the color grow out and begin the process of going to