 |
| Today we wrap up the Love Birds Top Sew-along. Are you with me so far? I hope you have been able to follow the steps all right so far, but please feel free to ask me any questions if you hit a bump in the road. The picture above is the version I have been making during the sew along and the one I made with my “Grampat” in mind. I love the angelic peacefulness that the white represents, however it was really my plan to reuse some of her beautiful doilies, that I snatched from the collection she left with my mom (thanks mom) So today we will finish it up! |
 |
| Grab your finished bodice piece and with your front skirt piece (the one cut on a fold) find the middle of the skirt piece and line it up with the middle of the front bodice piece. |
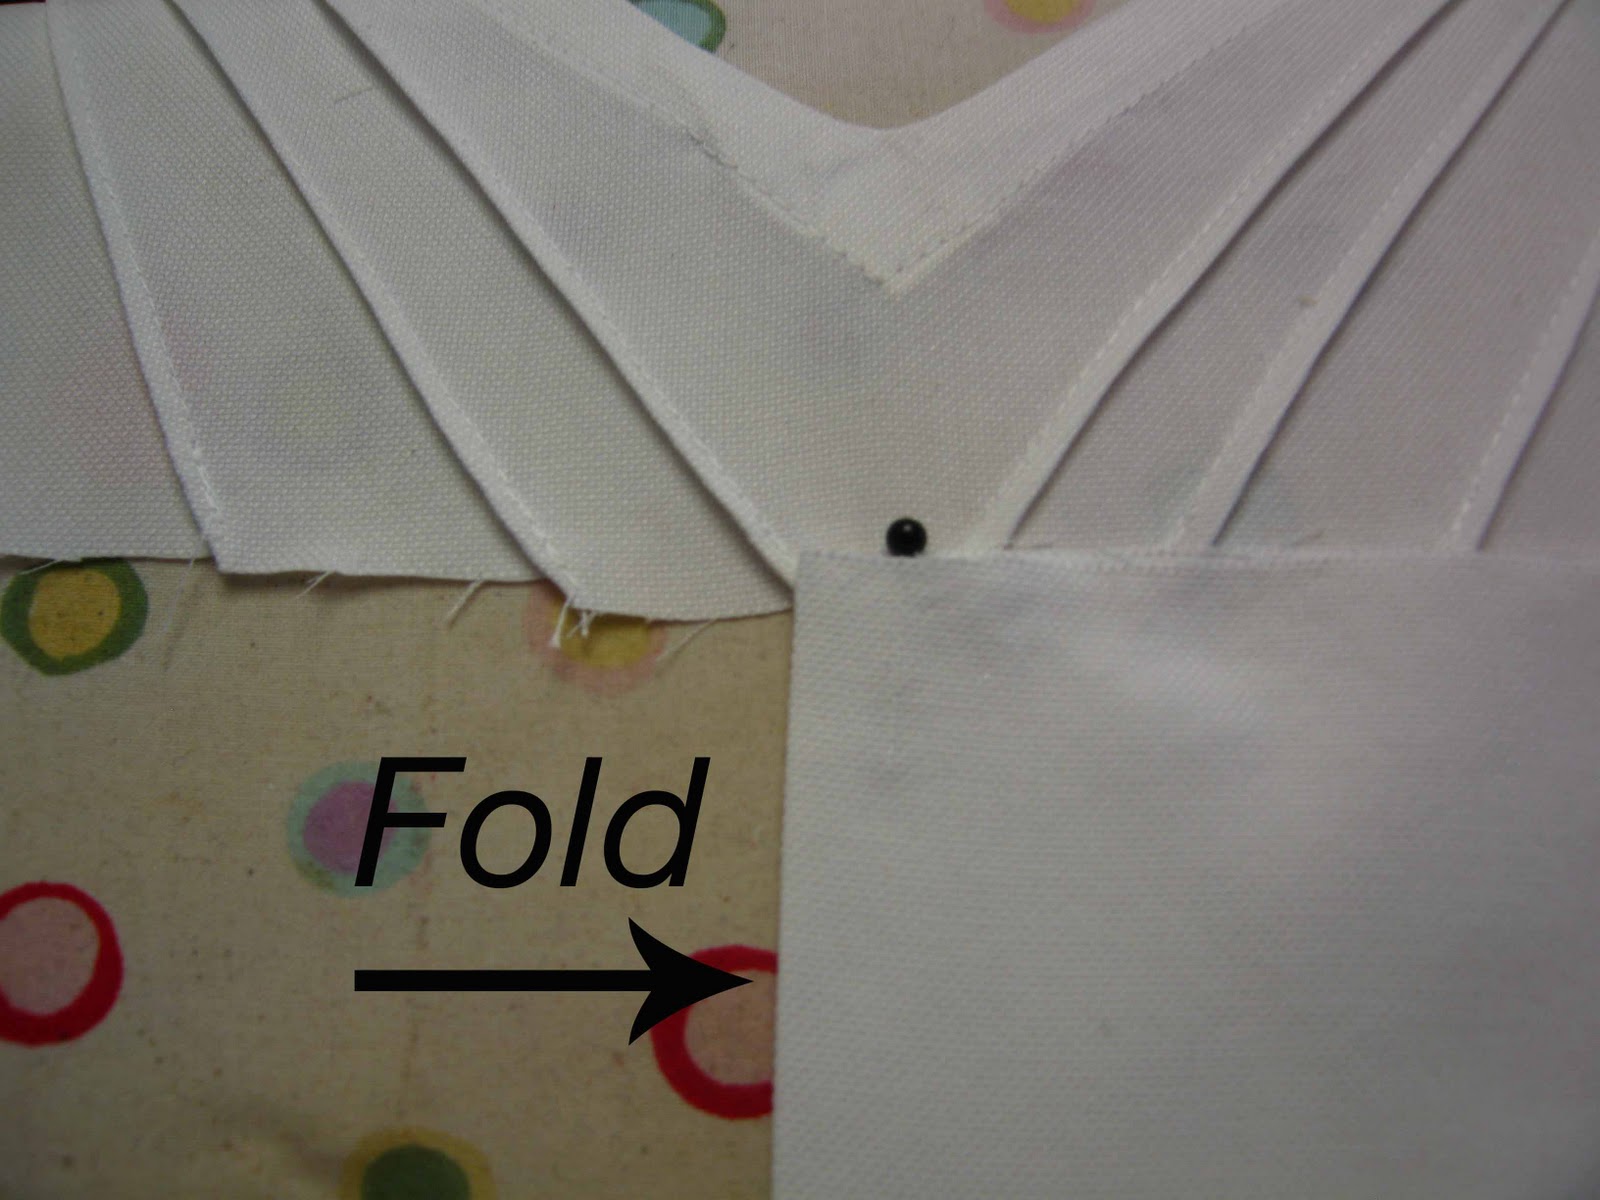 |
| Next fold the left side over to meet up with the first pin tuck on the bodice piece. As a note you are actually making the pin tucks for the right side of the skirt piece even though you are lining them up to the left side of the bodice, this will only line up well if your bodice is the same on both sides, I hope that makes sense… |
 |
| Iron the fold down smooth and mark with a pin where you want the pin tuck to end. They can be as long or short as you want them, I would just suggest measuring them so each one will be the same. Then you will sew from the pin mark to the top the same way you did for the pin tucks for the bodice right along the edge (sorry no picture for that…) |
 |
| Next line the pieces up again and do the same thing, fold and mark with a pin. Then sew. |
 |
| Continue doing the with both sides until you have all the pin tucks in place. If your skirt piece is wider still than your bodice piece you can trim the edge or add a few more pin tucks on the edge, I have done both methods and they both work fine. |
 |
| For example, I added more pin tucks to the back piece since I wanted to keep the fullness, It’s up to you how you want to do it. The back pieces are done the same way as the front with the folding and pining and sewing. |
 |
| Next place right sides together lining up the pin tucks and sew the bodice and skirt pieces together along the front and back. |
 |
| Next the sleeves, I like the style I have seen everywhere with pleats in the side of the arm seam, it gives a nice puff, you can do a gather at the top of the shoulder if you wanted to, to do the side pleats match up the sleeve in the corners of the shirt and the middle point of the sleeve with the middle of the shoulder seam. Then pleat the extra fabric in between. I did two pleats on each side. Then Sew the sleeve in place. |
 |
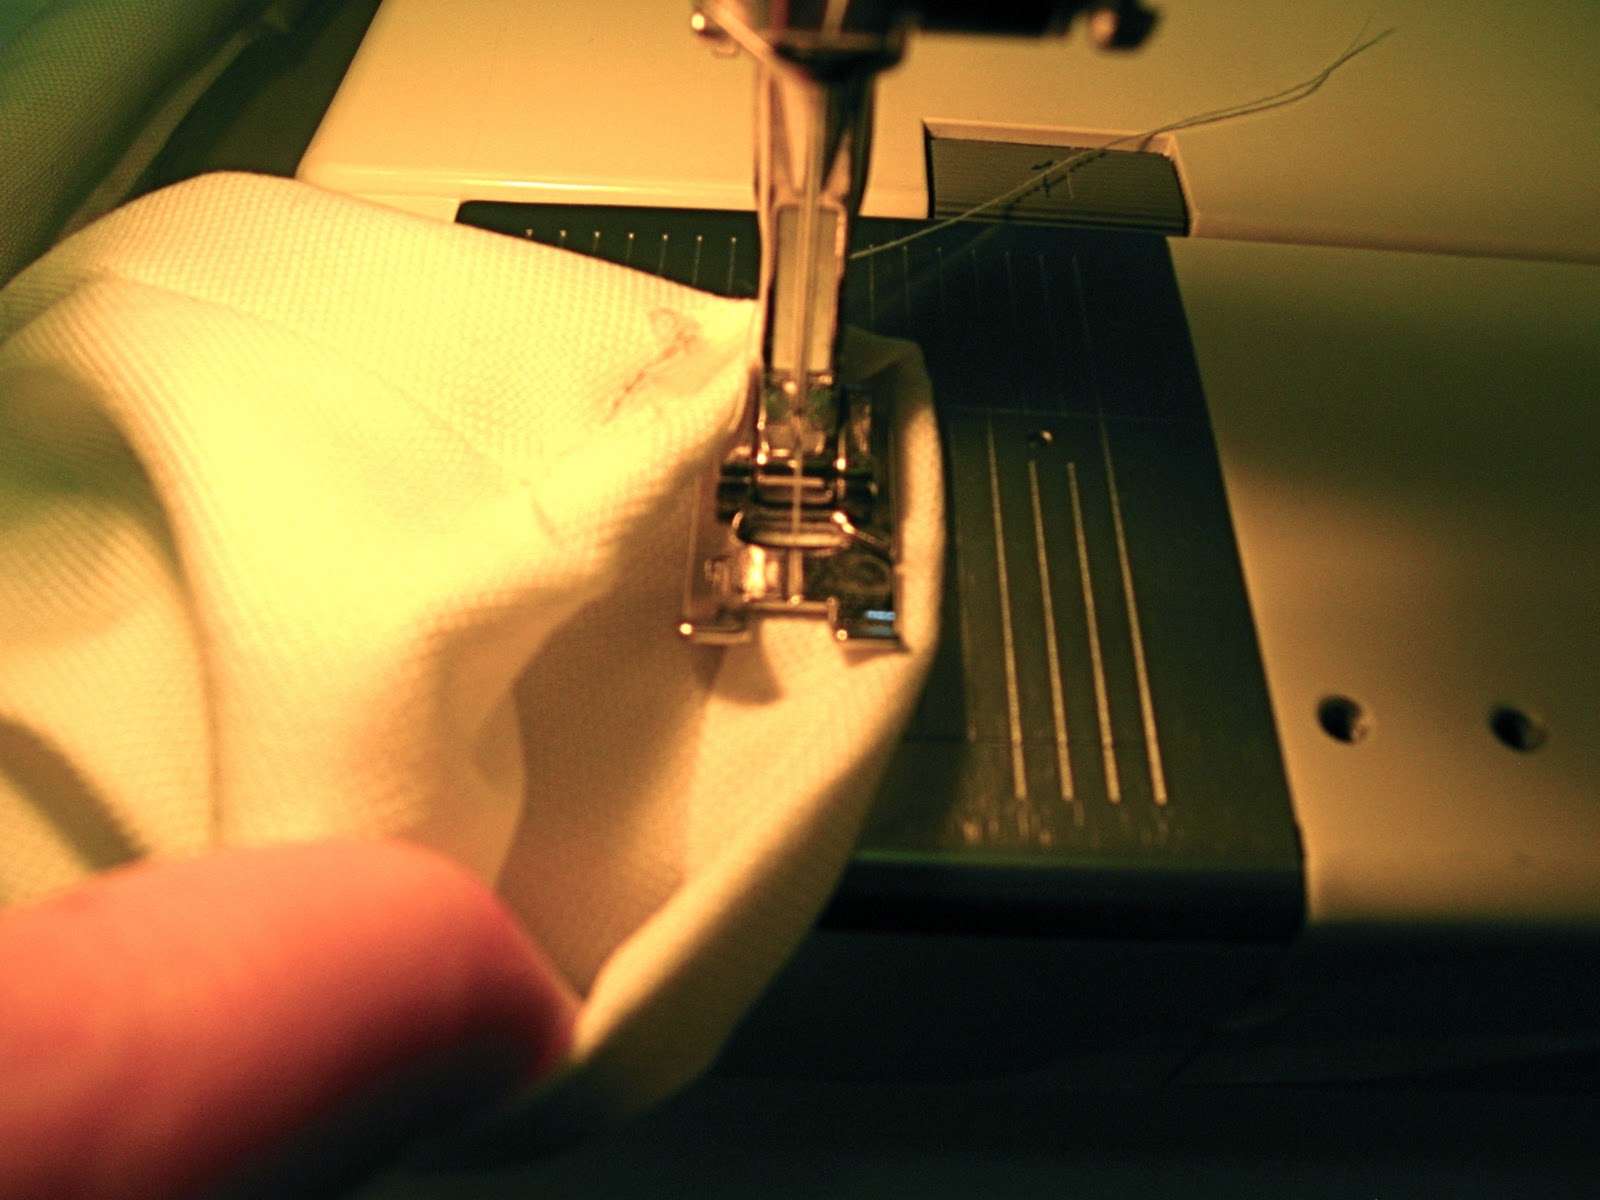
| Next the zipper down the back… Afraid of zippers? Hate zippers? No need really, They can be really easy to use, and easy to work with young kids especially. To start un-zip the zipper. Then take the right side of the zipper and place the right side down on the right side of the top. (ok that was a lot of “right” side talk I hope you followed that) You want the flap of the zipper lining up with the raw edge of the shirt and the zipper part towards the inside, like the picture above. |
 |
| Then I start at the bottom, which is actually an inch or so away from the bottom of the zipper since the zipper part is in the way. Then if you have a zipper foot you can use that, or you can be too lazy to switch out to the zipper foot and just sew carefully with a regular foot. You want to sew as close to the teeth of the zipper as you can. Sew all the way up. |
 |
| Then turn the flap around to the inside or wrong side of the top and line the fabric up so it comes to the edge of the zipper. Then starting at the same place at the bottom top stitch up to the top. |
 |
| Repeat to the other side and you have a zipper all most all the way in. Just the bottom should not be sewn in yet… |
 |
| Start by placing right sides together of the back pieces, then starting right under the zipper sew the two back pieces together. |
 |
| Then lay the back out flat and you can topstitch in the rest of the zipper, starting where you left off on the bottom crossing the bottom of the zipper and then back up the other side. Zipper done. Not to bad right? |
 |
| Next (and I am sorry the picture shows the after of this step and not before) Place the right sides together of the top and sew along the sleeve to the armpit and turn to go down the side. |
 |
| Next hem the sleeves, you do this by turning the fabric under and then under again to cover the raw edge. Then sew along the edge to hold the hem in place. Also hem the bottom in the same way. |
 |
| Next I took the doily of my Grandma’s and cut apart a few sections and then I hand sewed them down to the front neck line. |
 |
| I also added one solo one to the bottom edge of the top. It is almost perfect… Except the darn deep V… So I fixed it, and if you have the same problem here is how you could fix it too, without having to redo the whole bodice (although I did consider doing that) |
 |
| I took some white cotton and folded it then I cut a half circle. |
 |
| I pinned it in place along the neckline |
 |
| And sewed it down. Done, neckline raised up… |
 |
| For the pink top I made a freezer paper stencil of two love birds and the word love and added that to the bottom of the top. (hence the name of the top) The shirt is a lot of fun to customize. |
|
| There you have it! I hope you were able to sew along with me! It has been a fun new adventure, I have a sew along for boys next! (likely the first week of March) Please show off your lovely creations in our Flickr group We would LOVE to see them! |
Sharon
I love this! very pretty! I am hopeing to make this next week, thanks for sharing!!
Dominique @ Craft Couture
I'm hoping to get this done tonight :). So pretty!
brickstory
After I finish this weeks project I am totally tackeling this… I LOVE it! They are both so cute but that white one is ultra sweet!
casserole
I love this little top! The pintucks are such a beautiful detail!<br /><br />I linked to your tutorial on Craft Gossip Sewing:<br />http://sewing.craftgossip.com/free-pattern-love-birds-top-for-toddler-girls/2011/02/10/<br /><br />–Anne
The Extra Ordinary Bree
I didn't realize pintucks were so simple! I've been too scared to try this now I'm going to have to give it a go!
Rachel
Ok, I took 2 days off to finish this one because when I got to day 3… the zippers threw me off! Does anyone know the length of the zippers? Should the zippers match the shirt/dress or be white? I made mine orange (2 actually because I love to dress my girls the same).
Shwin W
Rachel, The length of the zipper is going to depend on the size or length of the garment. I used a 7 inch zipper for both of my tops, the pink one has a regular zipper in the back and the white one I used an invisible zipper. It just depends on how much zipper you want to show, I find they look about the same really. I matched my zippers to the fabric, but contrasting zippers can also be a fun
Rachel
I got one of my Lovebird shirts done and posted it to flicker (the darts look a little crooked 🙂 ).