 |
| Remember this top? It was one of the few I have taken the time to upload the pattern for. I always intend to upload the patterns for anyone who cares to use them but somehow it rarely happens. Part of the reason was since it was really a struggle to find out how to make that possible. Sweet kind Kelly from sewing in no man’s land helped me out a lot trying to figure out the way to do it. I am by no means a pro, and I almost doubt the way I do it is the best way, but incase anyone else is struggling to upload a pattern for their own use or to let others use, here is how I do it. |
 |
| Start by drawing a rectangle as a guide inside the paper, you do this since a printer doesn’t print to the edge. Make up as many as you need. I needed 3 pieces for this pattern. |
 |
| I color the corners of my paper so that it will help when I scan to make sure they stay full size. |
 |
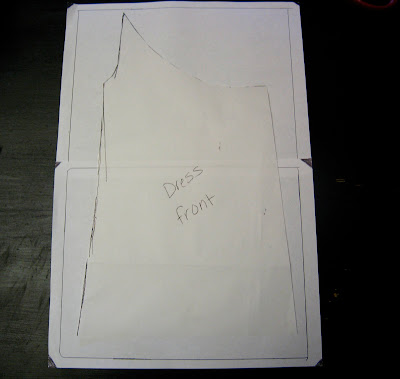
| Then for the body of the dress I needed two pieces together, line them up so the lines meet. Then trace your pattern on to the paper. |
 |
| Add dots, or marks so you know where to join the pieces back up when the pattern prints. |
 |
| trace all of your pieces and then you are ready to scan. |
 |
| Usually when you scan you get a preview where you can adjust the scan space size. Make sure to include all four corners of the paper (hence the reason I mark mine) Accept the scan and save the image. |
 |
| Open Photoshop (or a program like photoshop, but the instructions may vary a little) Open your saved scanned image. Start by selecting Image size. |
 |
| Check the size, you want it to be the size of the paper you scanned, (or close) I also set my resolution to 300. |
 |
| Then select the little pen tool and select “add anchor point” tool. |
 |
| Click to add an anchor then drag the point and the line will bend. |
 |
| Once you have the line in place and in line with the pattern, right click and select, “stroke path” |
 |
| Select the text button to add any text to the pattern like instructions or labeling the pieces. |
 |
| Lastly you flatten the image. |


Jessica
I'm so glad you shared this. I've been trying to figure this out FOREVER! Thank you thank you, and thanks Kelly too!
TaRa
very useful! so kind of you to share this and many other beautiful clothing with us. Thank you!
TaRa
I might add a test square to the downloadable pattern
April
Wish I had seen this before I bought pattern drafting software! I have gimp, which is supposedly the same as PS only free…I've never used PS so I can't personally say whether it does everything but it does some pretty cool stuff and I'm pretty sure it would do this. Plus I wouldn't have had to spend all those hours teaching myself how to use CAD…which I'm still mediocre(
colorfulpurls
Wow! Thanks for sharing!
felicia
Great tutorial! Now if only I had photoshop still
katie
Thankyou so much i have been hunting everywhere to find out how to this! Have a feww of my own patterns i would love to share, now i might be able to xx<br /><br />Katie lilyboo&co
Justine of SewCountryChick
Thanks so much for this great tutorial Shauna. It is getting me that much closer to publishing my patterns!
Nikki
Though it was written a while back, I’ve always found this post to be a very valuable resource and I refer to it often. Thank you for sharing this! I’ve noticed in your more recent patterns you use a lot more digital graphics, any hope of seeing a tutorial on how to do that?? 🙂