Our last (but most certainly not least) Guest this week is non other than the super talented Tam from sew dang cute! I just love her blog! I love her ideas, her crafts and I love her competition Crafting with the stars! It is super addictive so well organized and put together and fun! I have admired many things that she has done and I was so excited when she agreed to share a tutorial with us today! Here are a few of her other tutorials that are my favorites and if you haven’t seen them already you should go check them out:
 |
| Like these Pottery Barn Inspired Pillows |
 |
| Or how about this super cute knock off skirt |
Browse through her whole site you won’t be sorry! Then you will likely get addicted to crafting with the stars as well… For now here is Tam with a great tutorial for us!
Hi Shwin & Shwin readers. My name is Tam and I run a blog called Sew Dang Cute Crafts. I’m so excited to be here with you this week as you learn more about Adobe PhotoShop, and am thrilled to be sharing a tutorial with you about headswaps and other photo fixes. I currently use the version CS3 and LOVE it!!!
We have all been there. You take a picture and someone has their eyes closed, their face is shadowed, or their facial expression is “off”. One of the best things about PhotoShop is you can fix all of these problems. Let me show you what I mean.
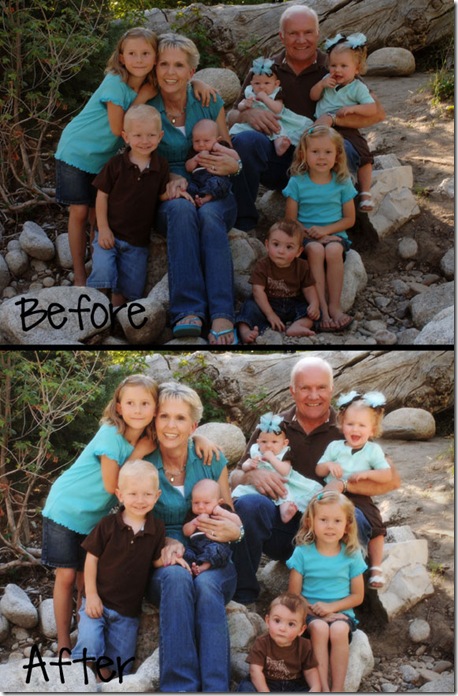
Here we have a family photo. Now when it comes to children, I just want a picture where everyone is looking at the camera. My daughter is the one on grandpa’s lap that is picking her nose. Even though she is looking, I didn’t want that, so I swapped her head and arm out from another photo.
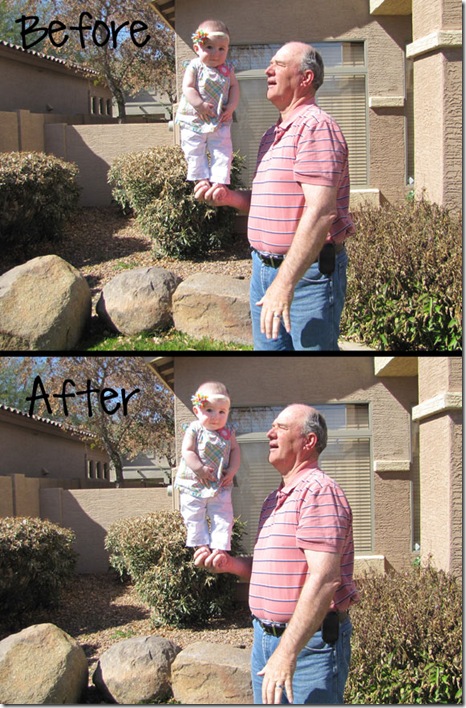
Or what if you have a cute photo, but someone’s face is shadowed. Using the same photo, I was able to swap out the shadowed face for a lighter one.
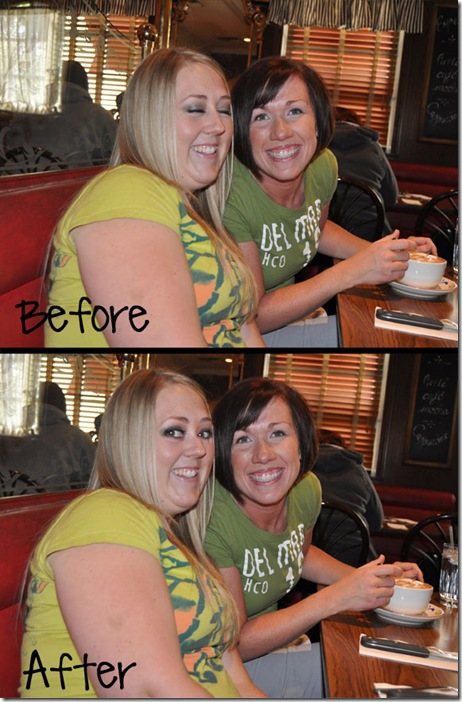
And this is one I always get: eyes are closed. Guess what?! You can swap those out as well.
All three of these techniques were done using the lasso tool, a layer mask, and a photo blending brush. It might seem like a lot of steps right now, but I promise it is really easy and only takes a few minutes. Ready to learn how? Let’s get started.
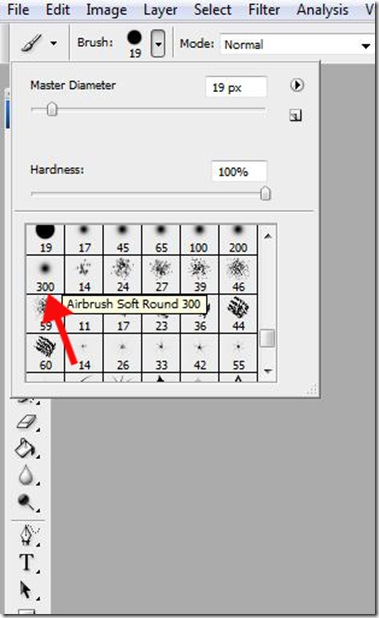
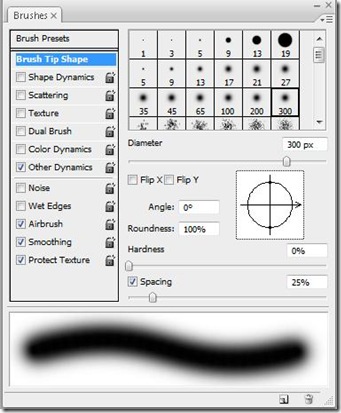
First we need to make our brush. Select your brush tool (shortcut, hit B), and choose “Airbrush Soft Round 300”
We need to make the following changes to this brush. You need to have your Brushes palette showing. You can do this by going up to Window and making sure Brushes has a checkmark next to it. (shortcut F5).
Highlight “Brush Tip Shape” and get all your settings like so:
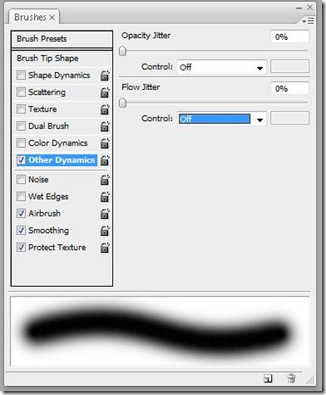
Then highlight “Other Dynamics” and set like so:
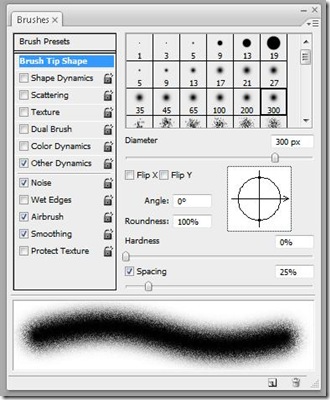
Click the boxes next to “Noise”, “Airbrush”, and “Smoothing” to place check marks next to them. Your final settings should look like this. Make sure other boxes aren’t checked that shouldn’t be.
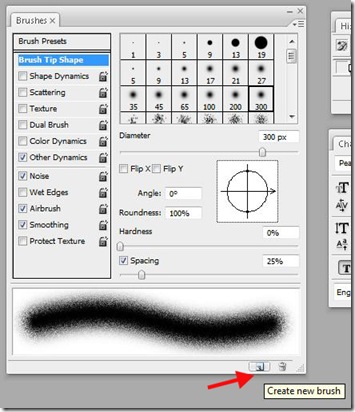
We need to save this brush so we don’t have to make it ever again. At the bottom of the brushes palette, click on the square button next to the garbage can.
Give it a unique name that will help you remember what it is and click OK. I called mine “Photo Blending”.
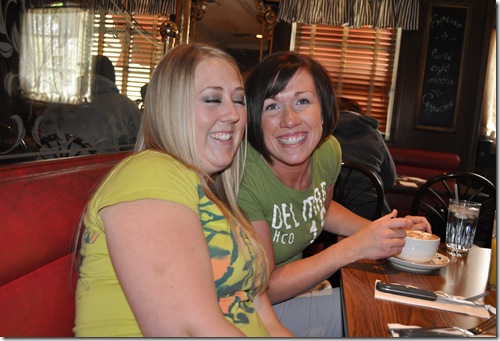
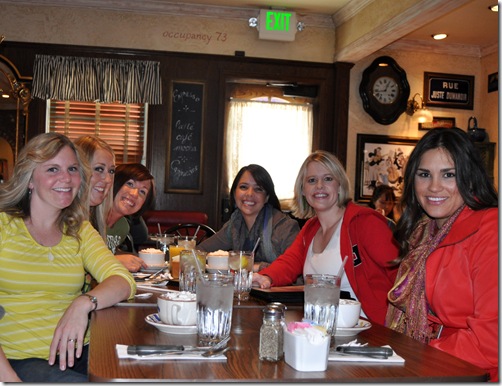
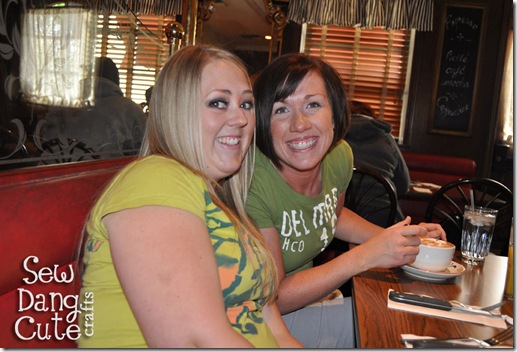
Now that our brush is made, we really are ready to go. Open the photo that needs editing as well as the photo that we are going to steal body parts from. In my case I started with these two photos. The first one is the one I’m going to edit, and the second one is the photo I’m going to get her eyes from.
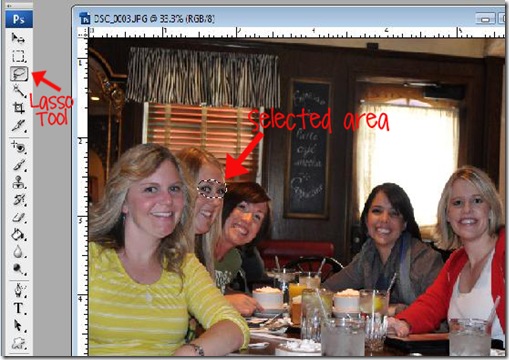
Working with the second photo, select your Lasso Tool (the one that looks like a cowboy lasso, shortcut L). Select the desired area by dragging your lasso around it like so, in my case I need her eyes.
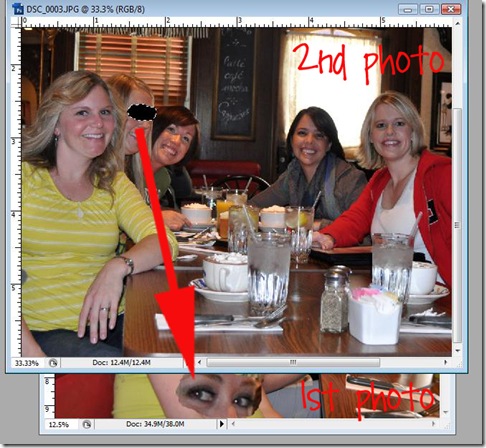
Using your Move Tool (main arrow, shortcut V), drag the selected area to your other photo (the one we are editing).
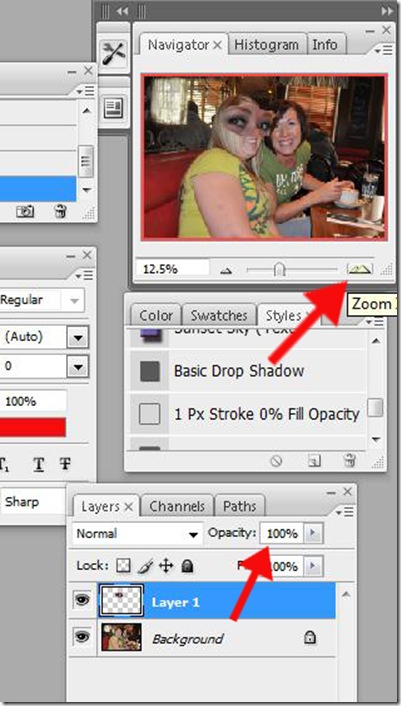
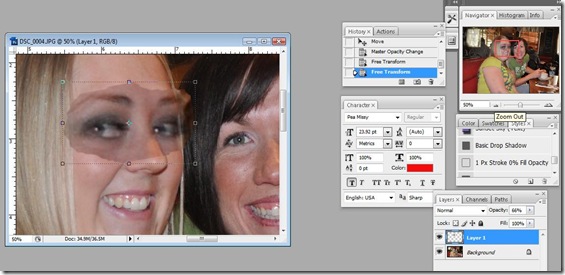
Go ahead and minimize your 2nd photo. We don’t need it anymore. Move the selected area over the desired location. Now we need to line it up, make sure it’s the right size, etc. The best way I’ve found to do this is working with my zoom and opacity.
I zoomed in 50% and adjusted my opacity to 66%. I had to resize and move mine around a bit, but I used her eyebrows and nose as a guideline to line everything up.
If you were fortunate to be able to steal body parts from another picture that had the exact same lighting, then you can skip this next step. Notice how mine are different colors. I need to fix that, so down in my layers palette make sure that your body part is selected (my new eyes). Then go ahead and change your opacity back to 100%, but stay zoomed in.
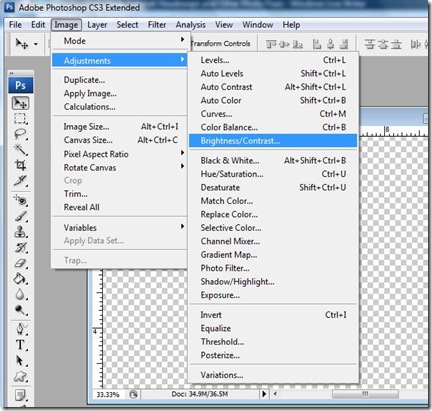
Then I’m going to go up to the menu and select “Image”, “Adjustments”, “Brightness/Contrast”.
Play around with the brightness and contrast until you think it matches well enough. I adjusted my brightness +51 and left my contrast the same.
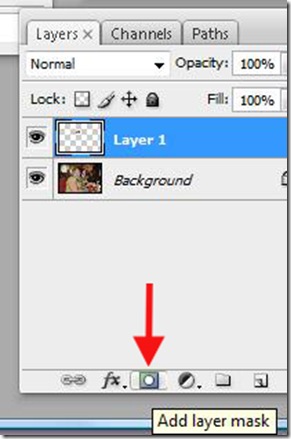
Next we are going to blend the two parts together with a layer mask and our photo blending brush. In your layers palette make sure layer of the body part selection is highlighted and click on the button at the bottom that looks like a square with a circle in it.
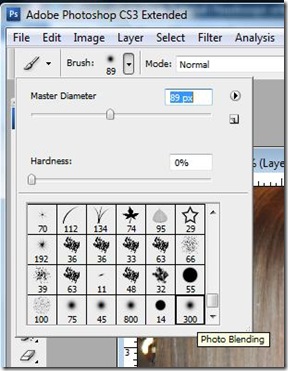
Then we need to select our brush tool and choose our “Photo Blending” brush. My diameter was bigger than I needed, so I changed mine to 89 px.
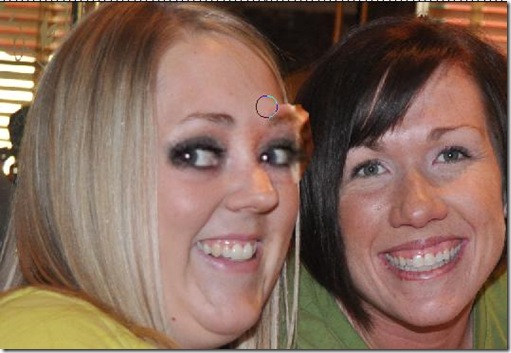
Make sure your foreground color is set to black and begin taking your brush along the edges to blend. Here’s mine about halfway done to give you an idea.
Keep using your brush until it’s completely blended, and then you are done! Save the file as a .jpeg and you have a new edited picture!!!
Please let me know if you have any questions, and I would love to have you stop by my blog, Sew Dang Cute Crafts. Thanks R & W for letting me be here today!!!

Heather
I haven't done much photo editing, so I have to say that is the COOLEST thing. Ever!<br /><br />Thanks so much for the tutorial!
RedHeadedStepChild
Oh, wow. I'm simply amazed. Why can't you be my neighbor?
robin
Awesome!
keepscrappin
Tam – thanks for the tutorial. I'm trying it in PSE. I know that the brush options will be different, but it's just what I need for some photos I've been wanting to scrapbook. Thanks for the great info.
Rachael
AWESOME that you can switch eyes like that!