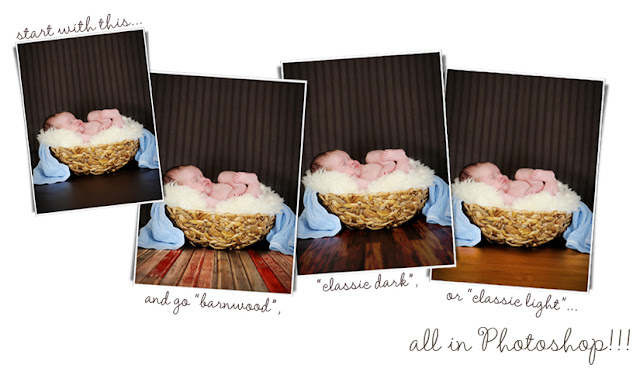
I am really excited about our first guest for this week,it is the talented and fabulous Kelly from Sewing in No Man’s Land. Her blog is lovely, her pictures are out of this world, her kids are too cute for words, and for some time I have felt like we are kindred spirits. It was a complete joy and honor to compete along side her in Project Run and Play and I find myself completely in awe of every project she posts. Recently she began teaching more than just fabulous sewing projects but also her tricks of the trade in photography. There is nothing this woman can’t do. Don’t believe me? Check out her post on making your own Backgrounds:
She shows how using photoshop actions you can change the look of backgrounds.
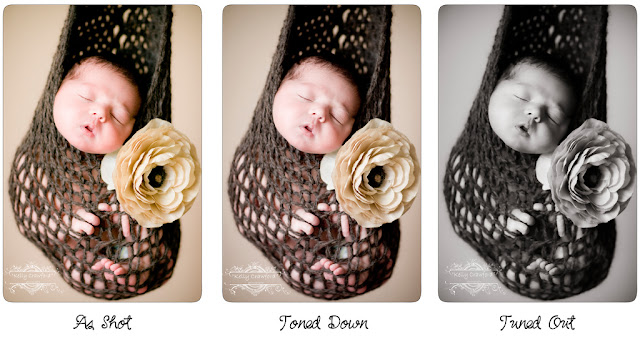
Or her post on working with babies:
She again uses photoshop actions to enhance your shots. Doing a simply lovely job.I just drool and wish I had an ounce of her photography skills! Her pictures are just stunning and she is amazing! We are in store for quite a treat today… Here’s Kelly:
with you to share some of the ways I use photoshop. Which by the way
is one of the coolest giveaways I have heard of in the blogosphere!
Today I was going to talk about how I soften skin and brighten eyes.
Now there are TONS of different ways to do this in Photoshop (thats
part of the fun), I thought it would be cool to share some less known
ways, aka not using Gaussian blur and the dodge tool. First lets
soften up that skin!
Meet Marley:
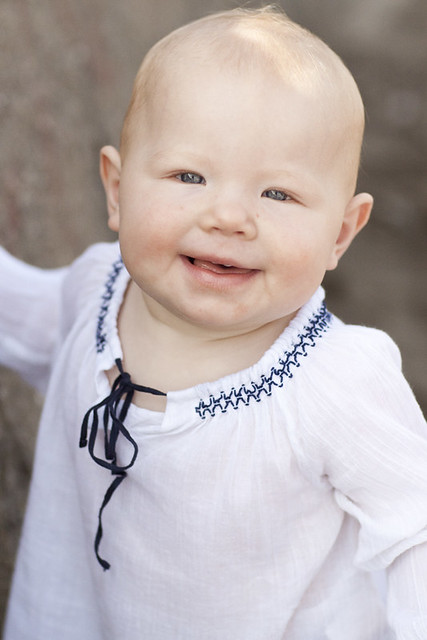
She is a cutie pattotie I have been able to photograph a few times
here in Timor. Now when you think of babies you think of perfect soft
skin. Problem is that is pretty rare, but you don’t want it to appear
that way! Lots of photographers would use some form of Gaussian blur
to soften out the skin, but I feel like you loose a lot of detail that
way, even when you lower the opacity. Instead give this little method
a try.
1. Open your photo in Photoshop (duh)
2. Under the “layers” tab at the top, drop down and select duplicate
layer. You can name it if you like but I am always a bit lazy and
don’t.
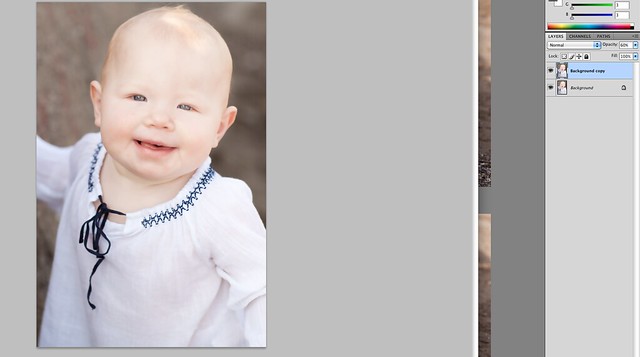
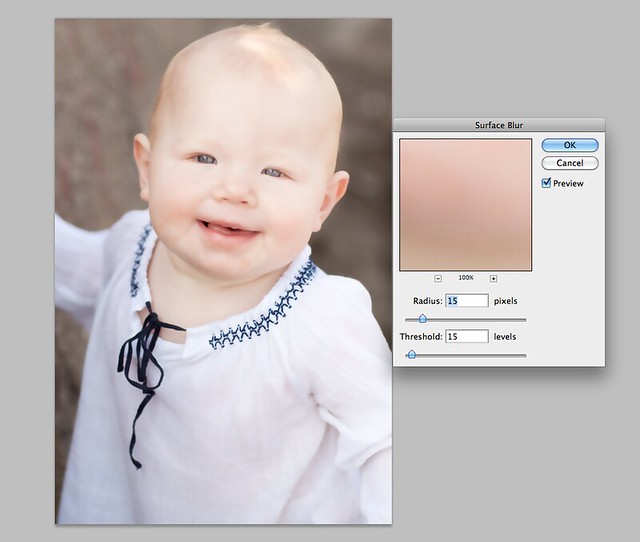
3. Under the “filter” tab at the top select “blur” then drop down to
surface blur and select it. A dialogue box should pop up allowing you
to select your “radius” and “threshold” You can fiddle with these
numbers and see the result in your screen. I find I like to stay
somewhere around 15.
4. Even then it is still a bit to blurry for me so I will drop the
opacity of the enter layer down to 60% (over in the right hand
corner).
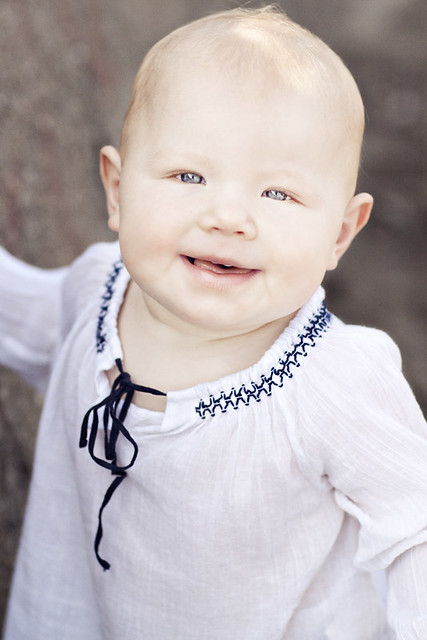
5. I finish up by using the healing brush tool on any out standing blemishes.
On this particular photo I then brightened Marley’s eyes using the
method I talk about bellow, and use Lily Blue’s “Honey” action as a
final touch. Brining me to:
If this is too much work for you there are several photoshop actions
out there you can purchase that will do all the work for you. I know
Photoshop Mama’s Silk and Stone powders are a popular set for
retouching. If I am in a crunch I personally will use Totally Rad’s
Pro Re-touch which allows me to do the skin and eyes in one pop! By
why spend money when you can do it yourself right?
On to the eyes! This can be a tricky one. You want them to pop,
without saying I am possessed and have come to suck your blood. You
can easily make a minor pop by simply going over the eyes with the
Dodge tool set on a low exposure, this will just lighten them up a
bit. The method I am going to share is a but unorthodox and kinda fun.
It was taught to me by a Marine who was visiting here in Timor and I
think it is pretty cool.
1. Open your photo in Photoshop
2. Under your “select” tab chose “edit in quick mode”
3. Select your paint brush and set the color to black.
4. Paint over your subjects eyes
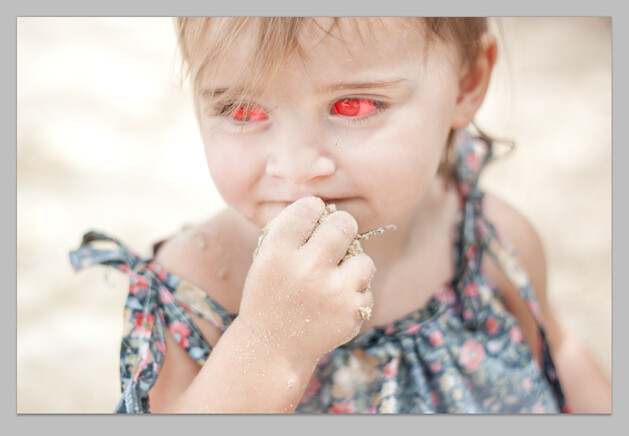
5. Click “standard mode”, which should make everything in your photo
be selected in a blinking dashes
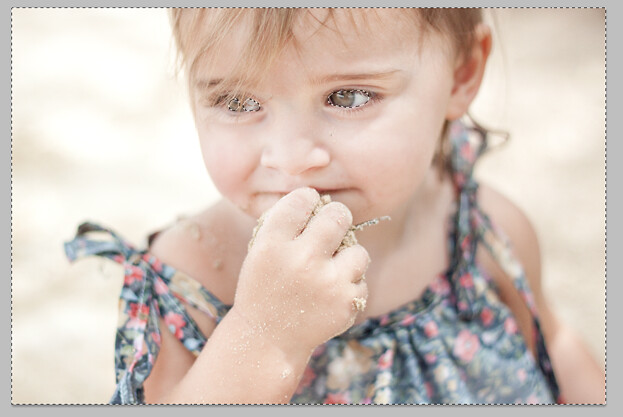
6. go to “select” then “inverse”. This should leave only the eyes selected

7. Got to “image” then “adjust” then Hue/Sat and adjust the sliders to
your liking.
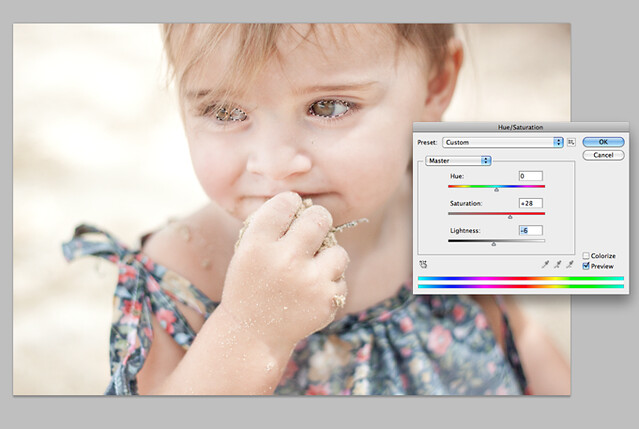
8. Click “Okay” then if needs be flatten your image! Taddah!
Bright eyes without the crazy! I of course went back and softened her
skin and brightened up the picture a bit leaving me with:
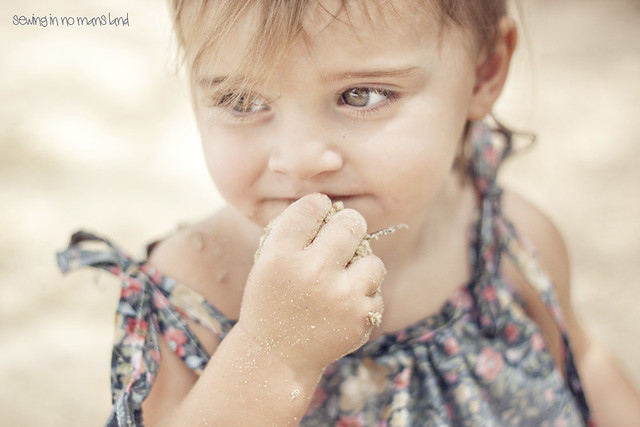
Well, I hope it was informative and not to confusing ha! I try to do
at least one photography related post a week so if you get a chance
pop on over to Sewing In No Mans
Land, and GOOD LUCK! on winning the Photoshop suite!!! Thanks
Shauna for inviting me to play 🙂

BrittaandGeorge
Kelly, Wow, I wish I was not related to the Shwin's, you make this look so wonderful. I think your pictures are great. You make it look easy. Thanks for sharing.