 Who is sewing a lot for babies?? I know I am. Seriously the girl went from wearing the same newborn clothing for the first 4 months of her life to suddenly out growing everything. So I started making onesies. They are surprisingly easy to make, come together really quick and there are some AMAZING knit prints out there that make adorable one of a kind onesies. (and really what is better than a baby in comfy knits?

While I was making up the onesies with a cute little kimono style ringer sleeve, I thought you know I might as well just share the pattern. Part of what makes these onesies so easy is that there is no tiny sleeve setting, all the edges are finished with rib knit, and you can make the whole thing with a sewing machine, nothing fancy here (although I do love a serger with knits)
So here is the Free pattern:
Baby Ringer Onesie Pattern Sizes 3m 6m and 9m
(the first page is a little fuzzy but the pattern should be fine)
You will need:
1/2 yard knit
***I find the best knits (like the ones used above) at Girl Charlee
If you are brand new to knits, go with a medium weight cotton knit or cotton lycra, they are really easy to work with, nice and sturdy so they don’t go all flimsy on you and get all wonky. If you are more experienced with knits, go for any knit as the body, they all work great.
1/4 yard Rib Knit
3 (size 16) Snaps (and snap tool)
Small scrap of interfacing (the sturdy stuff is best)
Matching thread
***Using thread that matches your ribbing is going to provide the best looking result.
Knit sewing needle. (totally recommended for best results)
Before you start:
The pattern has not been tested by anyone other than myself for my baby. She is currently wearing the 6m size. She is 6m old, 15 pounds and has a 16″ head circumference. The fit is great on her with a little room to grow. If your baby has chubby arms or legs you may want to add extra room, or longer ribbing so it won’t be as tight, it fits my daughter perfectly but she is not super chubby.
A couple notes. I have a few comments that the ribbing is too short, or it won’t stretch enough or that it makes too small of openings. Different fabric stretches differently. True ribbing has a lot of stretch and it is designed for that purpose. Regardless of the pattern if the ribbing piece can not stretch over your child’s head before you sew it to the neck then the shirt will also not fit. Same with the neckline of the shirt, if it doesn’t fit before you sew the ribbing on then it won’t fit after. The ribbing has to be shorter than the neck opening, and then stretched to fit. If you don’t stretch it (and I mean really stretch) then it will lay all wonky and wavy.

Ok let’s begin. Cut your pieces out. Follow the direction of stretch and all the markings on the pattern. (it should look like so)

We will start by preparing the ribbings. You will fold all the ribbing pieces the same way, basically folding them like bias tape. Fold them all in half the long ways, then fold the edges in toward the middle. Press Press Press. Using a little steam really helps to get the creases in there. Again do this for all the ribbing pieces, doing it at the beginning will save you from doing it each time you need them.

Now with the front and back right sides together sew along ONE shoulder. Using my sewing machine I do sew with a small zig-zag stitch so that the seam has some stretch. You can also use a stretch seam if you have the stretch seam foot, or a straight stitch if needed.

Open the top up and press flat. Mark the center front and center back point.

Now take your neck ribbing, and unfold the folds you pressed in. Now find the middle point, and mark it with a pin. Then find the middle point of each side. (or the 1/4 point) Mark with a pin. You should have 3 points marked.

Now pin the ribbing to the neckline. (right sides together) Match up the center point with the sewn shoulder seam. Then match up each 1/4 point with the center front and center back of the top. Then match up the edges of the ribbing with the edge of the neck line. You will notice the ribbing is smaller than the neckline. This is fine.

Sew the ribbing to the neckline following the top crease. Stretch the ribbing to fit as you sew. Stretching as you sew is what ensures that it will be able to stretch over the head without busting a seam. I sew this part with a straight seam.

Now place right sides together and sew the top edge of the ribbing down across the shoulder.

Turn the top right side out. Double fold the ribbing along the same crease marks, so the folds are towards the inside of the neckline. Then stretching again as you sew, sew along the bottom edge to secure the ribbing in place.

Sometimes, I miss some of the fold in back the first run through, (it happens) so in this case I simply sew a second line to make sure I secure the fold. The double line is a nice look just make sure to stretch it both times or you won’t be able to get it over the head.

Now for the sleeves. Unfold the ribbing and sew it (right sides together) to the sleeve edge. Stretch as you sew. Repeat with the other sleeve as well.

Now with right sides together sew from the edge of the ribbing curve around the armpit and go down the side.

Now the same way you did the neck ribbing you will do the sleeves. (they are smaller so it it a little trickier, if you need you can fold them and sew before you sew up the sides.)

Press the interfacing to the bottom of the front piece. Then fold up the bottom edge 1″ and press then sew in place.

Then in the same way we have sewn the other ribbings add ribbing to the bottom of the onesie. Start at the bottom front edge (don’t sew along the fold) then go around the leg and back and around the other leg stopping at the other side of the front bottom piece. Stretch as you sew again.

Now for the snaps. I use the Dritz Snap Fasteners in white, with the tool. They are easy and quick. You place the bottom (white with spikes) in the tool then place your fabric on top where you want the snap to be. (center of the bottom front) Then press the first layer of the tool down to show the placement. Add the top snap piece. Then close the tool and hammer until it’s flat. Then you are done!

Add three snaps to the bottom front.

Then add three snaps along the ribbing of the bottom back and you are done with a Onesie!

Put the soft and comfy knit onesie on your baby and they will be as happy about it as you are.

Or at least they will look super cute in the one of a kind onesie with way better prints then you will find in the store.
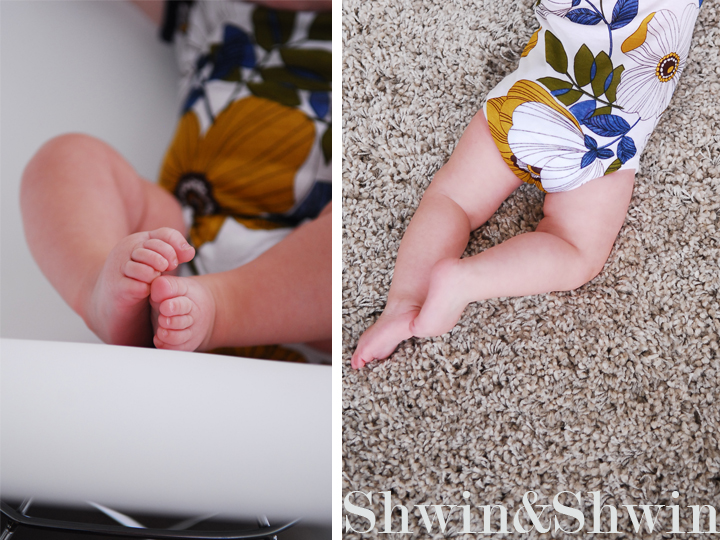
And really who can resist little baby bums in onesies? I can’t and during the hot hot summer heat we call the onesie a whole outfit. But in the winter or colder weather, pants and a sweater are great to wear with it.

Now off to sew a dozen more for this growing little girl…
If you make some too add them to our flickr group I would LOVE to see them!
Pienkel
Super sweet! Our girl will be 6months old next week, so I'll definately try them out. Thanx for sharing!
Annika
love it! and just two pieces. that's perfect! my son is 5 1/2 months now, so i'll give these a try for sure. thanks a lot for offering these!
Oiane Niebla
Thank you for sharing! They are lovely!!
Elke (pulsinchen)
With only 2 pieces it is even simpler than the ones I made following the pattern and instructions of a German sewing blogger. Thank you for the inspiration!<br /><br />If you want to take a look at my onesies: http://pulsinchen.blogspot.de/2013/07/body-kollektion-in-groe-86.html<br /><br />Best regards,<br />Elke
@lliE from FreshlyCompleted
This is so totally cute. I'm going to have to try some of these!
Heidi Amber
These are so stinkin' adorable!! I can't wait to make a few of these, they will make awesome gifts.<br />Heidi @ handmadefrenzy.blogspot.com
Monica Swift
Oooh! These caught my eye immediately, she is too cute in them. I love using these fun prints for them, and onesies are so tiny that they would be the ultimate re-fashion item. A lot of fun could be had here….! My summer babies lived in onesies too…but none as stylin' as these!!
monicagears
oh thank you so much. easy to follow…and she is a beauty…
Mareike
OMG! These onesies are adorable!!!! I like the floral one!!! She looks like a cool girl 😉 And thanks for the tipp how you sew the ribbing and seams together. This will improve my sewing a lot! Thanks Thanks Thanks
{jen} iCandyhandmade
Oh my goodness, Shauna! To die for. Adorable. Pinning this for when we finally get a baby…
Cassandra
Gorgeous! Can't wait to whip up a few of these for baby #3 who is arriving in the next few weeks!<br />Thanks for sharing x
Goldogmom
Hi, I just discovered your blog and am enjoying your posts and learning as I go. Thank you for sharing your wisdom!<br />I am very excited to make the onesie for my new granddaughter who is 7 months old. My daughter loves a onesie they received 2nd hand which has sleeves with a cute little bit of gathering that makes them more girlie than the standard kind. Do you have any suggestions as to
Jessica at Me Sew Crazy
Very cute Shauna!
dianneo
Thanks so much for this pattern. I made one today and it's adorable and I'll be making many more. I wanted an easy pattern to make onesies for our local pregnancy center. I have a serger so I did change a few things. I didn't double the bias strips and I did have to make the neck and leg pieces longer (no amount of stretching was going to work). I serged all seams except when
Kristie
So sweet! You should totally make this into a pattern and sell it. Amazing, and it would be the perfect baby shower gift. <br /> Well done!
fiona
Fantastic! Thank you for this, my new granddaughter is never going to be short of onesies thats for sure 🙂 Love the blog, so much to do and learn thank you for sharing.<br /><br />Bright blessings,<br />Jane xx
Janet Jin
Absolutely adorable! Thank you for the mention. 🙂 Wonderful tutorial. I can't wait to see more. <br /><br />~Janet http://www.girlcharlee.com//
dianneo
I have made about a dozen of these now for the pregnancy center. Since knits vary, some are stretchier than others, this is what I found works for a variety of knit fabrics. Sometimes, no matter how much I stretch, I can't make the ribbing size in the pattern work for the legs. So what I do is make the ribbing a longer length. Then I just stretch it as much as possible while sewing.
Jan G.
Thanks Dianneo, I too want to use my serger so your comments are very helpful. Pattern cut out, ribbing too (so we'll see if it is long enough)… Your comments re: serger modifications are indeed timely! Thanks
dee kay
Hi, the pattern won't open for me. It starts loading then gets stuck 3/4 way, can it be sent to me by any chance?
Sydney Lund
Hi! I know we can't sell the pattern but I was wondering if selling the onesies we make is possible?
Shauna@shwinandshwin
Sure thing! You may want to test out the sizes since the pattern has not been tested and I have only used it for personal use I can't promise the sizing will be standard.
Laura Bruce
Hello! I am completely new to sewing. I was wondering if you used a twin needle for some of this. If so which size? They are adorable and I would love to try to make this for my baby girl!
Shauna@shwinandshwin
I didn't use a twin needle, but if you do they will have twin needles just for sewing with knits, which are a different size and needle type than one you would use for denim or other fabrics.
Sher Marchman Day
Wonderfully written! I was looking for a pattern to make dozens of onesies and you hit the nail on the head. Thank you for sharing!
CreativaCale
You are the best women! Your blog is the best.Your children are beautiful.You inspire me.THANKS!<br />Kiss from Serbia
Sarah B
Awesome pattern, but 1/2 yd doesn't seem like enough for even the smallest size…. Unless I'm being dumb or misunderstanding.
Vega
Super Cute! Maybe I missed it, but what is the seam allowance used on this?
Jayne Reed Dickus
@Vega…Good question! I was just about to ask the same thing. I just printed this and they are so cute. So does anyone know??
20 FREE sewing patterns for kids' clothing - Andrea's Notebook
[…] Baby Ringer Onesie […]
Tammy
Same question regarding seam allowance! Is it built in or do I need to add it?
Shauna
It’s included. 3/8″ seam allowance was used.
Migdalia
These onesies are so cute! I would like to make them and give them as gifts. I tried several times to download the pattern, but was unable to do so. Is it possible for you to send it to me by email? I will greatly appreciate it. Keep up the good work!
5 kostenlose Schnittmuster für Babykleidung | nadelwild
[…] Bodys gehören wohl zu den meistgetragenen Kleidungsstücken bei Babys. Also gibt es hier noch ein Tutorial für einen Body. […]
Jennifer H
Hello! I love this tutorial! Any tips on making it with long sleeves? Thanks!
Jennifer
Favorite Baby Tutorials and Links
[…] Baby Ringer Onesie by Schwin & Schwin […]
desiree
i have two questions. first, i wanted to know how long and wide your pattern is. when i printed the pdf pattern it seems really big compared to another onesie pattern i have and i wanted to make sure that it printed correctly. It also doesnt fit on the 1/2 yard needed to make the onesie. the second question is is it ok to sell the finished product if i make it from your pattern. i did see that you have added a copyright to the pattern but i was unsure about the finished onesie.
Shauna
You are right, the 9m size will need 20″ for the back piece so it will be just shy of fitting on a half a yard. I made the smaller sizes and they fit just fine on a half yard. The copyright on the pattern is for the pattern and design. What you do with the items you make is totally up to you. Thanks for asking!
desiree
Great! thanks for the permission to sell and thanks for responding!
Renee
Can these onesies be made in regular cotton fabric?
Shauna
The pattern does require a knit with stretch or it won’t be able to fit on the baby.
loretta patzner
I am trying to get the pattern for this onsie. I tried to get it from craftsy but it will not work. would it be possible to email to me at beblessed1075@yahoo.com
if so – that would be wonderful.
Shauna
You download from an account you create in craftsy, and then the pattern is there in “your patterns” Hope that helps!
loretta patzner
I does not let me download the pattern. It has a link to your site for the tutorial instructions.
loretta patzner
Disregard. I figured it out. thanks!
Lesley afflick
Thank you for sharing this pattern, can’t wait until I get started on these as gifts for friends.
Might be worthwhile to mention that the instructions are only 14 pages of the 37 pages that prints out and the rest are the comments. As it doesn’t have page numbers in instructions this could be good.
Thanks again Lesley
Kids Clothes Week – Day 2 | Just Jax
[…] I think I’ll try a different onesie pattern next. Maybe this one? […]
20 Free Sewing Patterns For Both Kids and Babies Too!
[…] Shwin & Shwin also shows us how to create a onesie for our little babies. Choose your pattern – for boys or girls – and get started with the making of unique onesies! […]
Sew a Onesie | knitchetlene
[…] this pattern by Shwin & Shwin. It is called the Baby Ringer Onesie. You can download this free pattern. (sizes 3, 6 and 9 months) It’s just […]
Migdalia
Hi. I just wanted to thank you for sharing such a nice pattern. Is there the possibility that in the near future you include other sizes as well? Thanks.
Pat
Thanks for the pattern, I made 7 this week for our church mission project. They are sooo cute.
Carmen
I just want to know if your seam are 5/8” or 1cm? The value of the seam are included in the pattern?
T-shirt Turned Onsie | The Sewing Phoenix
[…] Sorting through my alteration pile, I got a glimpse of the brightly colored baby onsie hidden under the awkward enthusiasm of that silky bow. A quick online search provided me with a free pattern download. […]
hannah
aw!!!!!!!! hmmm two babies
hannah
Could bias tape be used over ribbing??
Rhonda
I would think that bias tape lacks the necessary stretch, particularly around the neck hole where getting over a big head is important.
HOWEVER, I’m going to try it with fold-over-elastic. It works like bias tape but has much more stretch.
Ringer Onesie by Shwin & Shwin Pattern review – theredspottymushroom
[…] Ringer Onesie is a free pattern by Shwin & Shwin. You still have to go through a checkout routine but it will […]
Baby Ringer Onesie free sewing pattern – sewing mania club
[…] Get tutorial Categories baby, clothing […]
Baby Ringer Onesie sewing tutorial – sewing mania club
[…] Get tutorial Categories baby, clothing […]
marta
Hi this pattern is so greeat!!!
Thanks a lot!!!
the first one took me hours to finish but now I just did another 2 so quickly! and looks great! thanks!
Rhonda
Thank you for the pattern and tutorial.
Two questions:
1. Would old t-shirts (although not as cute) work for this pattern?
2. Could I substitute fold-over-elastic for the rib knit bands?
TIA
Rhonda
My Top 6 Free DIY Tutorials for Your Newborn Baby - All My Delight
[…] 3. T-shirt OnesieThis is the perfect base for your little one’s wardrobe. Customize it with your choice of patterned knit fabric and contrast ribbing. For an upcycled option cut the pattern from an adult t-shirt. […]
Hannah
Hi, please can you tell me what kind of interfacing you would recommend for this pattern? Does it have to be knit interfacing or would woven/ non-woven work? Thanks!
Di
How would one resize this patter to fit a newborn… slightly smaller than a size 0 as I believe it goes premie newborn 0-3 3-6 and so on. If I am mistaken please let me know but I am in need of the newborn size if you can let me know how to resize it. Thanks.
Carol Wilkins
Thank you for the onsie pattern. I love it will make more! I had to double all the bias tape. I made it out if knit Jersey the childrens pop line.
Thank you!
Carolanne
20 Amazing And Free Baby Clothes Patterns
[…] shwinandshwin […]
Want A Free Baby Romper Sewing Pattern? 22 Tutorials To Download
[…] Baby Ringer Onsie […]