

I went through several “prototypes” until I finally made one that was perfect. The first one was far too big in the crown and the rim didn’t fit around, so back to the drawing board… The second all fit together great but the proportions were all off, not a total failure since it will fit her someday. Then everything fell into place perfectly.
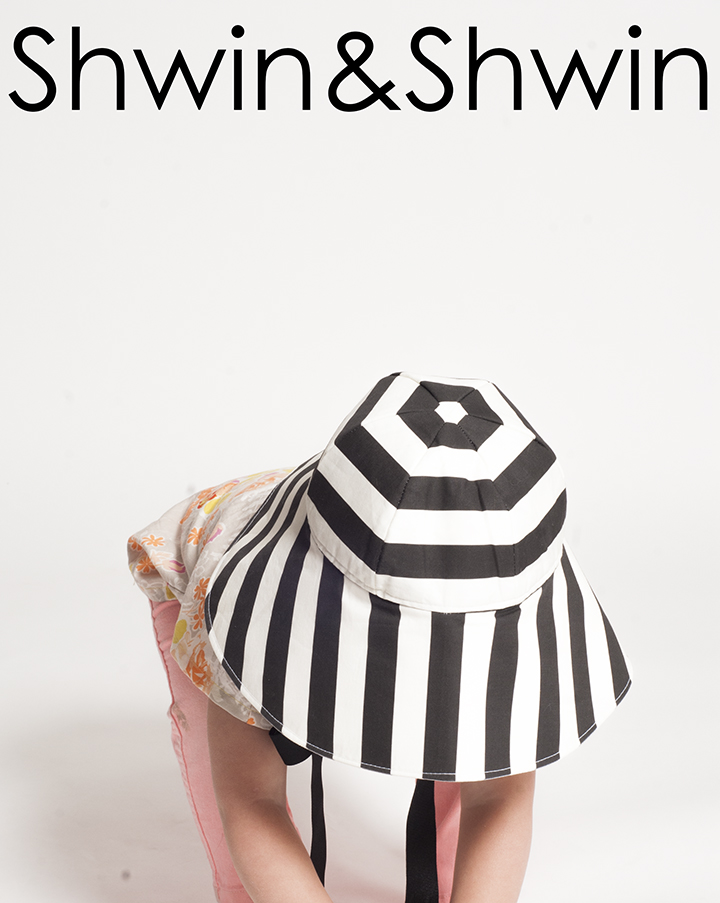
which just so happens to work out well for me because the stripes are my favorite anyway.
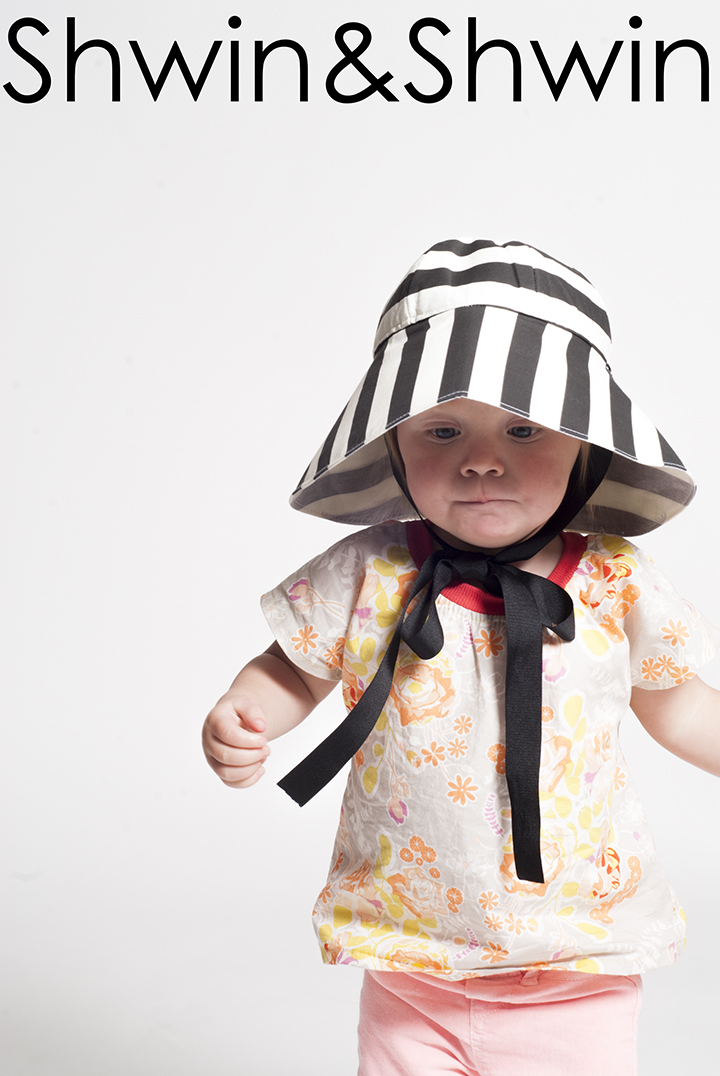
And in case you were wondering if it just covers the whole face and head, no they can still see just fine (just maybe not up but they don’t need to look at the sun) and since it’s tied on it stays in place.

So you can get the free pattern HERE
Size: Toddler the finished circumference is 20.5″
You will need
- Pattern Pieces printed out
- 1/2 yard of fabric total (for lining and main but you can do them out of two fabrics if you want)
- 1/2 yard fusible interfacing mid weight (optional)
- 1/2 yard of ribbon (optional)
- Iron (you want to press the seams)
(since I made several hats the pictures are from a few different versions)

To start, if you want a stiff brim (like I made) press interfacing on to one of the brim pieces (the outer is best) Then with right sides together you are going to sew together the two end pieces so you create a loop. Repeat with the lining.
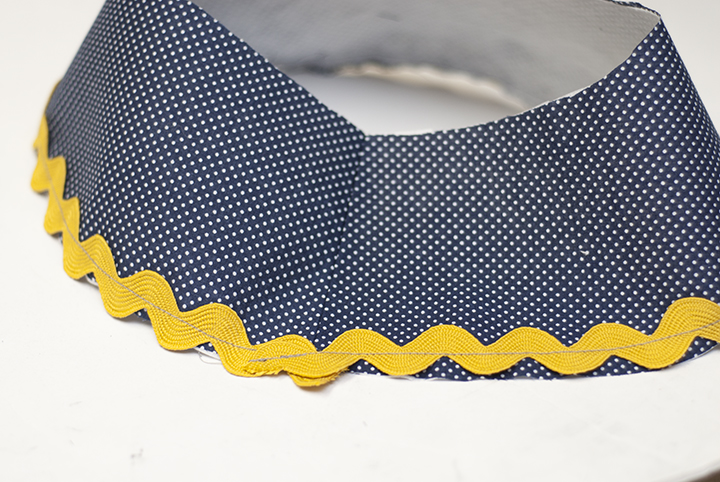
For one prototype hat I added some roc-rac to the edge of the brim. To do this I simply stitched it to the outside of edge crossing the edges over at the seam.

Then with the two brim pieces right sides together sew along bottom edge. Then clip the curved edge. I used pinking shears to clip the curved edge.

Then turn the brim pieces right side out and press. (see the cute trim)
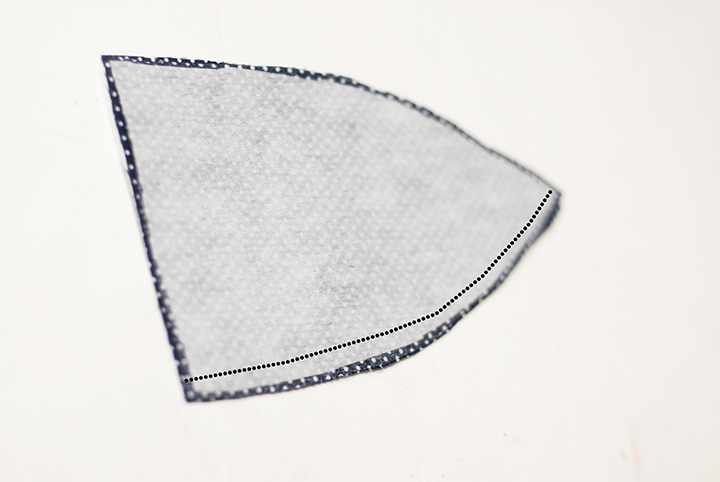
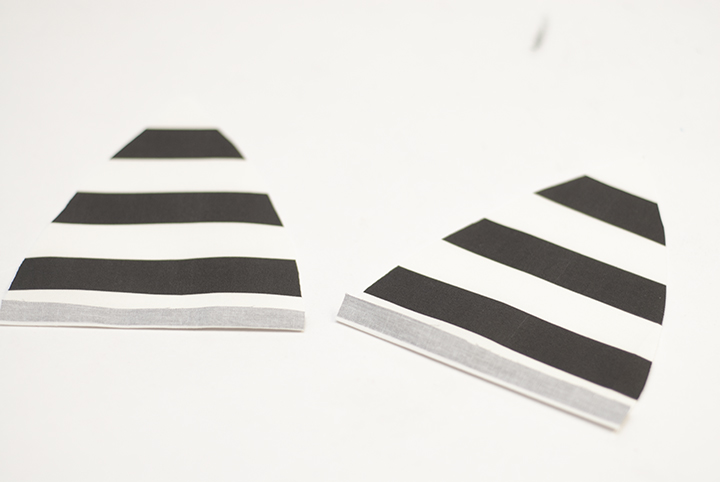
Now for the crown. Take the 6 outer pieces and press the fusible interfacing to the wrong sides. Then with the right sides together sew two crown pieces together along the edge.

Then press the seam open. I know it’s tough since the seam is curved but make sure the press the top and bottom and just do the best you can with the rest. Then sew another crown piece right sides together to the two piece so you have 3 sewn together.

At this point you should have two halves all sewn and pressed. Then with the right sides together sew the two halves together starting at the bottom up around the curve and down the other side.

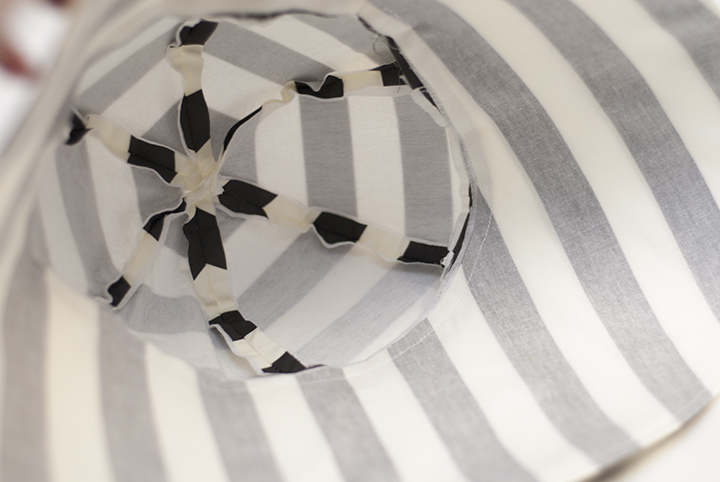
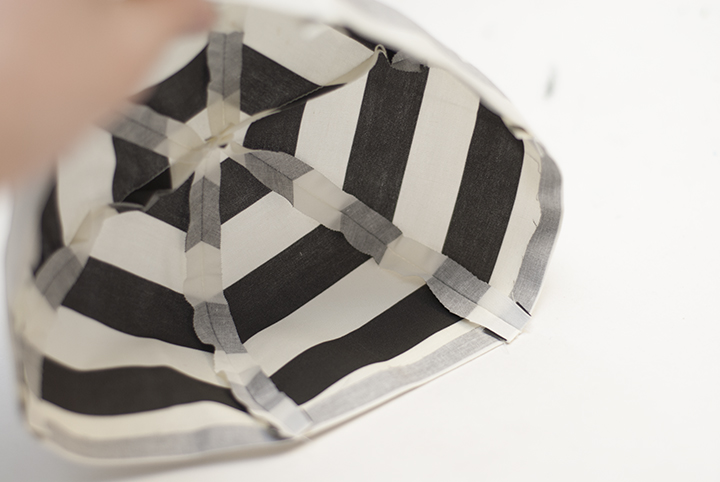
Then you will have a cap like so. (shown in this picture it’s deeper than the actual pattern since I edited the depth) Mark the center front and center back. The middle of one crown section will be “center front” and the middle of the opposite crown section will be “center back”

Now take the outer crown and the brim and sew them right sides together. Match up the center back of the crown with the seam in the brim. The center front of the crown should match the center front of the brim. When sewing the two pieces together be sure to ease around the curves and smooth them out as you go.
(changing to a different hat here) Press the seam from where the brim and the crown meet toward the inside.
Now for the crown lining. Fold the bottom edge of each piece up by 3/8″ (you will be pressing it towards the “wrong side” of the fabric.
Then sew the crown lining the same way you did the main crown. When you are done you should once again have a cap but the bottom edge will be all folded under.

Place the lining into the cap so the wrong sides are together. Match the folded edge of the lining up with the stitch line from where the crown and brim were sewn. Then sew along the edge where the brim and crown meet to sew the lining in place.

See the lining sewing in place? Cool. So you can be done or you can add ribbons which I do since the hat is for a baby who would take it off or it would fall off, or any number of things. Sew the ribbon at the two side points of the hat along the inside.

Then the hat is done. Ready to be worn to protect them from the sun.

There is nothing cuter than a babe in a wide brimmed hat. Seriously.

It melts my heart every single time.

Hat || Free Pattern
Fabric || Black and white stripe || Modern Yardage
Shirt || From this post
Pants || Target
Rebecca McAfee
I love it!!! What a great pattern. Thank you.
Leah
So pretty, now we just need it in adult size. 😉 Thanks
Jenni Jex
Awesome! Must make for my little red head!
Beatriz Azuara
It's beautiful and it looks wonderful, I love it, thank you very much.
Leentje
sweet!
Anne Weaver
Those stripes are AWESOME!! I've got a Craft Gossip post that links to your free pattern: http://sewing.craftgossip.com/free-pattern-here-comes-the-sunhat/2014/05/30/<br />–Anne
Laura J.
Cute! Cute! Cute! Can't wait to make one. Although I have YET to find or make a hat that my little one will leave on her head. I'll try again!
Delia
Ack! This is so cute and wonderfully practical Shauna. Well done!
Sarah Hawkins
THANK YOU!!!! I have searched for a perfect hat pattern for my 1 year old and have not found it until now. And it's FREE! You are amazing.
Elisabetta
That's an awesome tutorial, need to pin this for later, I'd like to make one for my princess, summer is approaching ^_^
Julee Posyluzny
Awesome pattern, but I have made 2 of them now and followed directions completely, but I've had to put 2 little pleats in the back. Somehow I end up with extra brim. Are all of the seams 3/8"? Any idea why this is happening? I love the pattern, but I'd be happy if it would turn out!
Shauna@shwinandshwin
Yes all the seams are 3/8" seam allowance. Are you adding interfacing to the brim? The brim is circular so much of it is cut along the bias and some fabrics have more stretch and give on the bias than others. The interfacing will help stabilize the brim a bit to keep it from over stretching which could be what's leading to the problem. You may also want to double check that the brim
Julee Posyluzny
Okay that makes sense. Yes, I am adding interfacing to the brim, and I was so surprised at how easily the crown pieces went together. I was cutting out that center back piece on the fold as well. If anyone else has done that, I just made two little pleats at the back to work it all in. They look ok, almost like they are meant to be there, but now I'm anxious to see how one goes together the
Shauna@shwinandshwin
The A and B circle markings will meet together to create a full circle when the pieces match up.
hallbus10
Same situation here. . Doesn’t work out with 3/8” seam allowance . Cute just wrong pattern sizes. Maybe I’ll try it again minus interfacing in th crown parts and take th smallest seam allowance possible. I cut nearly 2” off th brim band length.
Brenda
I have the same problem with one I’m making
Missy
I had the same problem and now have two pleats in the back of mine too. Very cute hat but not quite as shown.
Julee Posyluzny
Just read the post below. My email addresses for summer, since school is out are— julee31561@gmail.com or amanda@pmt.org THANKS!
Cindy Kwok
Hi Shauna! Great photos and tutorial. The hat looks great. I'm finding the brim is 2" too big. Also, one of the brim pieces on the pattern doesn't specify a fold line but in assumed, since it would then be too short without it.<br />Am I doing something wrong?
Shauna@shwinandshwin
The brim should be all one piece, it prints on 2 pieces of paper but you tape it together (at the markings) to create one brim piece and then the whole brim piece is cut on the fold. Hopefully that will help.
Cindy Kwok
Ha! That makes sense now. Thanks so much!
Julee Posyluzny
Thanks Cindy! Sounds like you were having the same problem that I was. I just put two little pleats on either side of what would be the center back, to work it all in, I can email you pictures if you'd like. I think it looks okay, and almost like they are meant to be there!
Cindy Kwok
I changed the brim and it's still about 2" too big. Also, I measured the pieces of the crown and it came out to about 18" instead of the 20" meant for the brim.
Cindy Kwok
Hey Julee! I made the changes Shauna suggested but the brim piece was still too big, or the crown too small. I did pleat the back also. Overall, I love thr project, bc it's cute, useful, and quick, even with a little one running around all day. Here's a photo mine my daughter is wearing it! <br />http://www.jeffreydates.com/gallery/picture.php?/849/category/2<br />
Julee Posyluzny
Cindy I have not heard from Shauna but I cut 1 inch off the pattern and it worked great! (2 inches total) hope this helps! Julee
Shauna@shwinandshwin
Sorry Ladies! I will have to take a look at the brim piece in a bit to see what may be off. Sounds like taking an 1" is the best solution 🙂
Cindy Kwok
Good idea. Let's cut off an inch. Going to make another one bc I used scrap fabric and didn't use interfacing so I could keep it light. Love it. Here's my girl wearing it with watermelon dripping down her chin. Lol.<br />http://www.jeffreydates.com/gallery/picture.php?/850/category/2<br /><br />
Julee Posyluzny
Darling! I saw your photos! What a little doll with the watermelon chin too! I do like this pattern, it just took a little adjusting! Thanks
A Bear Called Paddington |
[…] hat by the end of the night and, of course, I was able to find a simple tutorial on Pinterest (link here). So here it is my little snuggly Paddington. We will definitely be recreating characters […]
Angel
Hi! Great looking hat! I am going to make one for my daughter. What is the seam allowance?
Anne
Hi, I made this hat today and while I love it (and the instructions!), I’ll give it away because after I made the necessary darts in the brim (seems the pattern isn’t fixed) the hat wouldn’t fit either of my daughters. Now our neighbour will get a cute, widebrimmed sunhat for her new baby.
Sunhat Pattern - Sewtorial
[…] sun is even more enjoyable when you know that your little ones are protected from harsh sun rays. Shwin and Shwin created this adorable (and free!) sunhat pattern that’s perfect for keeping delicate skin […]
Nichole Chernecki
hi there! I am having the same problem with the brim. glad its not just me!!! I printed it twice and took it all apart and did as others, I cut 2 inches off all together and now it fits.
5 Moldes gratuitos para bebés - Cose +
[…] chapéu com fitas para segurar nas cabeças mais teimosas. Uma T-shirt para aproveitar retalhos pequenitos de […]
christine sinclair
hi is there a way to make the pces larger for an older child and adult
sideshowpt
I need the the PDF with the yellow hat you made some straps. What size did you cut out?
Sheila
I can’t thank you enough for the lovely pattern. I know how much work you put into it as I’ve tried to make patterns and it’s a real challenge. Having said that, I’m just about to cut out my first hat and will do as your followers have suggested and take 1 inch off each piece of the brim. Thanks also for your other patterns. I’m going to take a closer look because I’m hooked on sewing for my new grand daughter!
Thanks thanks thanks!
Easy Summer Sewing Craft Projects
[…] from breathable cotton, this sun hat helps keep your little one cool and sunburn-free and is just adorable. This easy pattern makes it […]