Alright next lesson in sewing 101 is another really easy way to finish a neckline. (the first was facing, the second was the flat collar) So let’s talk ribbing. If you own a tee shirt then you have seen ribbing. Although knit fabric does not have to be finished since it won’t unravel or anything it always looks much better if you finish the neckline. One of the easiest ways to do that is with ribbing. It still allows for plenty of stretch over the head and you can mix and match colors for design if you like. Rib Knit is a special type of knit that has lines running up and down it. (creating bumps like ribs) It has a lot of stretch to it.
To start you want to cut a strip that is long enough to fit over the head when stretched. I tend to hold the fabric up to my kids heads stretch it around their head and mark it. (include seam allowance when you cut it) You will also be folding the strip in half so make it twice as wide as you want it.
Next put right sides together (tends to be the slightly smoother looking side) Sew the ends of the strip together to create a tube. This is where I stop and check that the tube stretches over their head. (I like to double check so I don’t have to redo it later)
Then you are going to fold the tube in half so the wrong sides are together. I hold it in place while marking the center back, center front and the two middle points with pins.
Next take your bodice piece (already sewn at the shoulders) and pin the neck tube to the right side of the bodice around the neck. This is where you will match up the front middle, back middle and two side points with the shoulder seams.
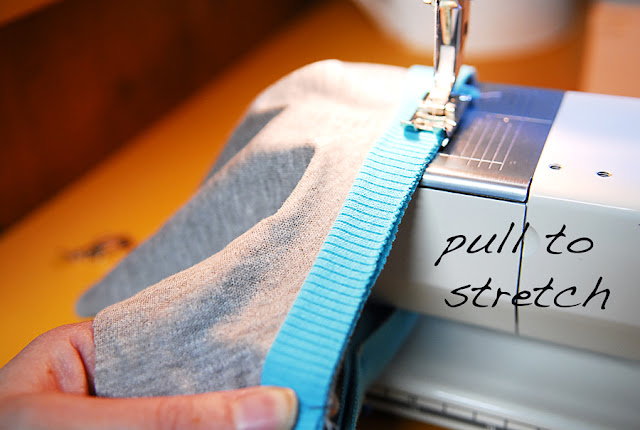
Next start sewing. I start in the center back at the seam of the ribbing piece. Then you will stretch the ribbing tight, (so it matches the size of the neck opening) Stretch from pin to pin, sewing all the way around.
Then turn the seam to the inside and top stitch along the edge.
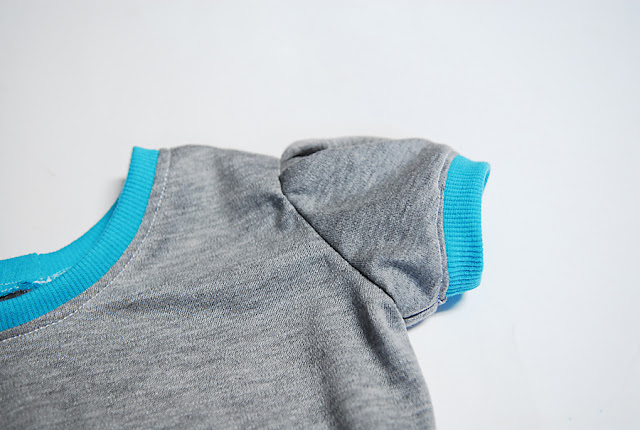
Now you have a nicely finished rib knit neck line.
You can use this same technique to finish sleeves as well just cut a smaller piece that is long enough to stretch around the arm. Then follow the same steps.
There you have a nicely finished sleeve the ribbing helps add a little bubble to the sleeve as well.
So there you have it ribbing, nothing to be afraid of, since you are supposed to stretch it as you sew it is really easy to work with, and hard to screw up.
You can also follow the same steps with a much taller band to make a turtle neck and you can use regular knit to sub in for rib knit just always be sure it stretches enough to make it over the head.


TeaEllePea
Thank you soooo much for this post! I just took a few of my husbands tshirts to refashion for myself and I was trying to figure out a more finished/polished technique. Many thanks.
April
Great tutorial! Love it!
Jessica
If only you posted this a few weeks ago! I made my daughter an adorable knit raglan but the collar is all wonky. Now I know why, I didn't stretch the collar while I sewed :-)<br />Thanks!<br />giarosesews.blogspot.com
Lynda
Perfect timing- I was just about to start PJ's for fall. Thanks so much!
feelincrafty
This is perfect! i was just looking at some fabric last night and thougth I want to make pj's but how to ai do the edge. Thanks!
kaci + tom
thanks for this post — i am a brand new beginner sewer who is interested in making comfy clothes for my kid. which, i'm learning, includes using things like ribbing! can't wait to get my hands on some after seeing this info.
DA E
Thanks for sharing!
Siska Priscilla
Just wondering if you could tell me what sort of needle do you use? I am struggling sewing ribbed knit at the moment. Do you use ballpoint needle?
LaPriel
I always use a Schmetz universal needle size 80/12. But, a lot of people use the ball point needles.
Lady Mockingbird
Do you have a good source for rib knit? From what I know its difficult to find..
LaPriel
https://www.fabric.com/SearchResults2.aspx?Source=Header&SearchText=Rib+knit&CategoryID=1d5f47dc-9991-4088-93f3-26a376046a5e
Or, I purchased a rib knit tank top at Walmart and used it. They have lots of colors in the girls department.
Sarah Seufert
THANKS for the detailed tutorial on adding ribbing (knit) to necklines & bottom of sleeves. I plan to alter/ repurpose USED T-shirts for kids & this will help. New ribbing in bright colors is my plan by using adult T-shirt fabric in good condition. Sarah in Minneapolis
Leisa B
Perfect tutorial. Thanks so quick and easy!
LaPriel
Dear Schwin and Schwin,
How do I know how much ribbing to use for a v- neck or a scooped neck t shirt?
Thanks you.
Shauna
I measure the neckline and then subtract about 1.5″ from that since you want the ribbing to stretch to fit. You can subtract more if desired. Best rule of thumb make sure the ribbing can stretch enough to fit over the head 🙂
Amy
This is an awesome tutorial, thanks for explaining it so well.
30 Min Tee Shirt Dress || Shwin&Shwin
[…] New to neck bindings? See how to sew them HERE. […]
ingrid
aren’t those straight stitches going to snap when you stretch it over the head? I would tend to sew the rib on with a narrow zig zag, and then topstitch with a double needle which makes an elastic seam..?
Shauna
Since you stretch the ribbing while you sew the stitches will still stretch over the head without snapping, I sew with a straight stitch all the time with knits, the only time I use a stretch stitch are when I need the seam to stretch.
Catching Up… – Scatterbrained Seamstress
[…] although the ribbing for the neckline wasn’t clear. I ended up using Shwin and Shwin’s ribbing tutorial. If you want an easy, picture walk through of how to sew ribbing, this is the way to […]
Anne Williams
Yes great, I know all this but WHERE CAN IBUY THE RIBBING?
Lynn
Where have you found the best place to buy ribbing for t-shirt necklines – WITHIN THE UNITED STATES?